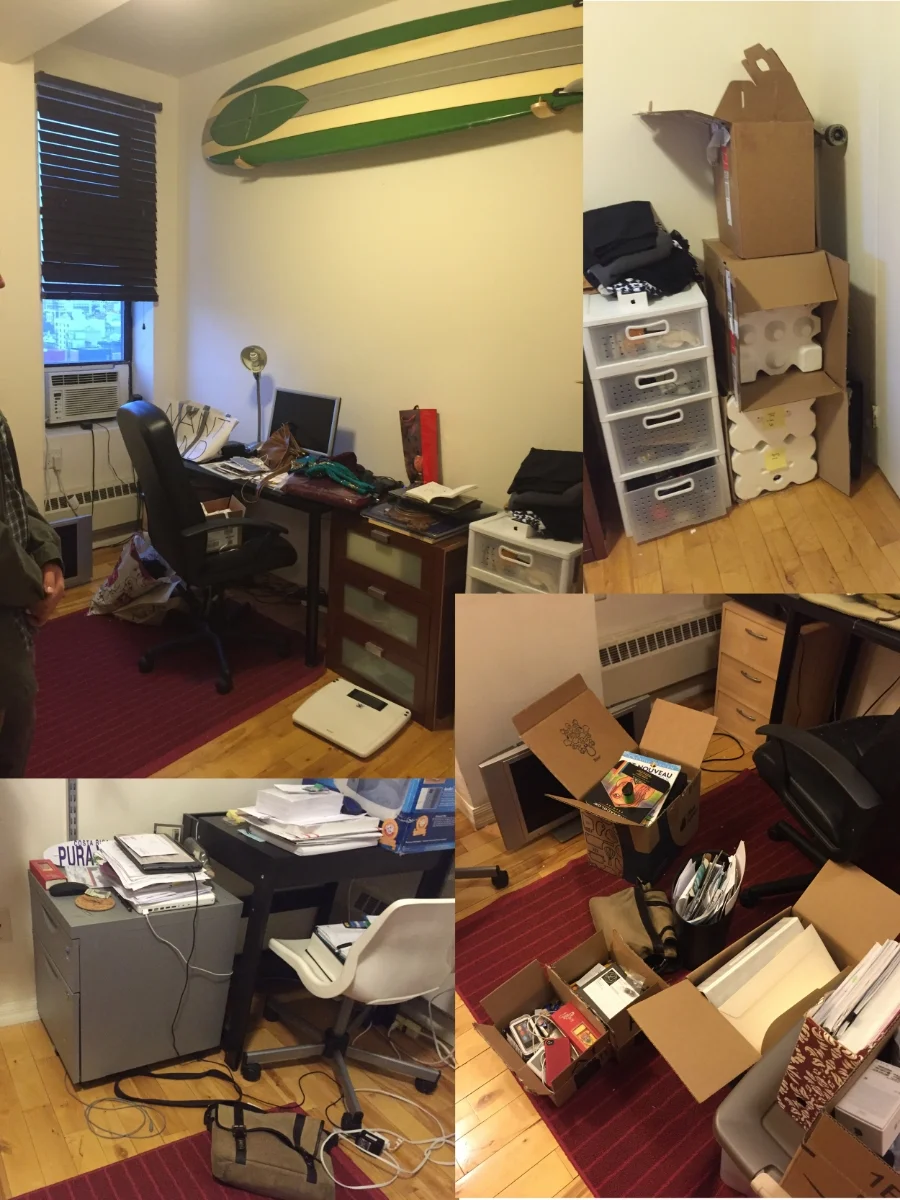
The clients had a second bedroom that they mainly used as a work space. They wanted a comprehensive design for their home office that would be aesthetically pleasing and easy to keep organized.
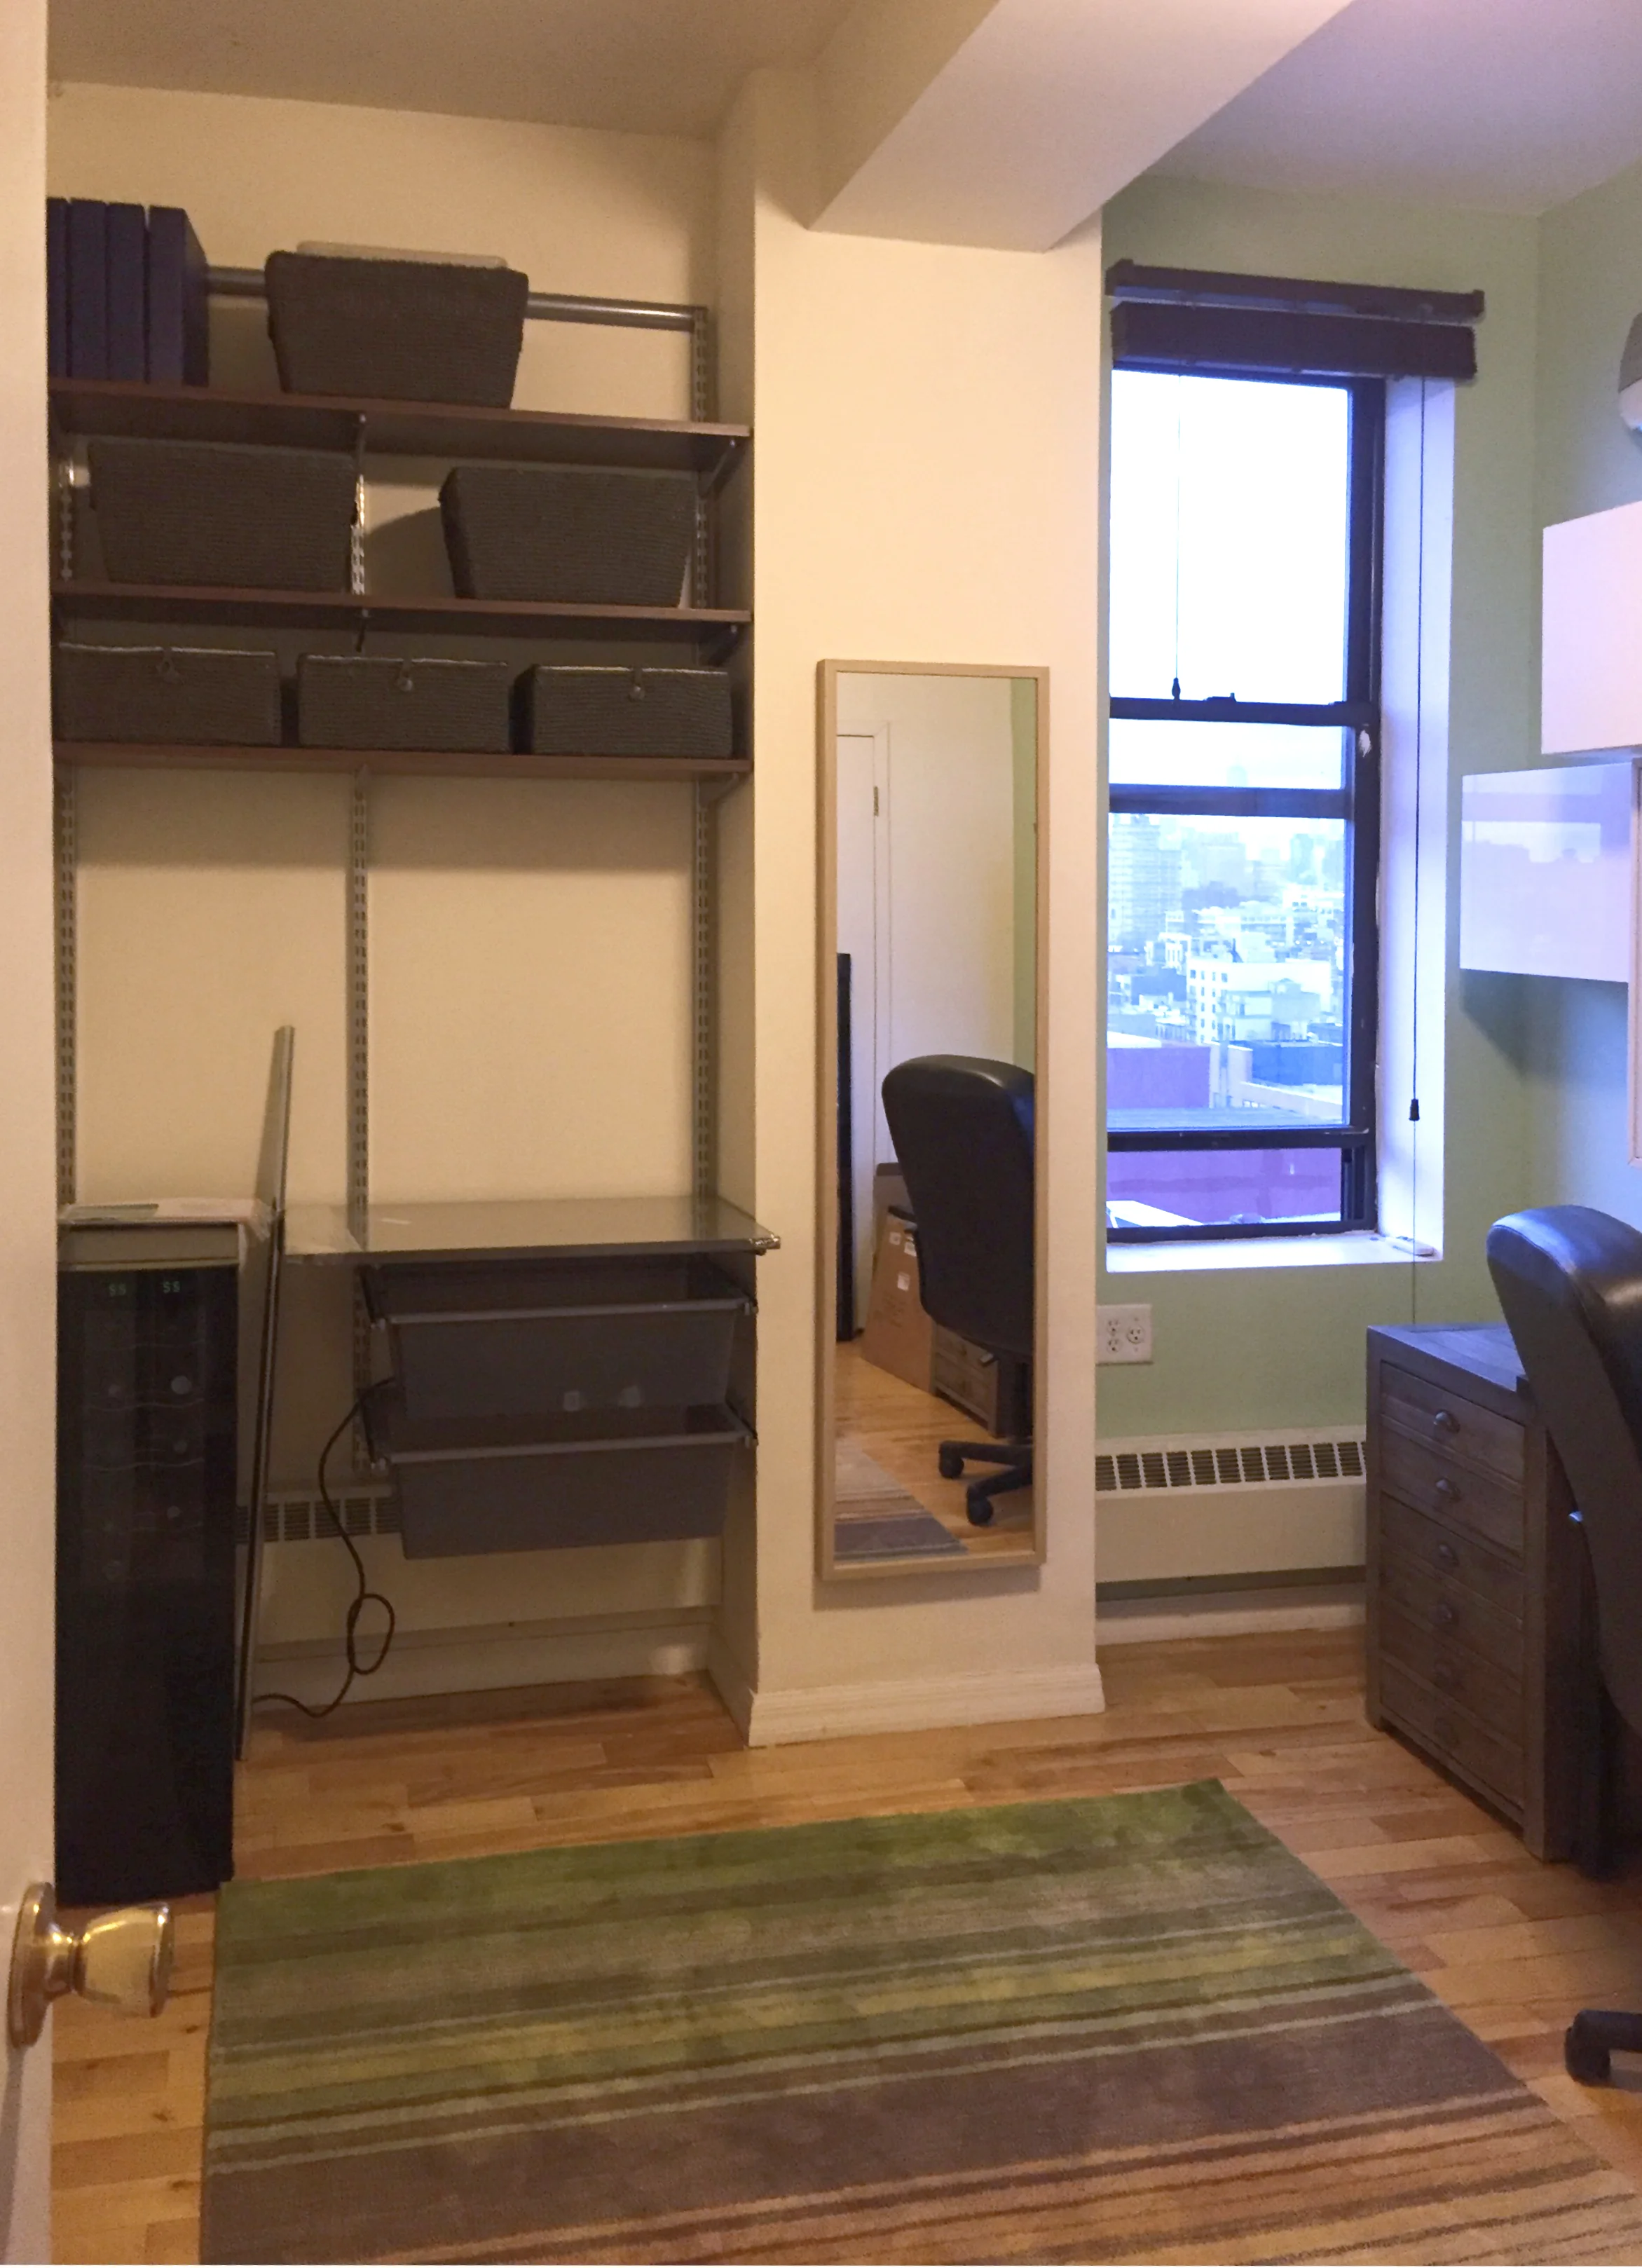
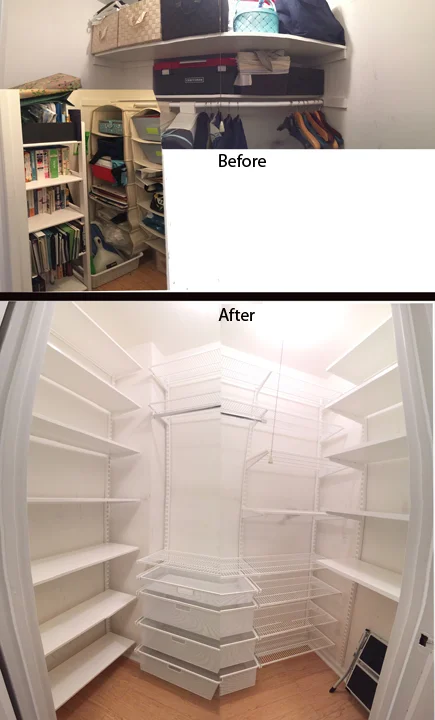
Before
The space was a bit cluttered and was not a pleasant place to try to work
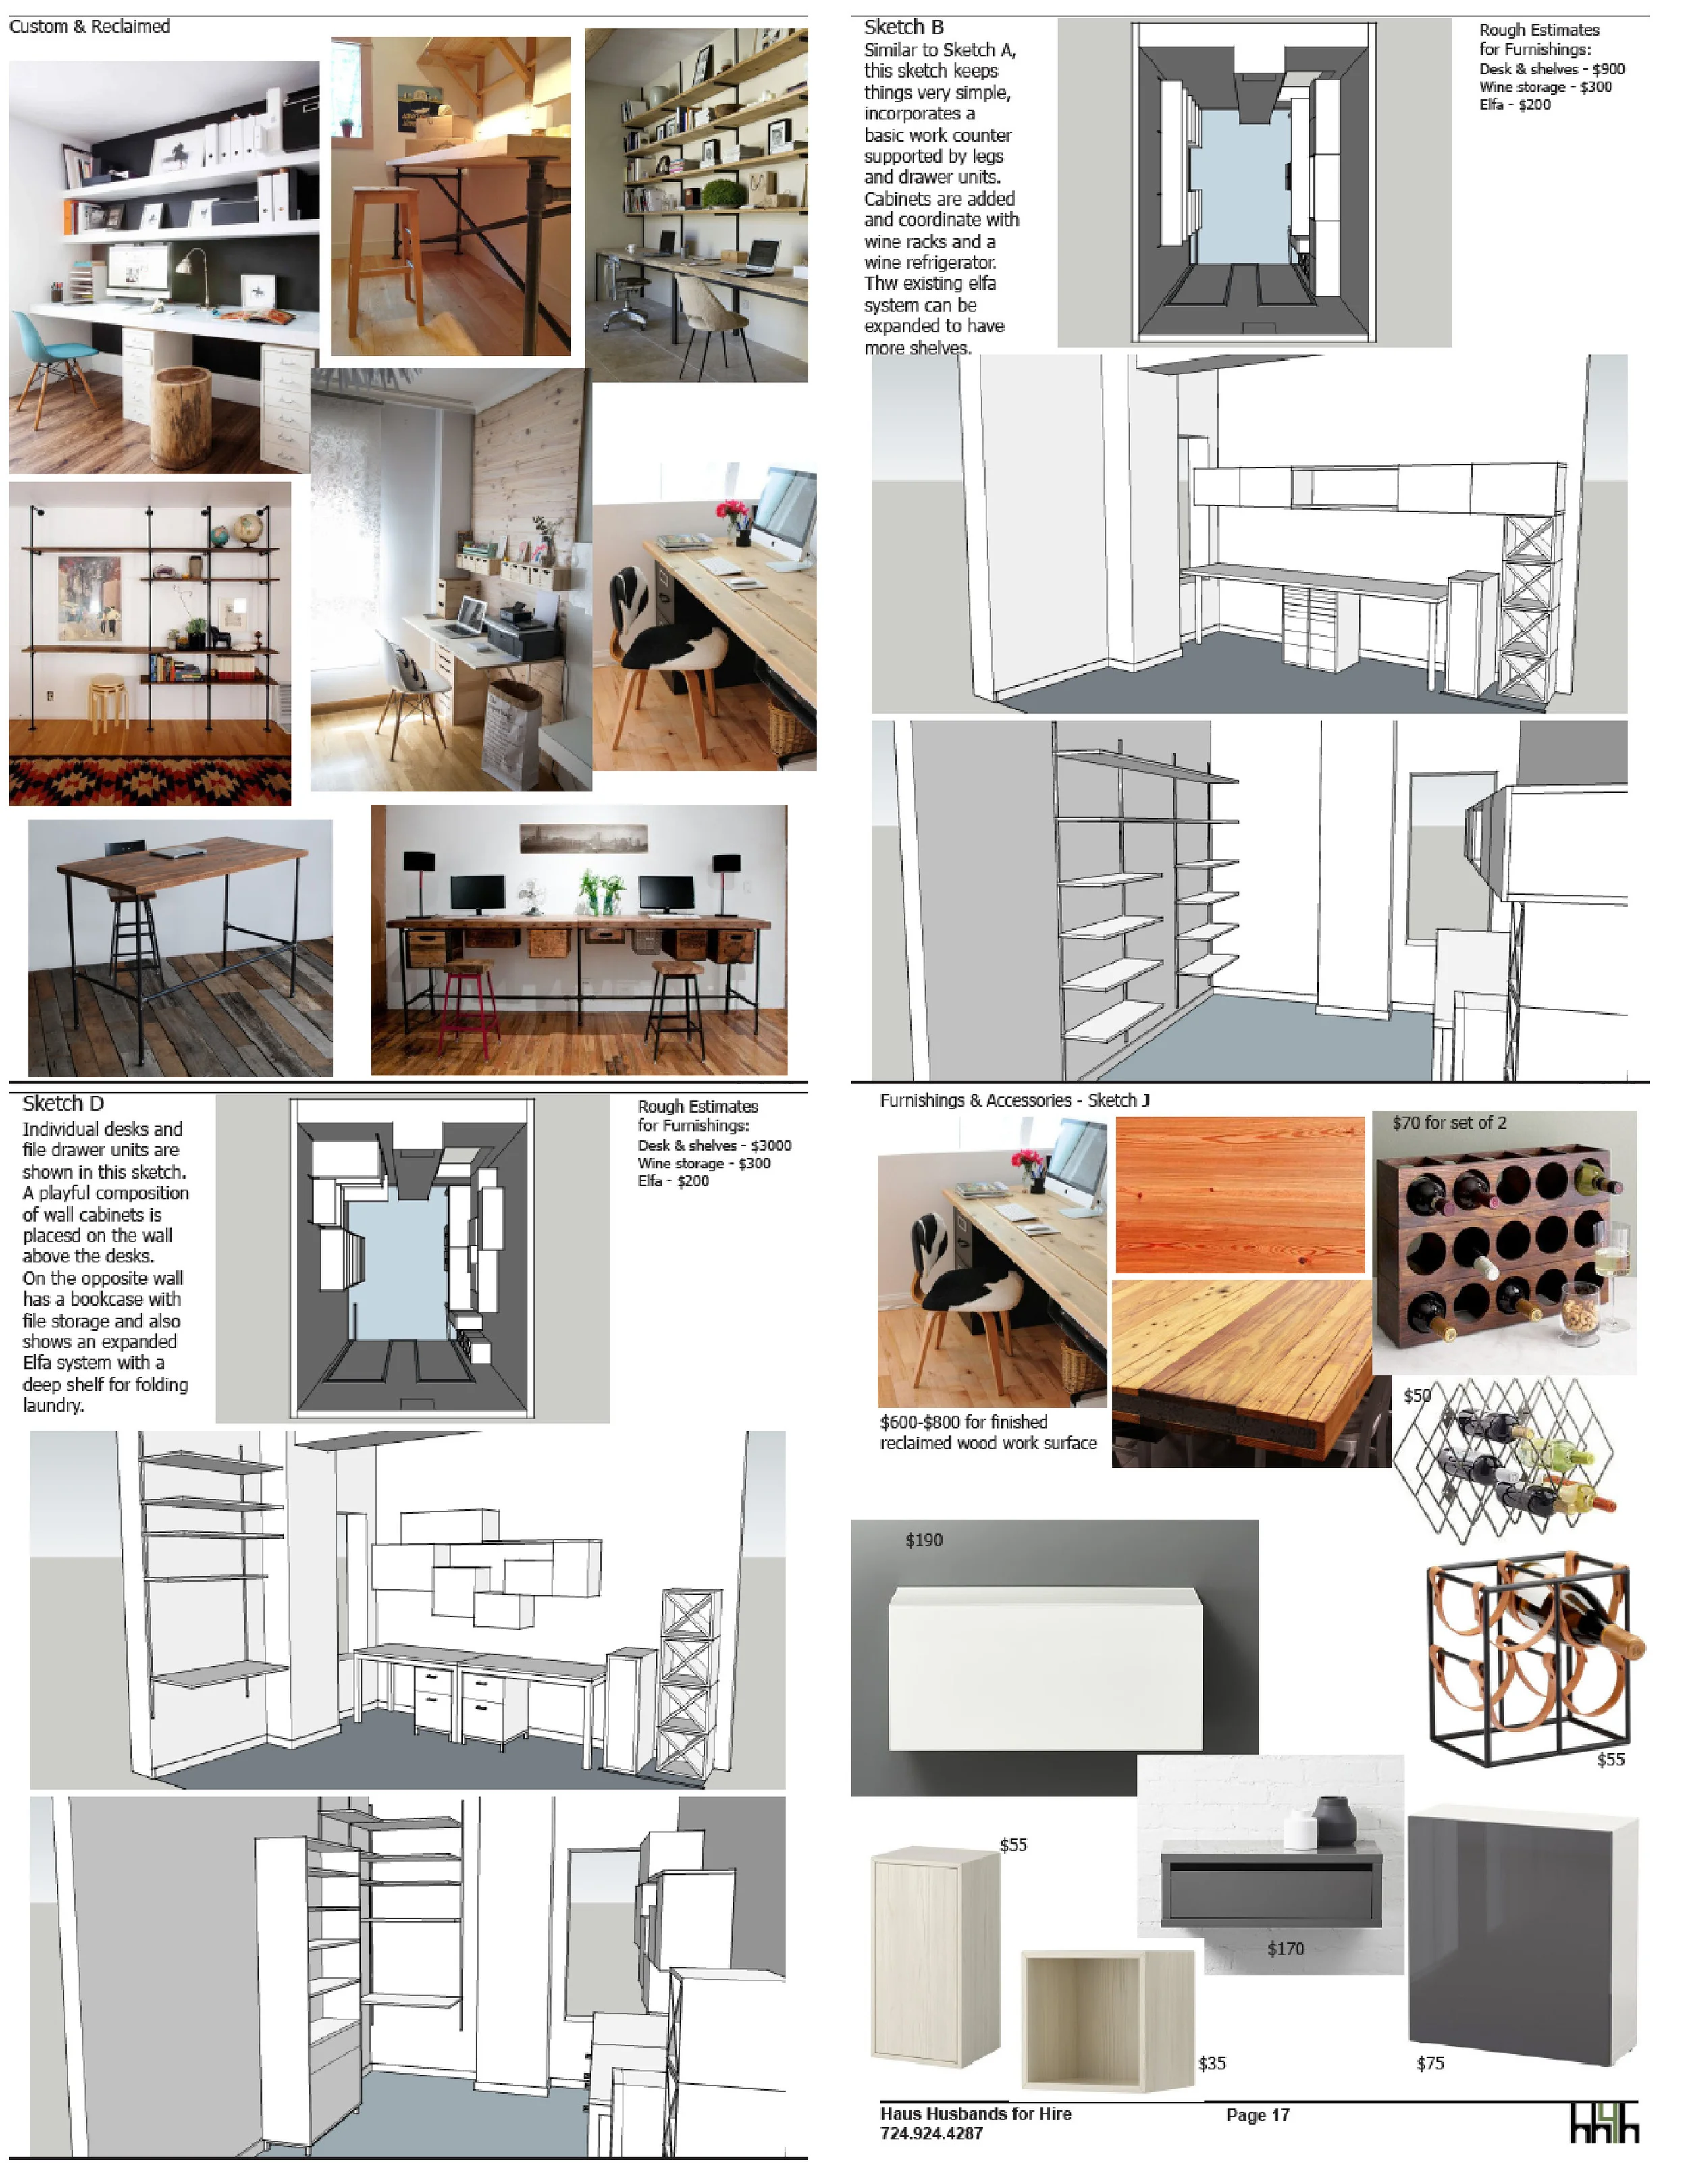
Concept and design idea boards
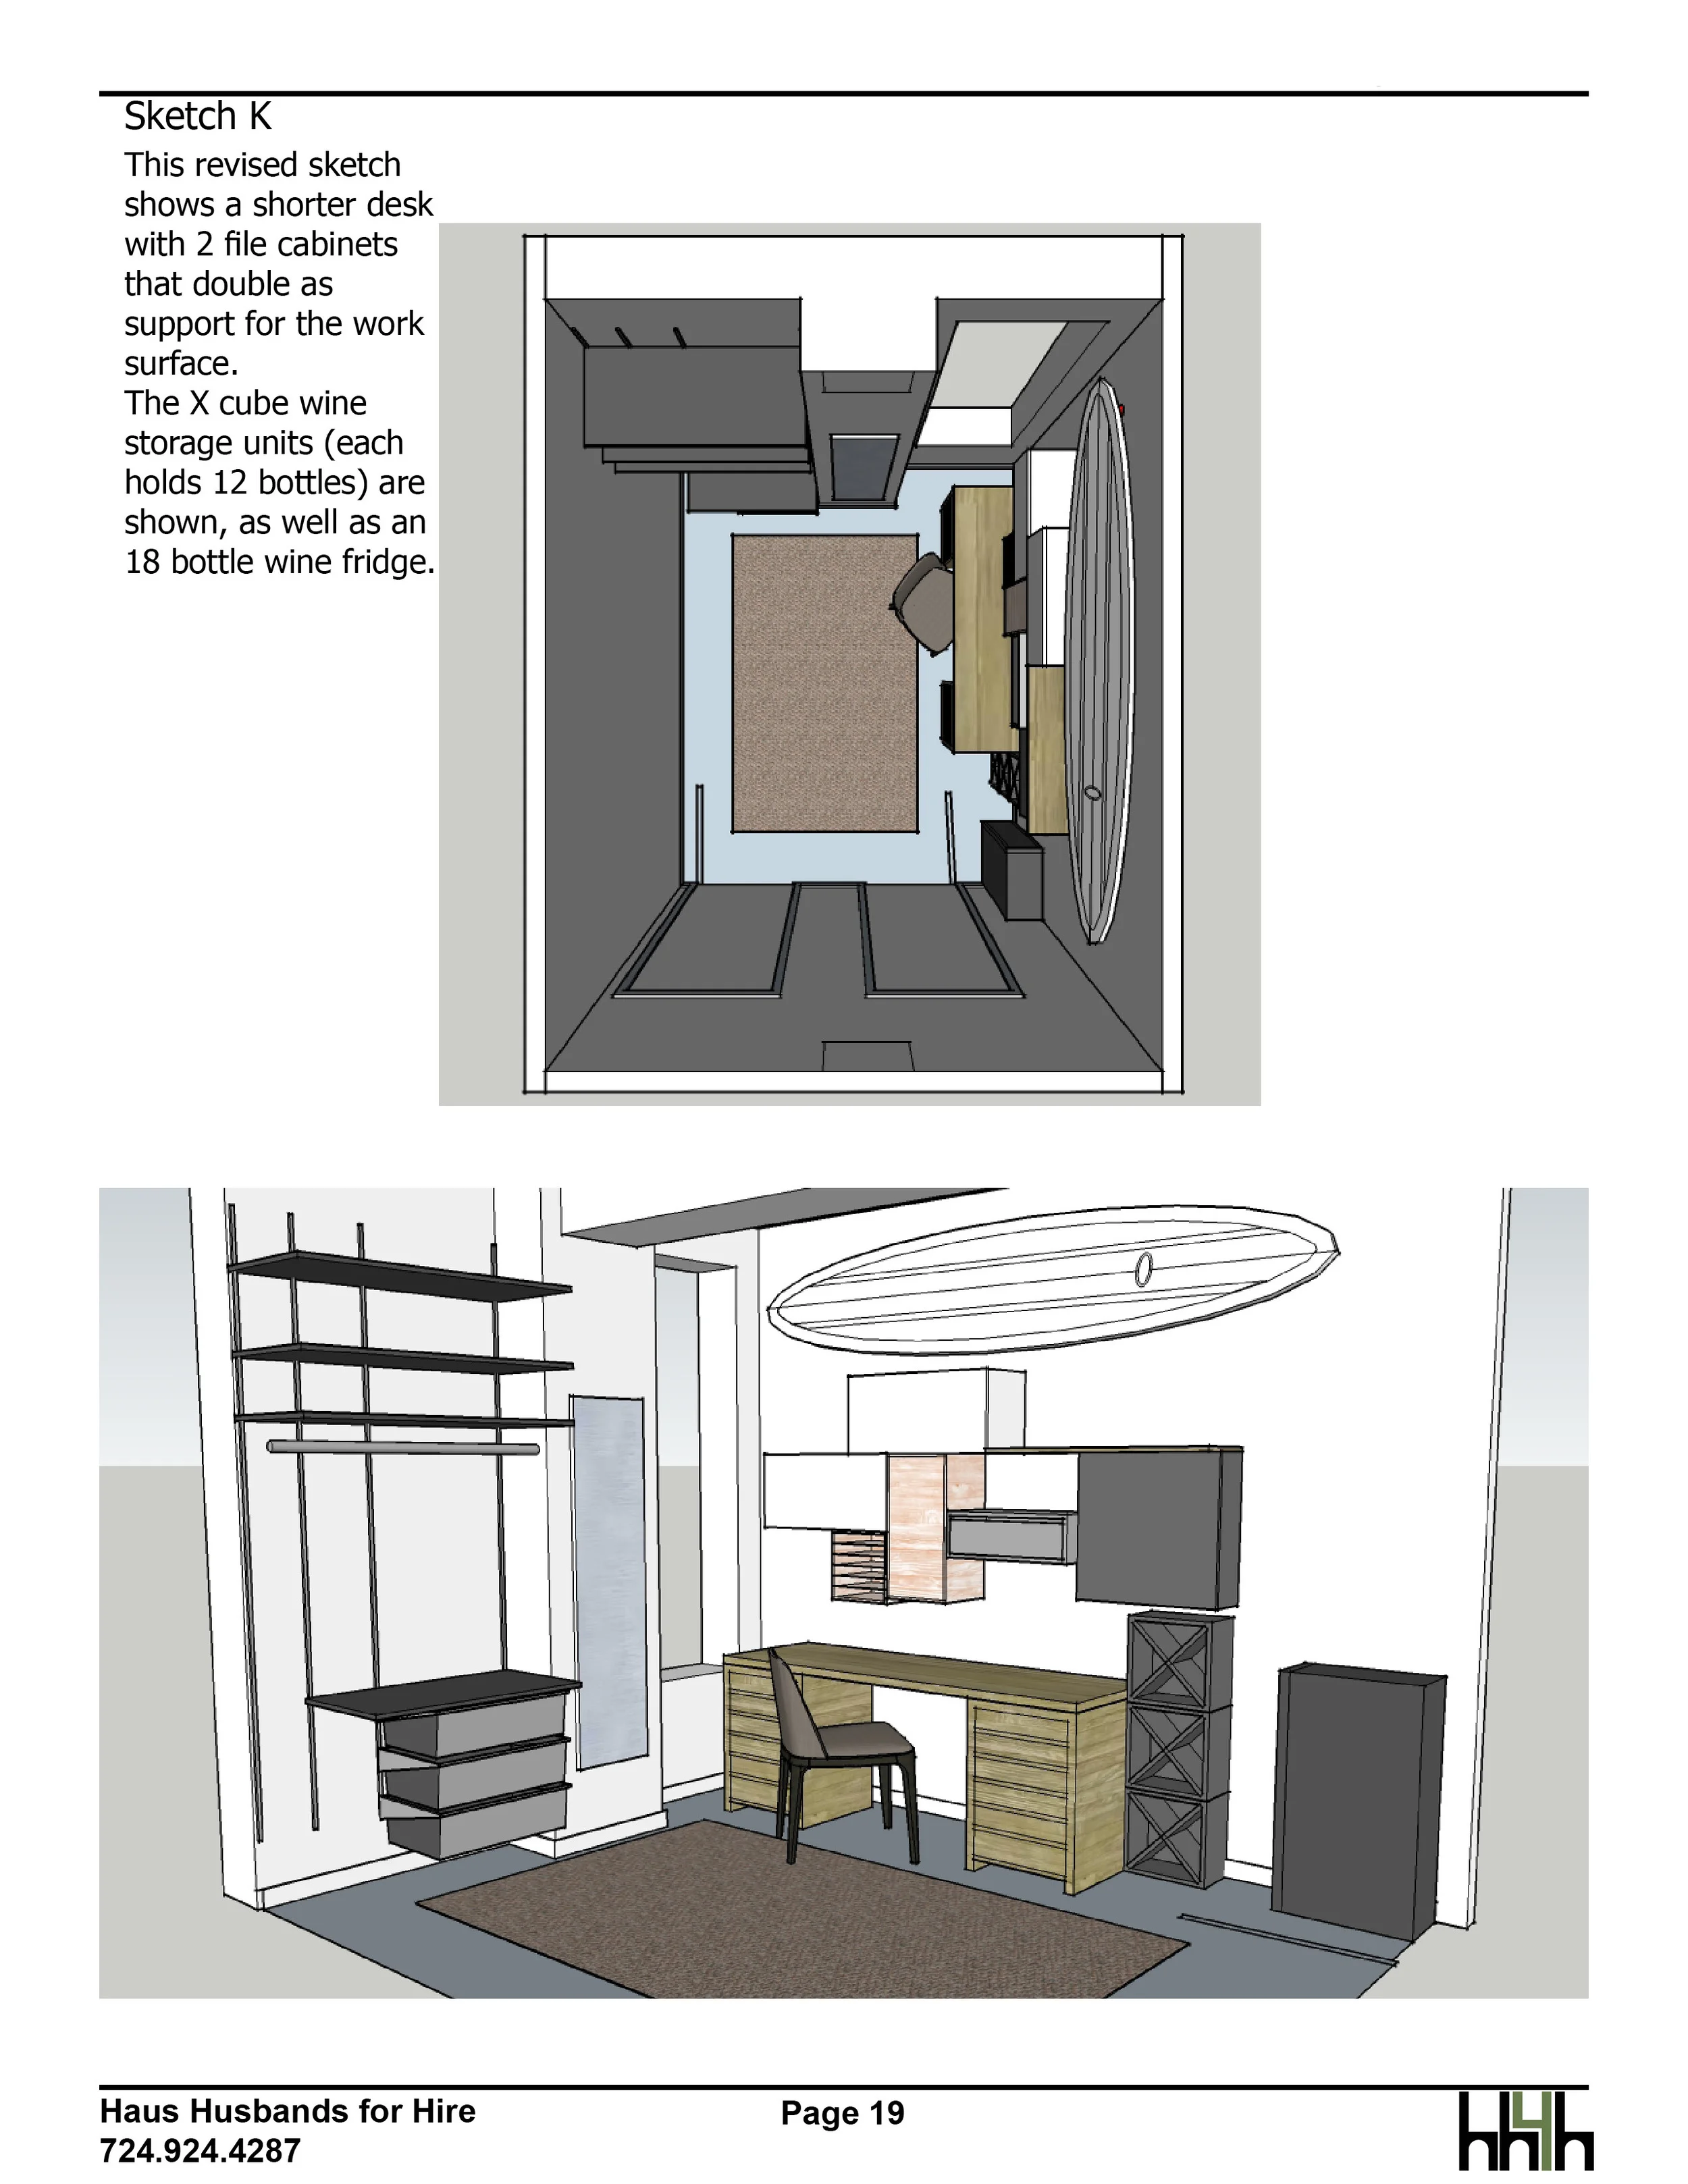
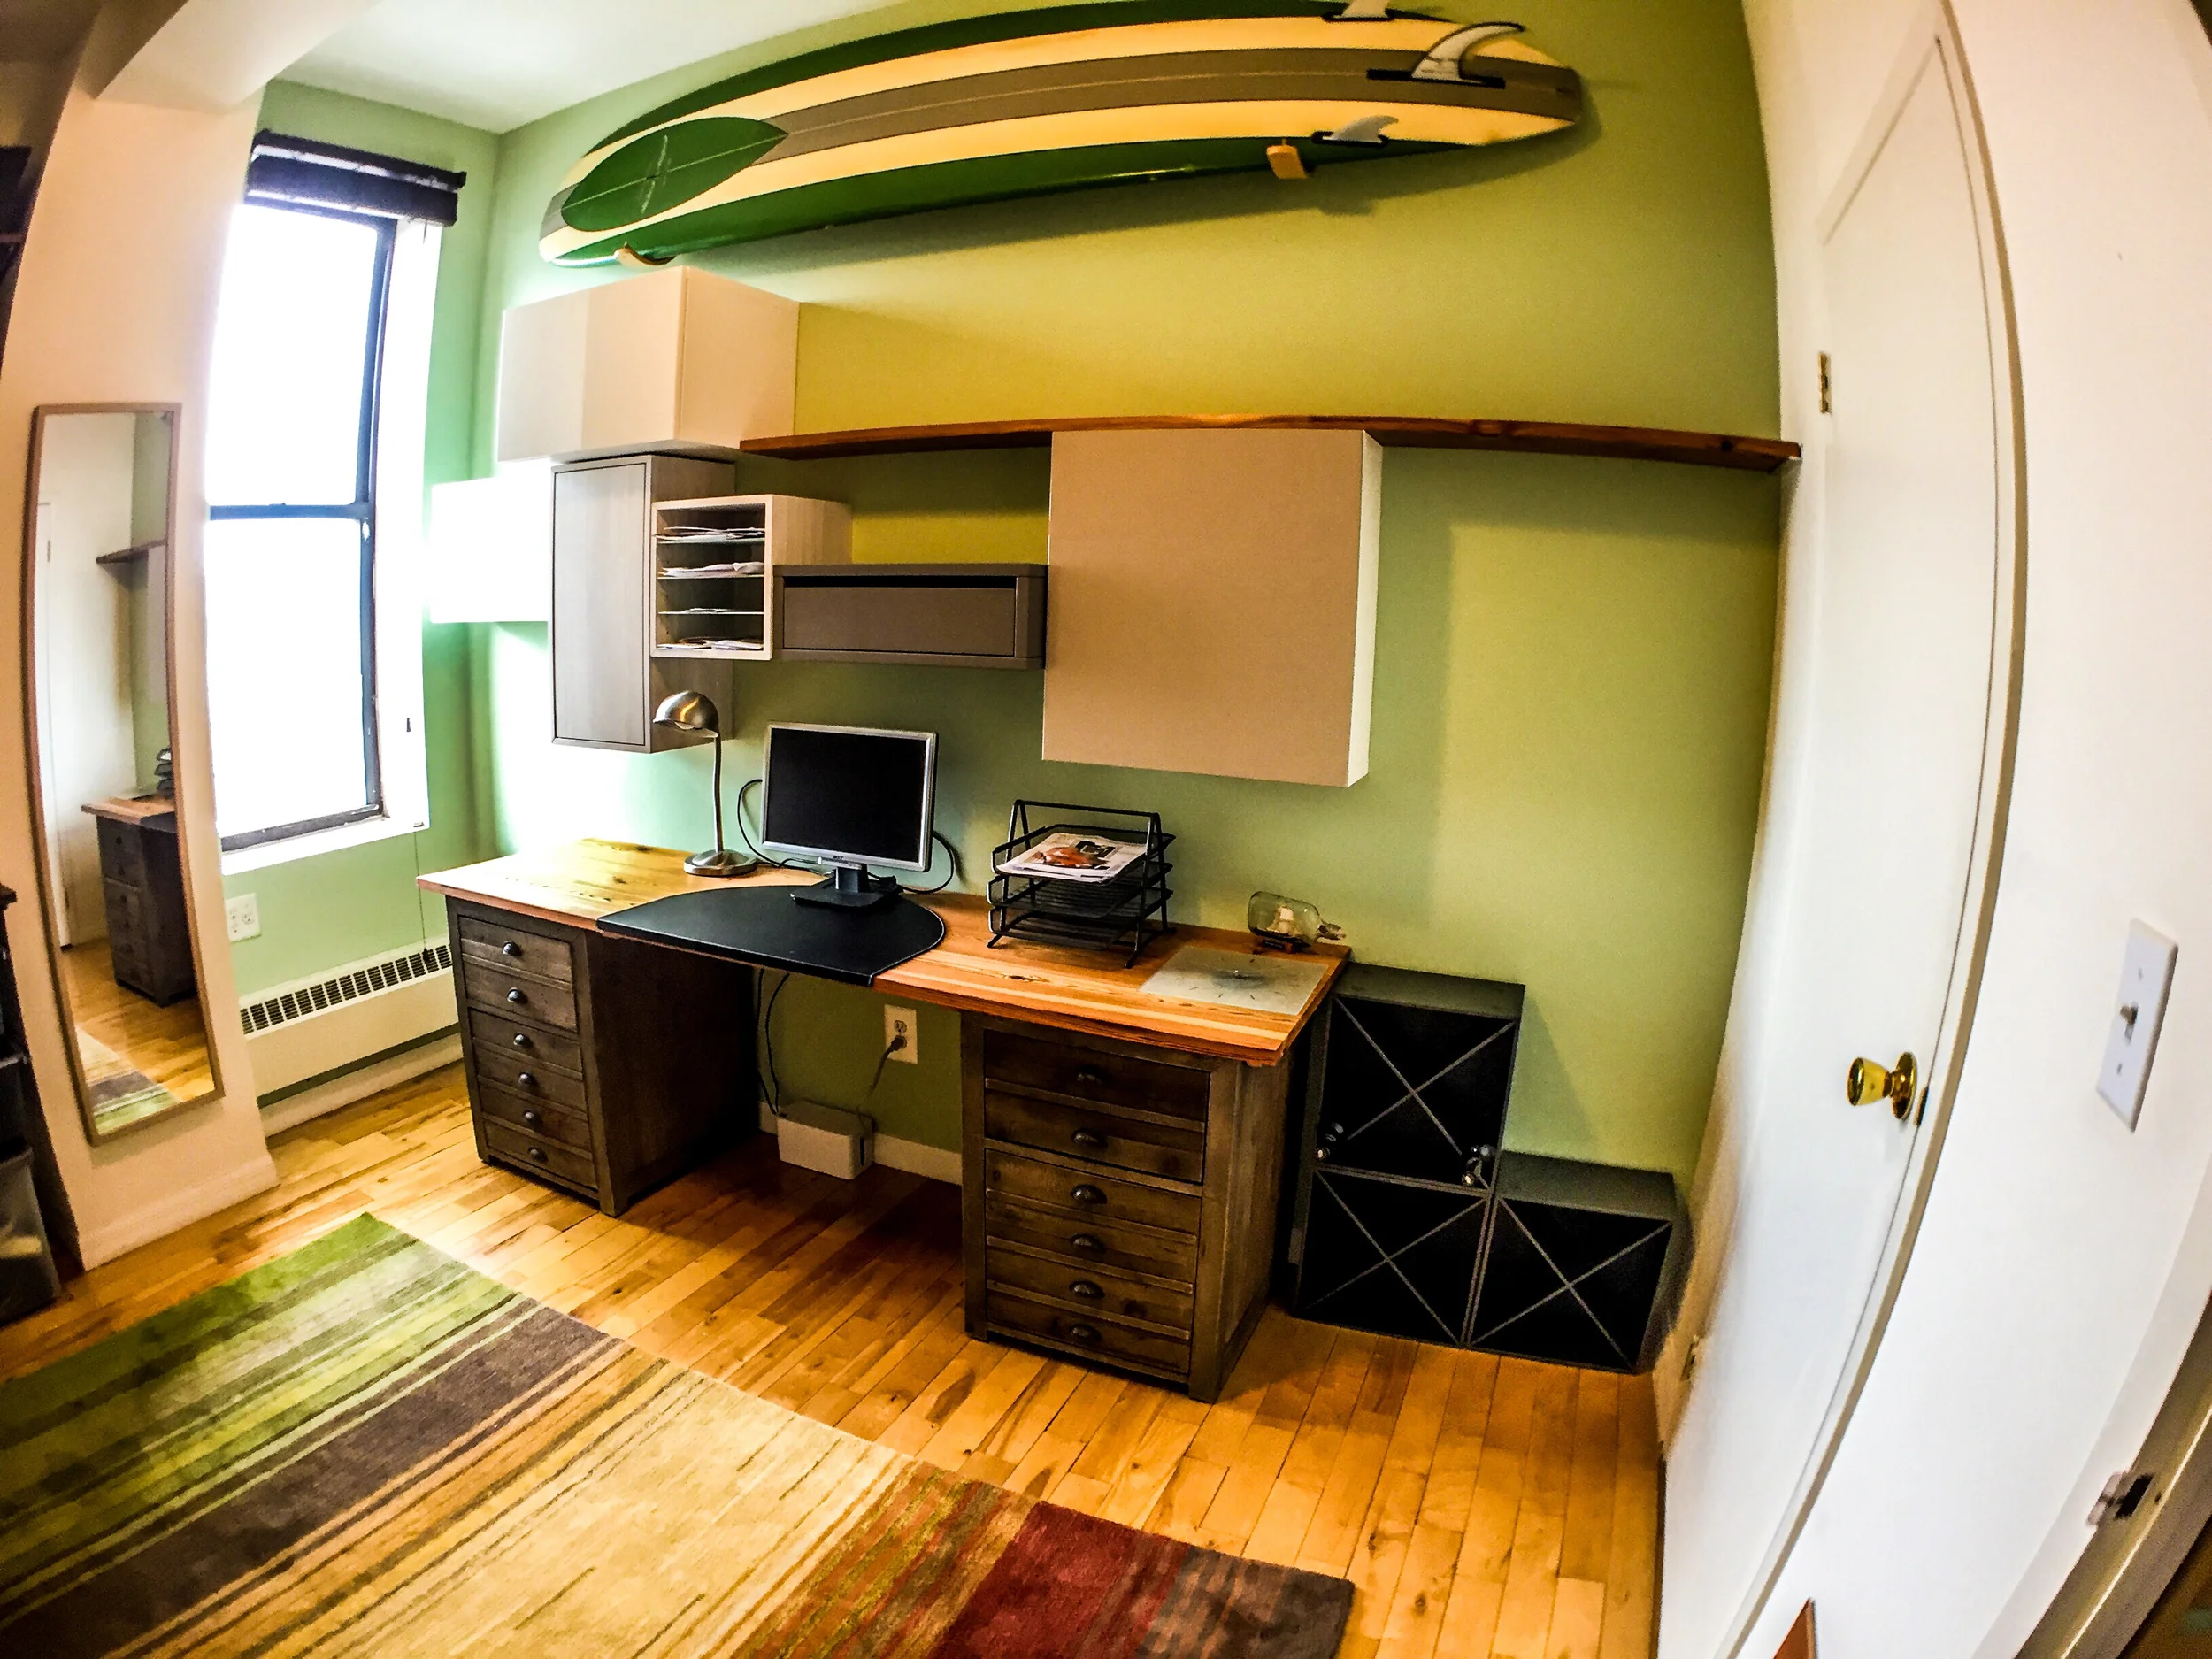
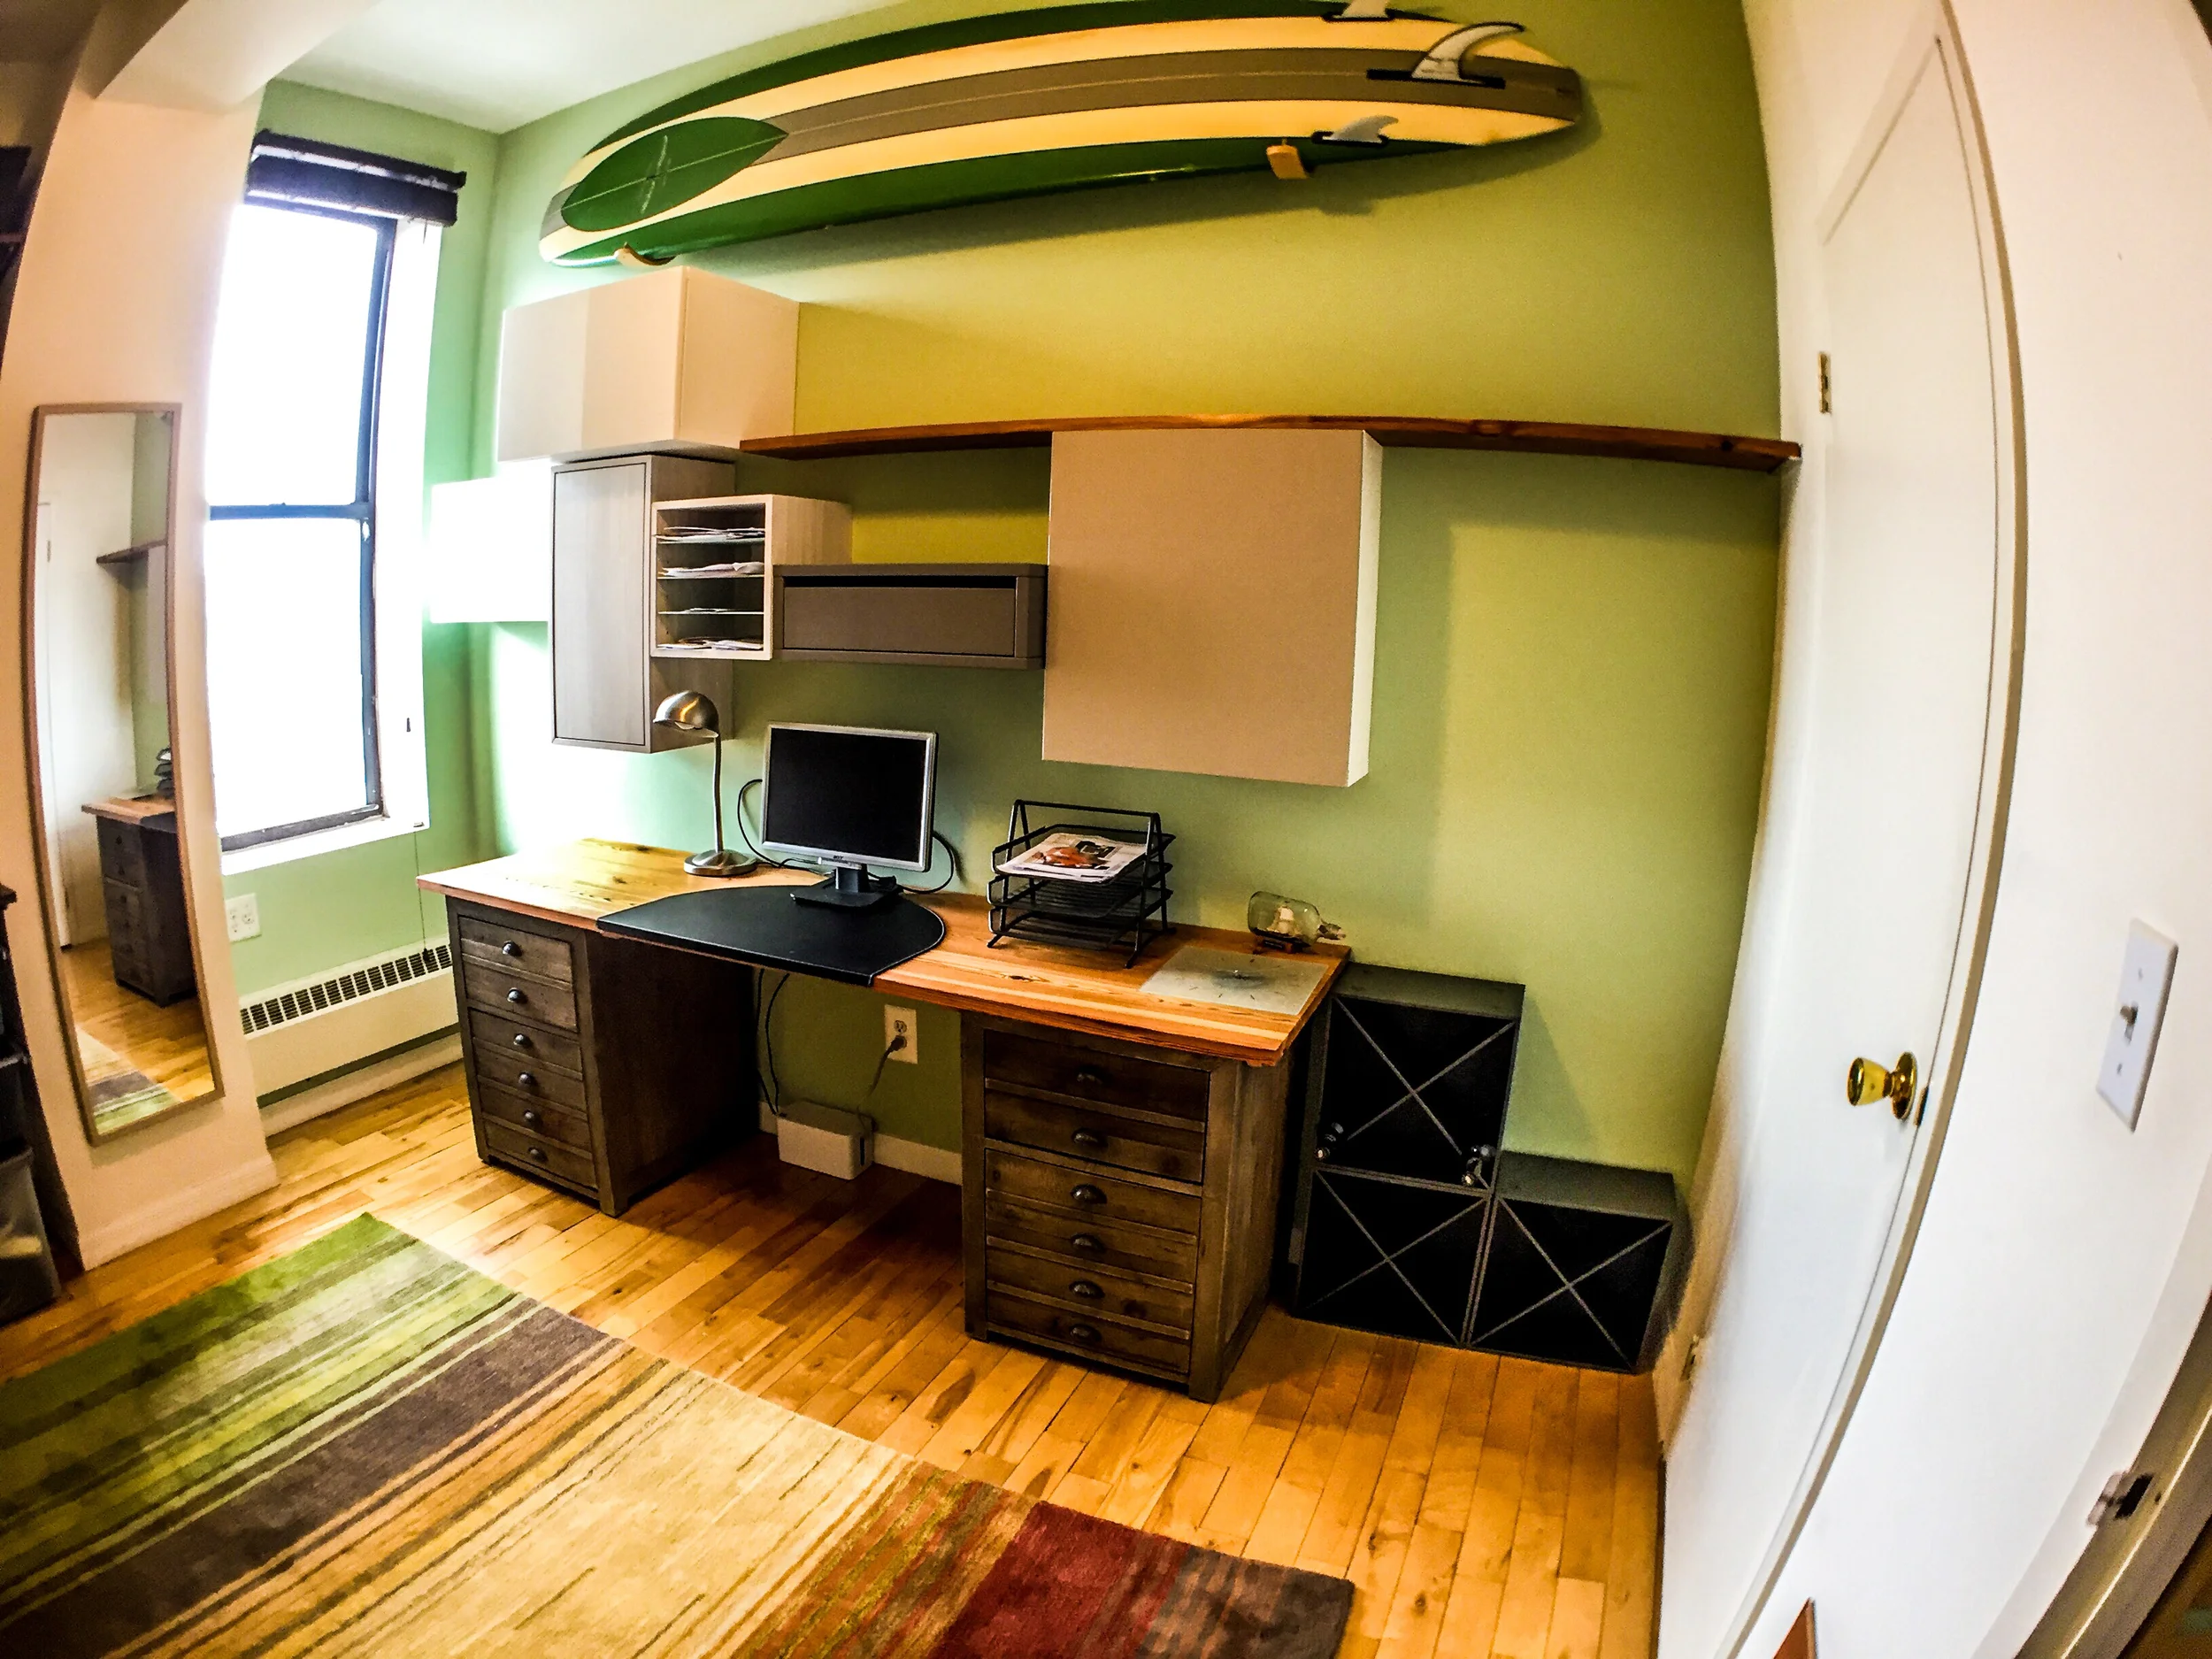
Final Concept
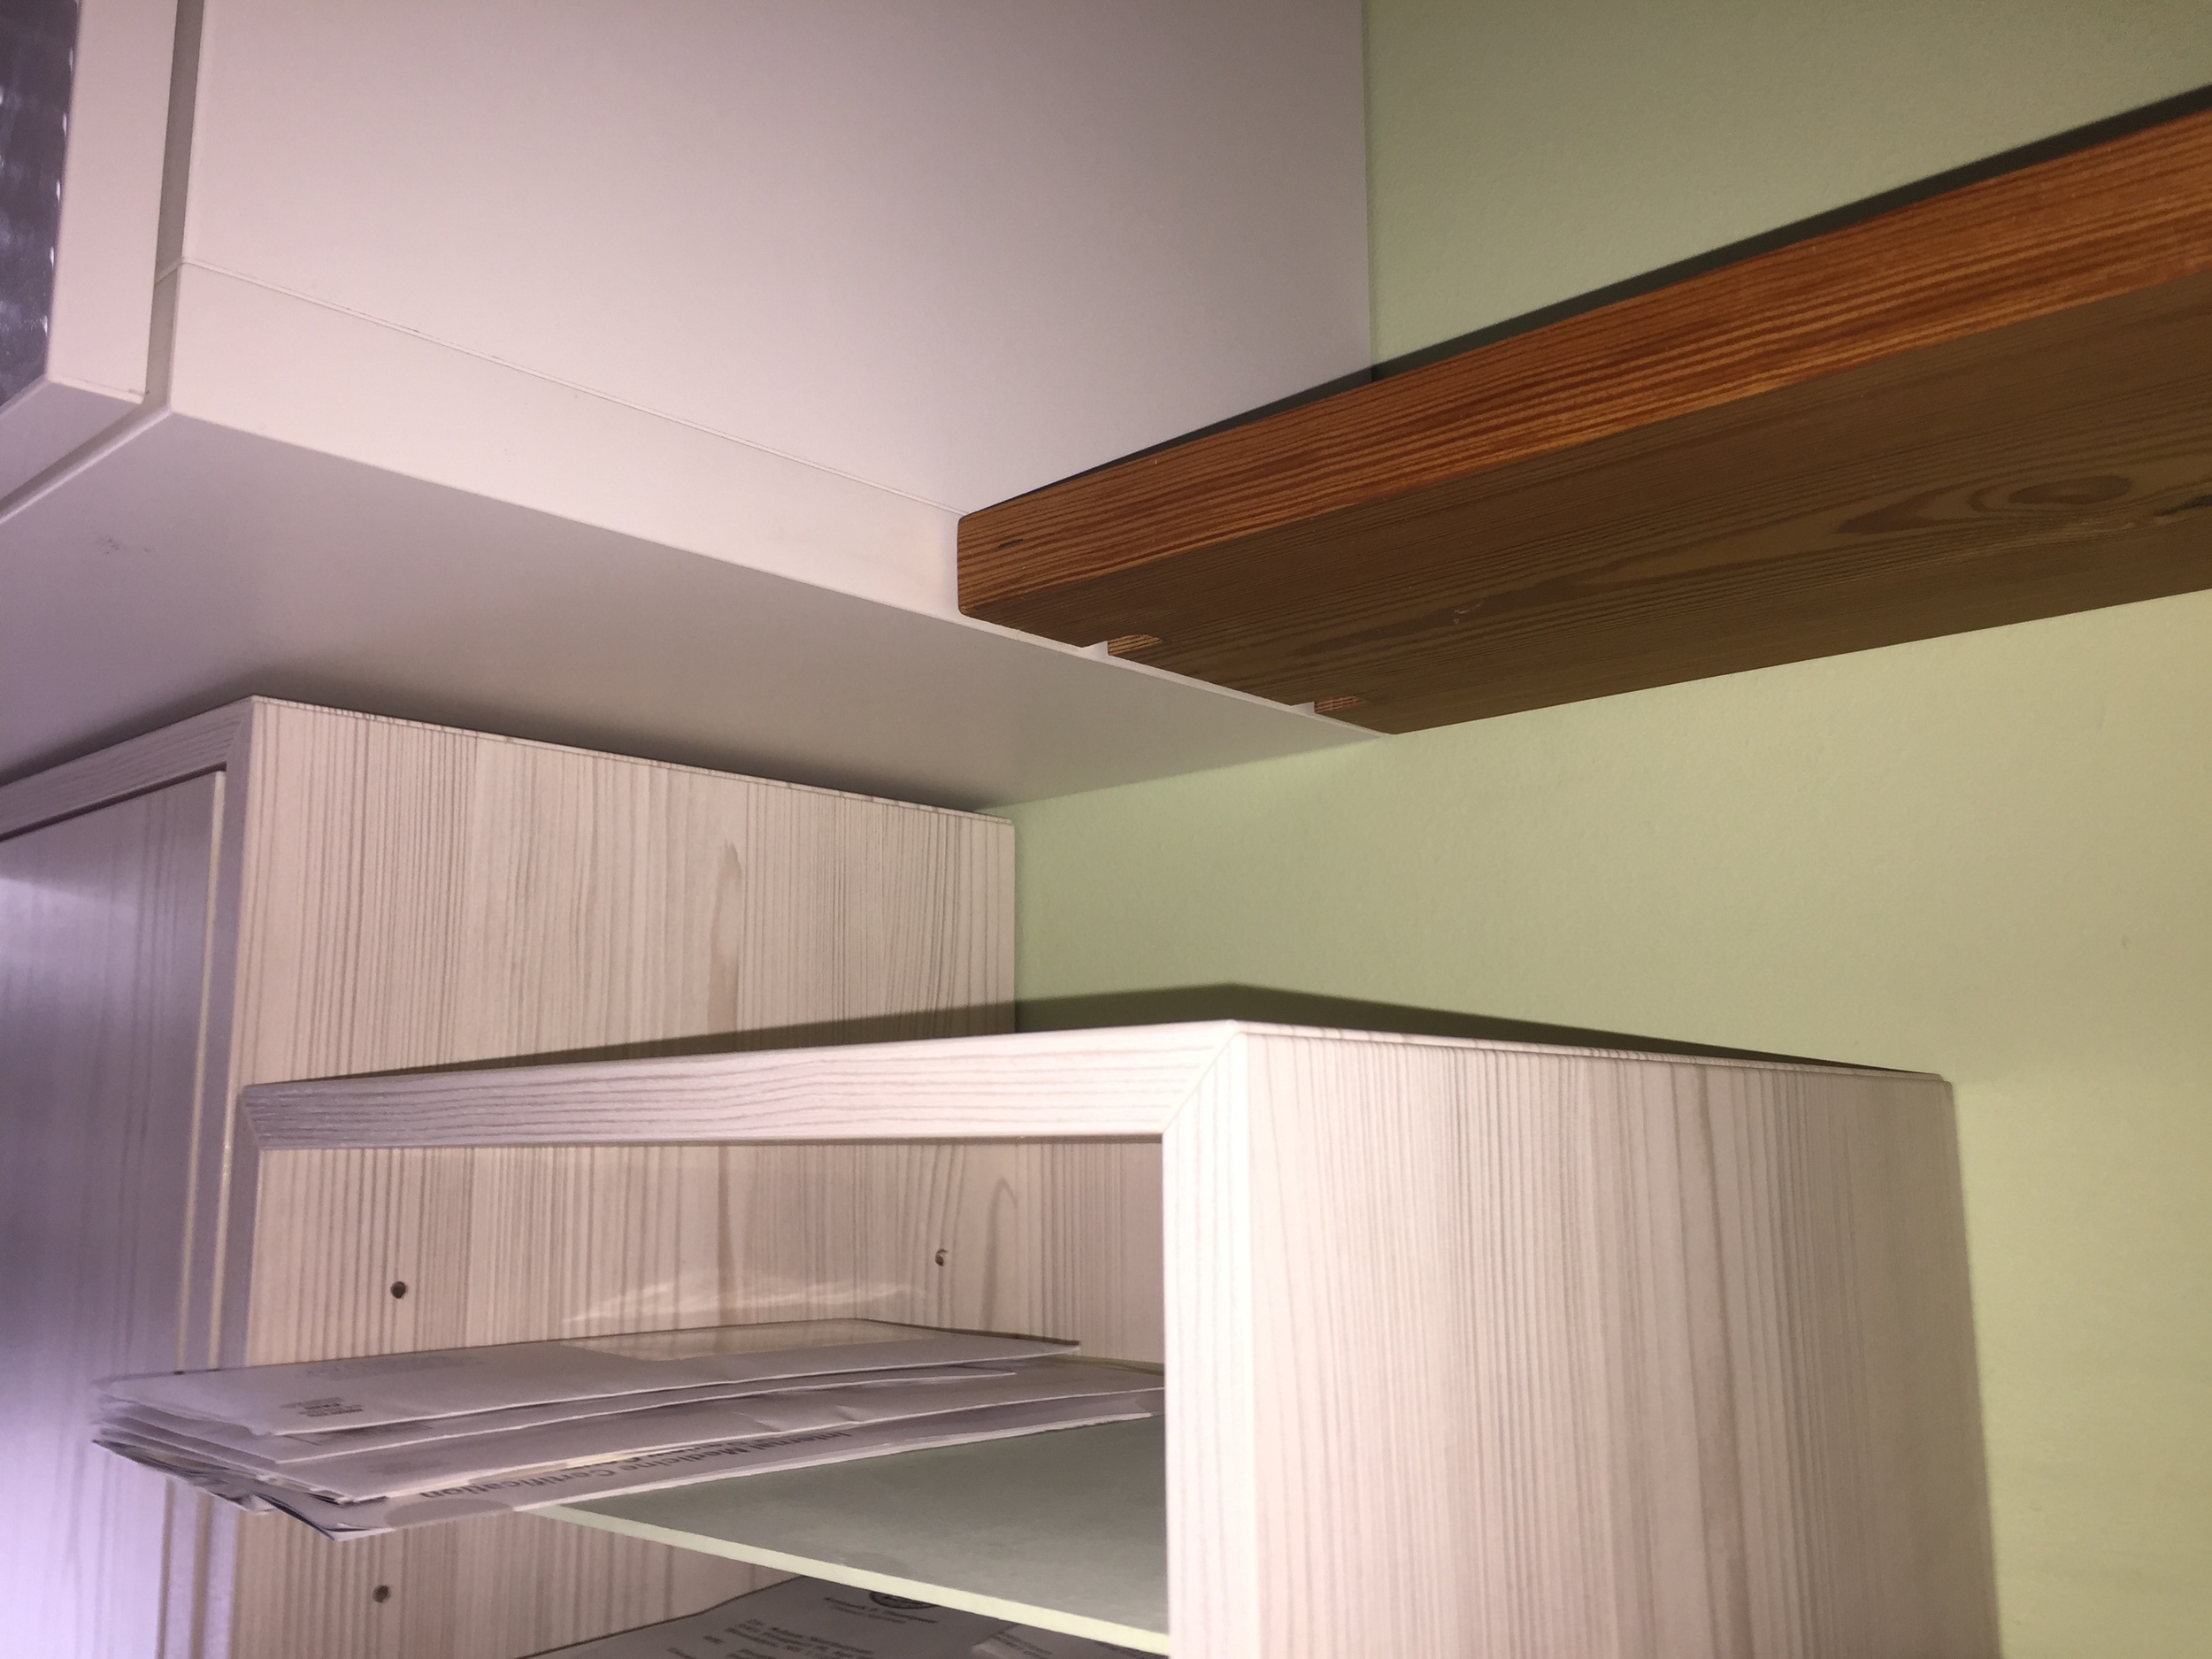
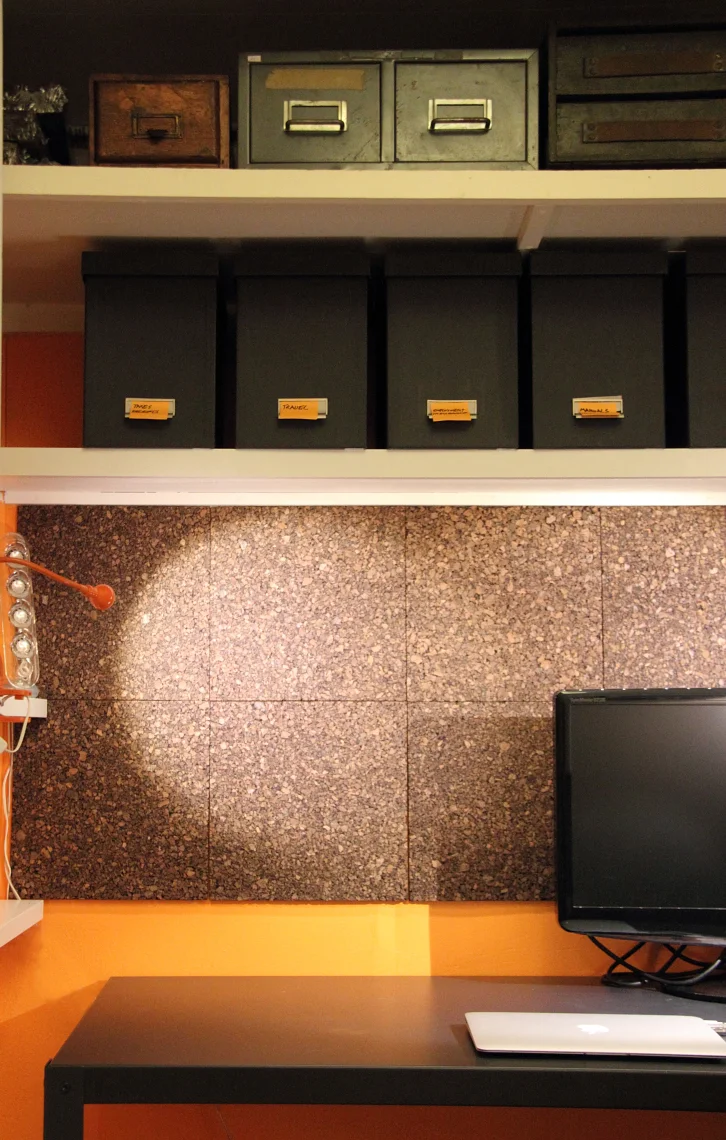
The final design consisted of a composition of different wall cabinets individually purchased from different manufacturers like Ikea and CB2. We also moved and added to the Elfa system to make it look a bit more fitted to the space.
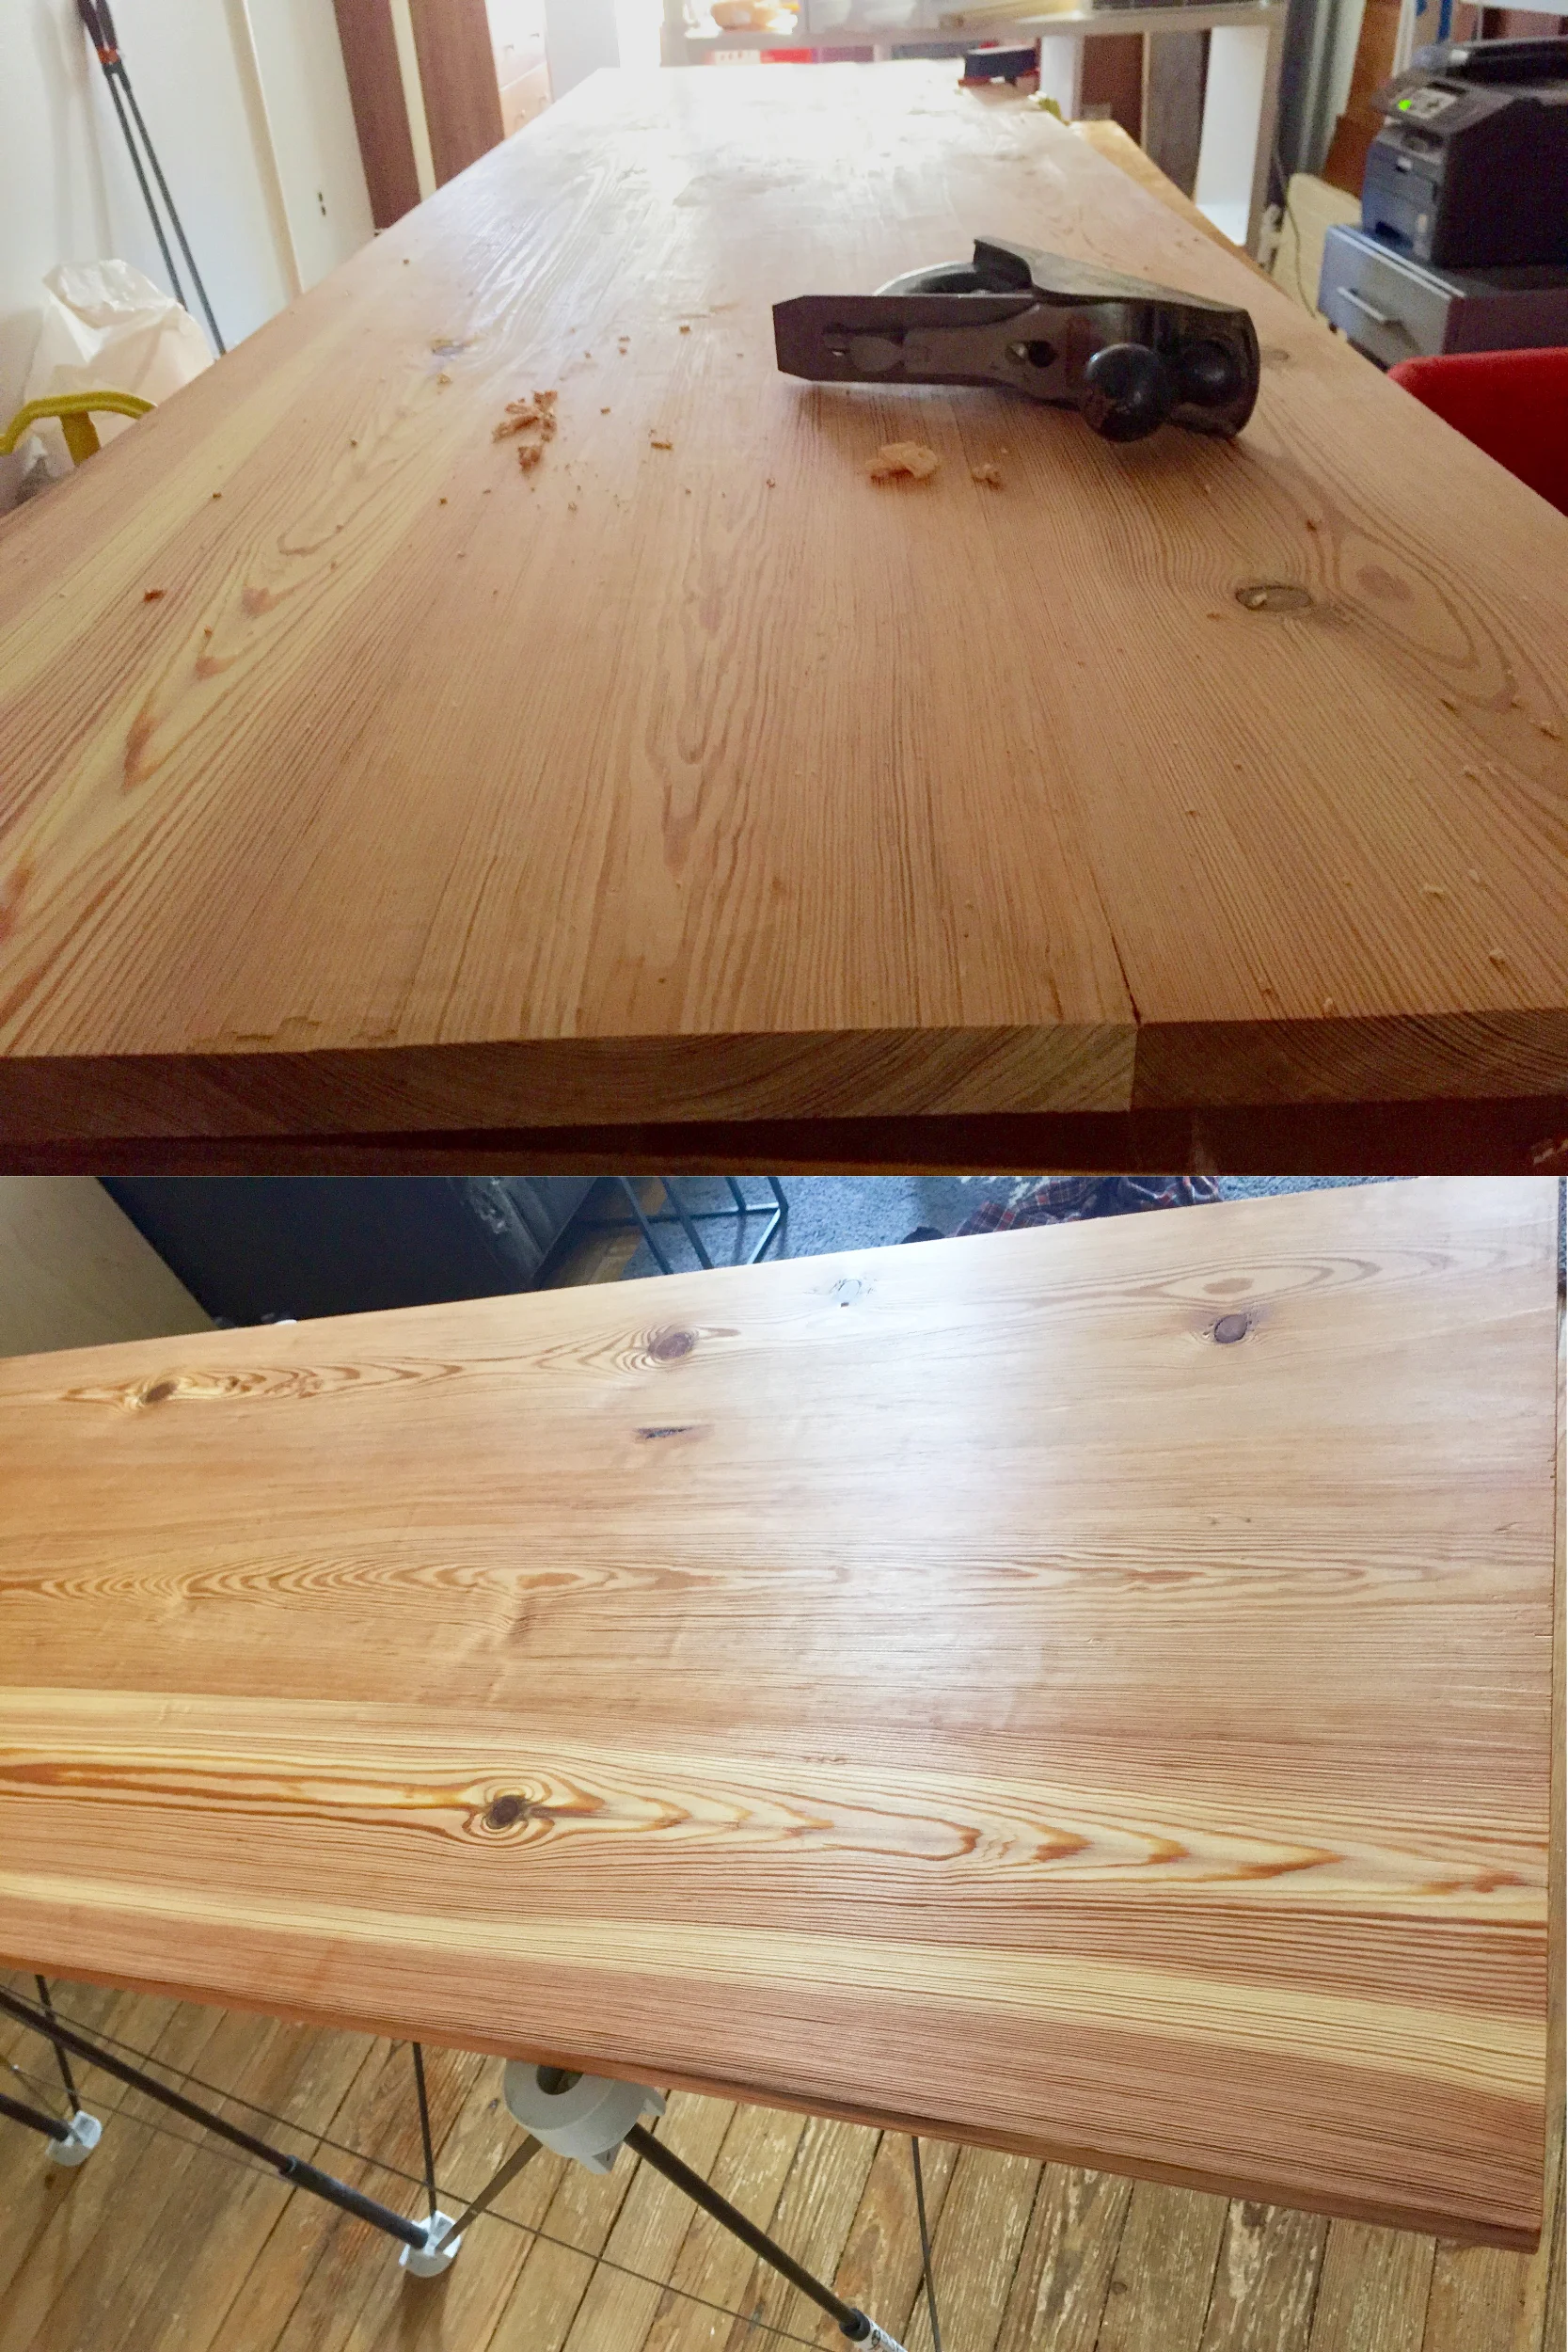
We made a custom desk top from reclaimed yellow pine and sat it on rustic wood file cabinets purchased from Restoration Hardware.
We really liked the clients surfboard and ended up using it to develop the color pallet for the new wall paint, carpet, wood colors, etc.
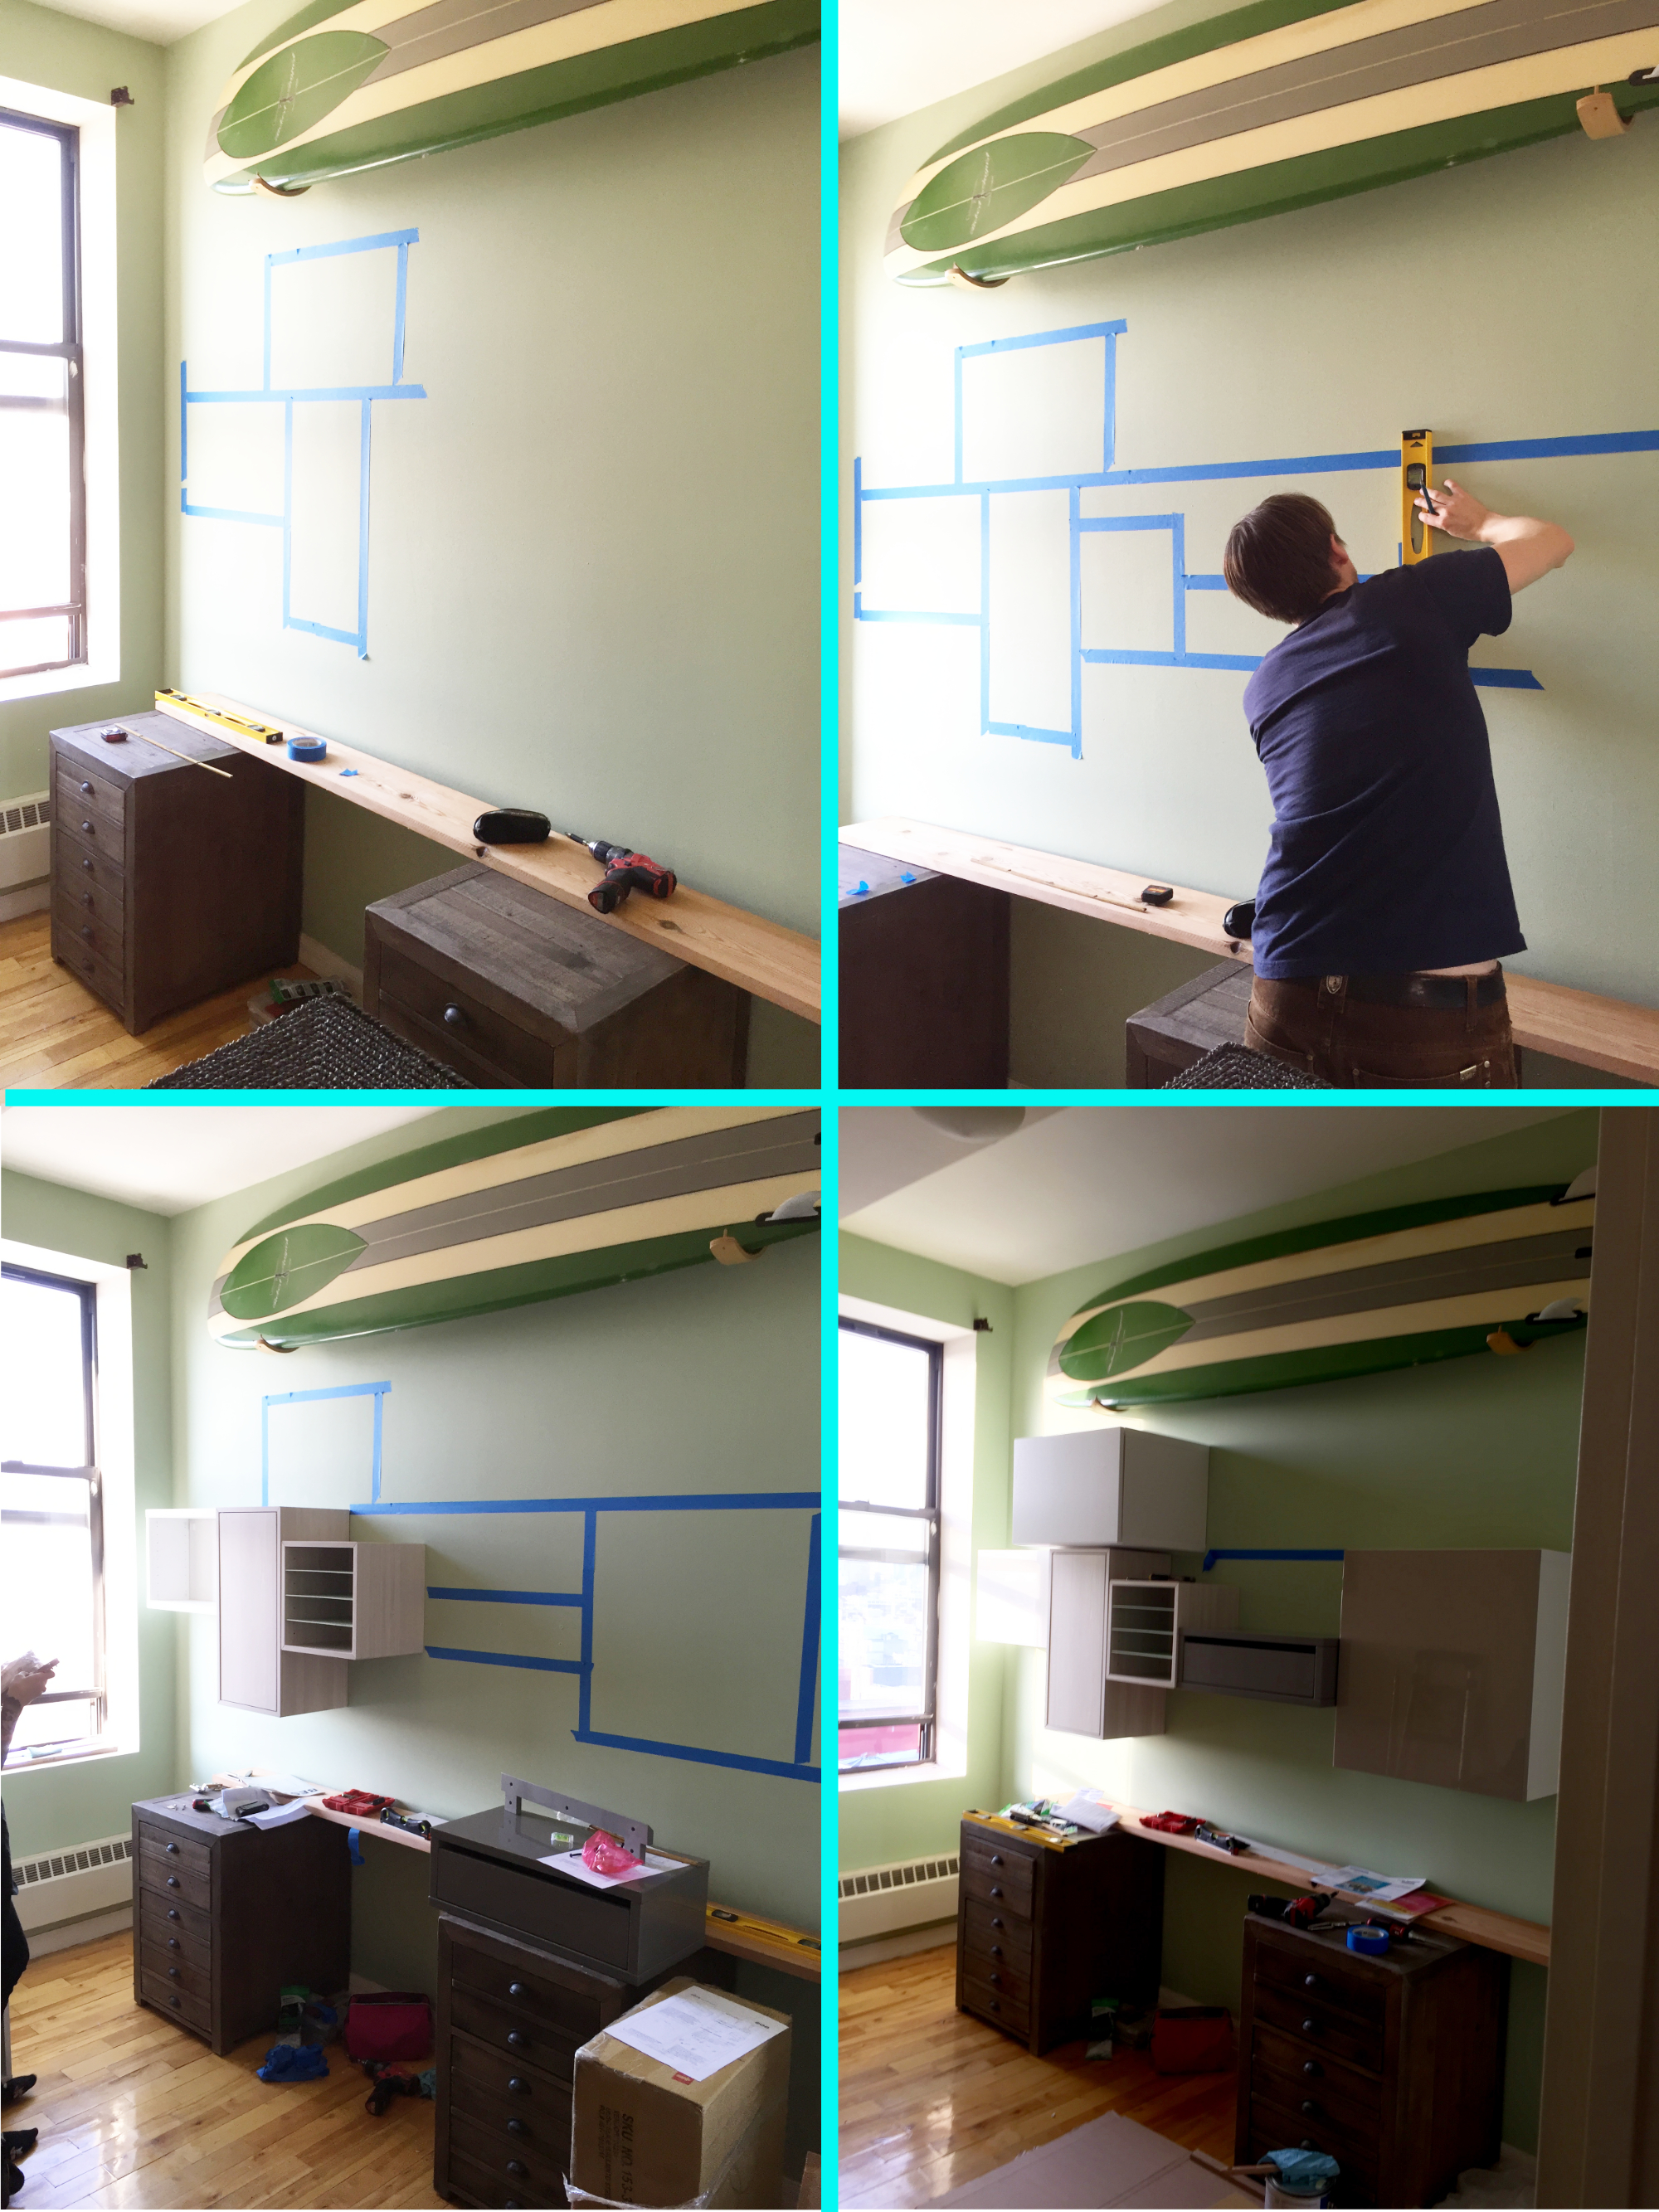
Mapping out the shelving units
We painted the wall then mapped out the location of each cabinet unit with painters tape.
Making the desk top
Detail
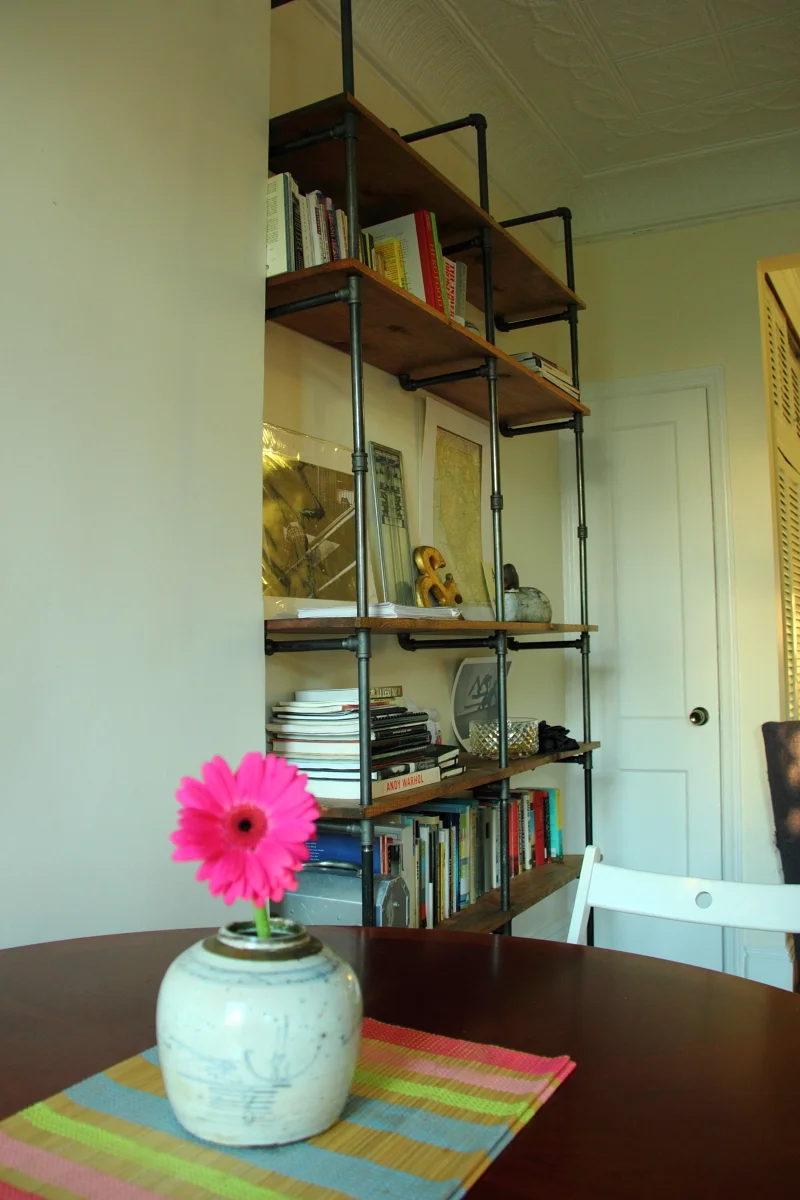
Built In Shelving
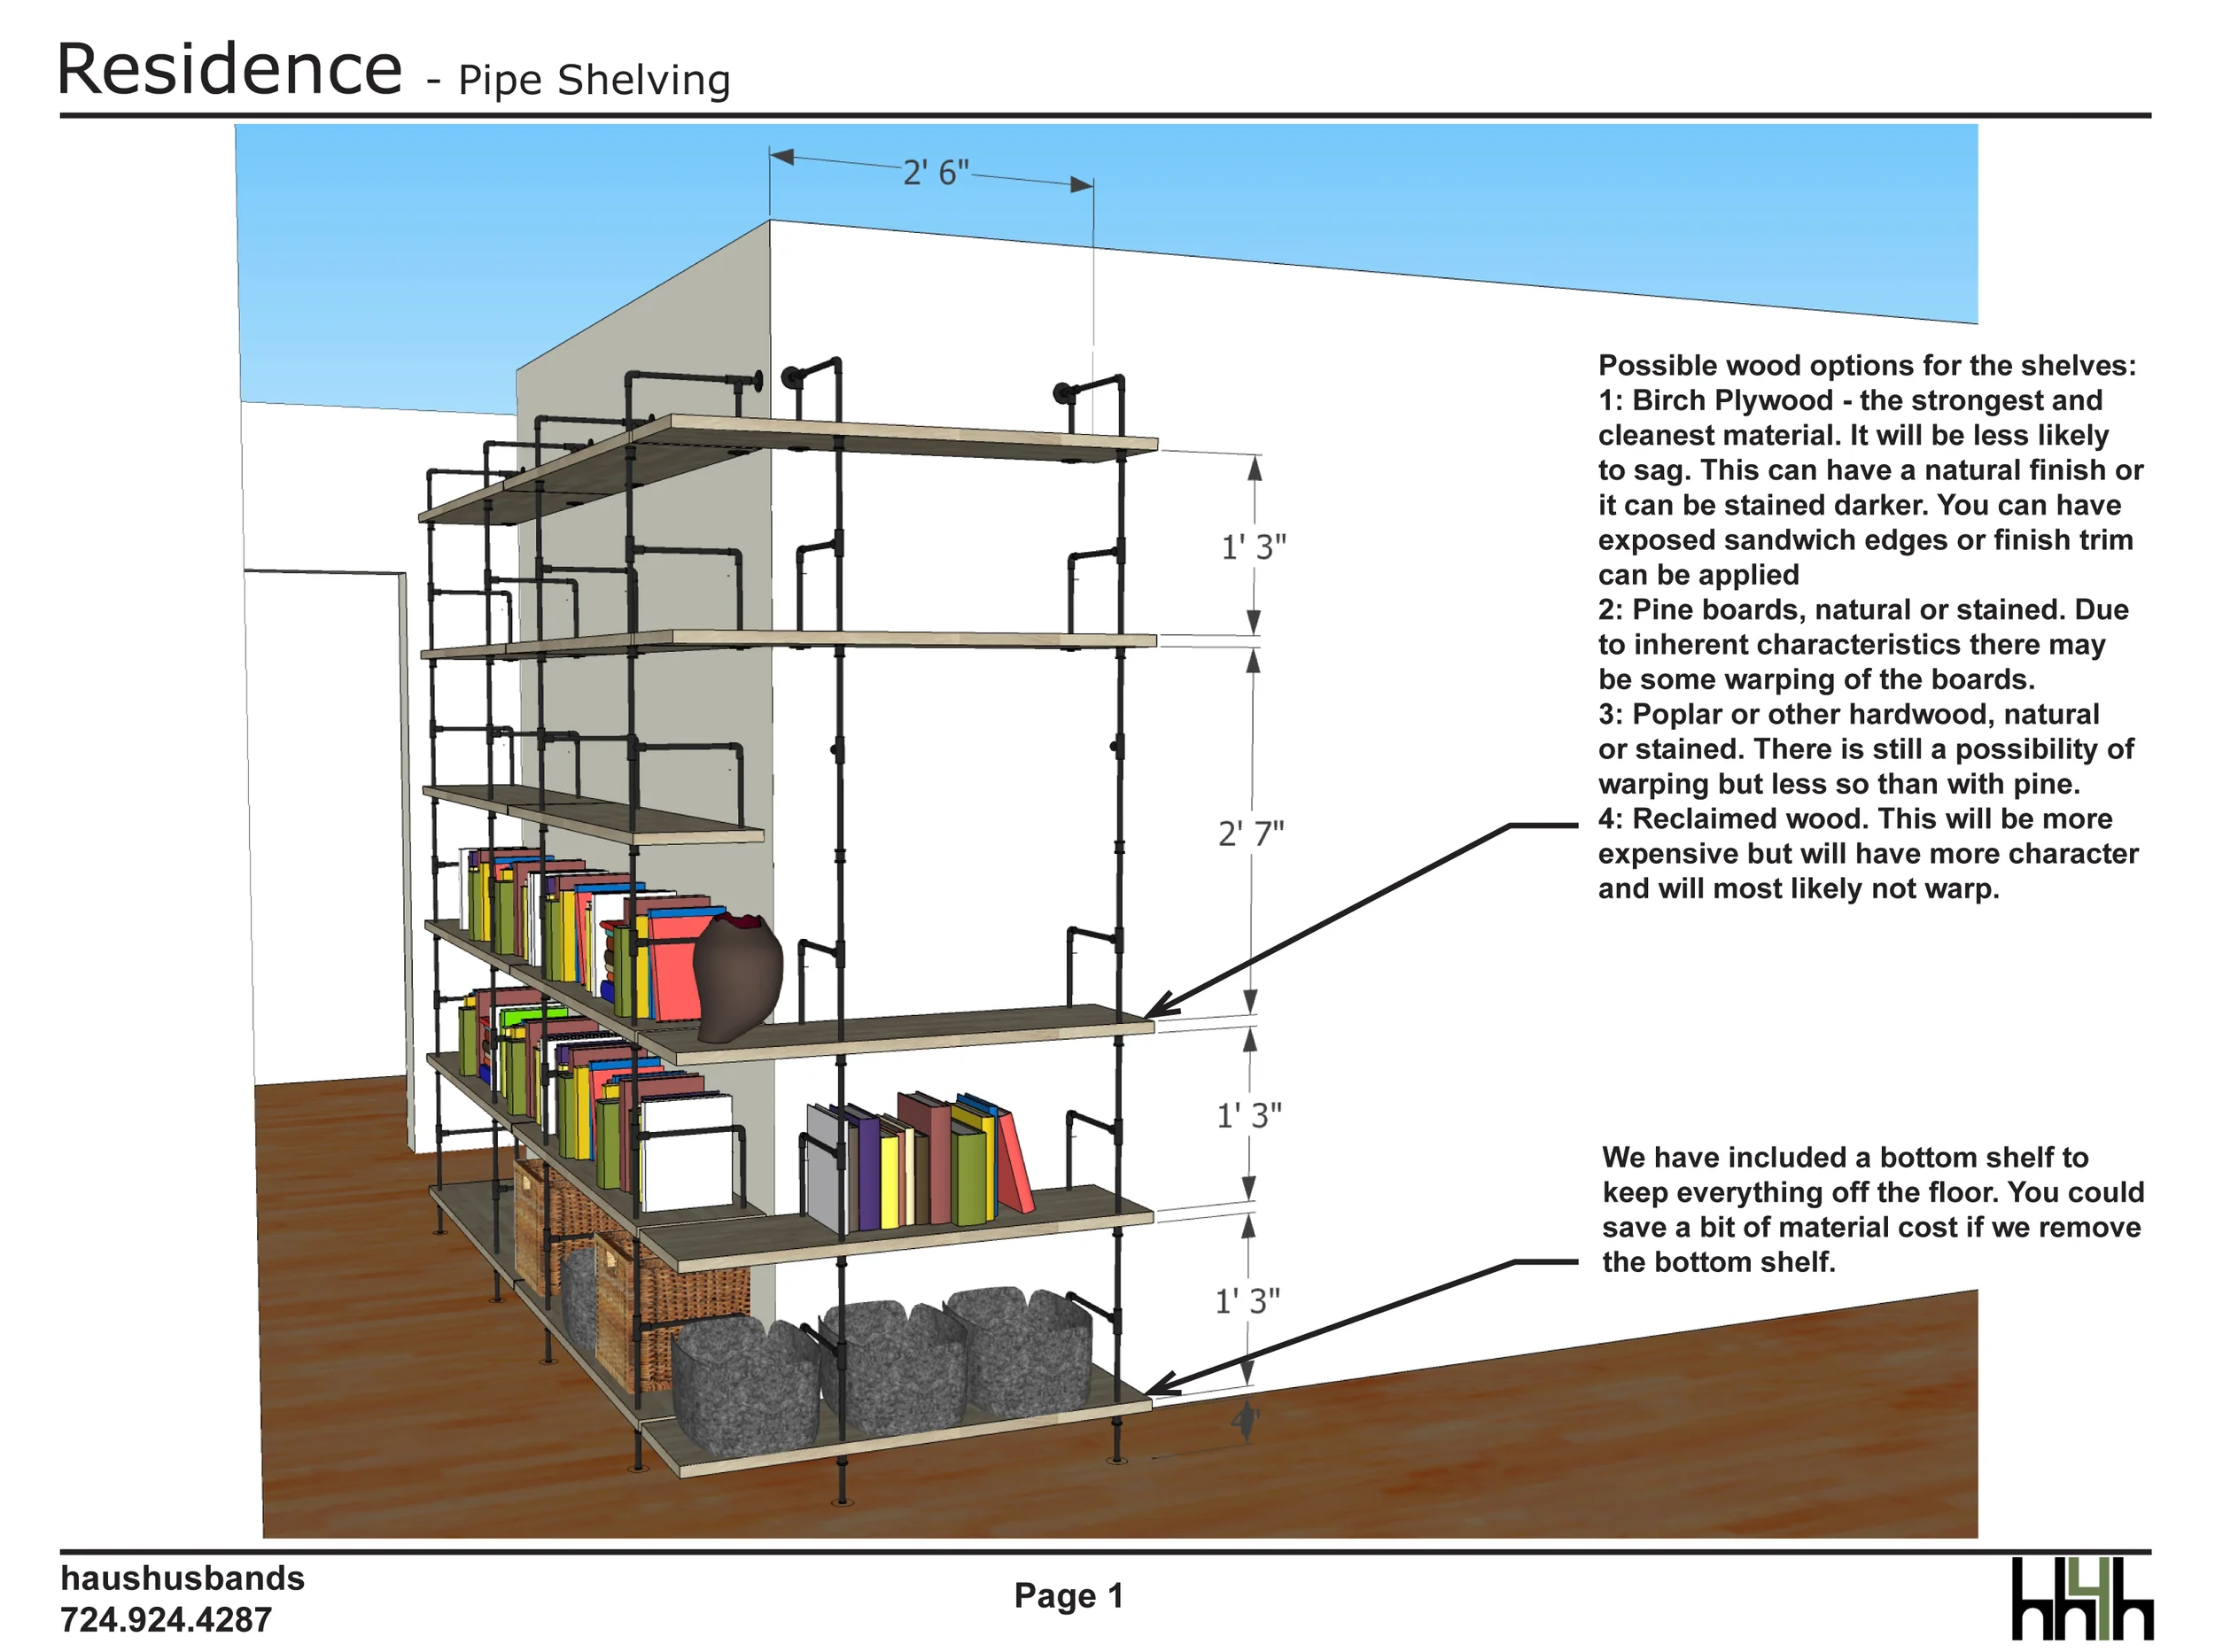
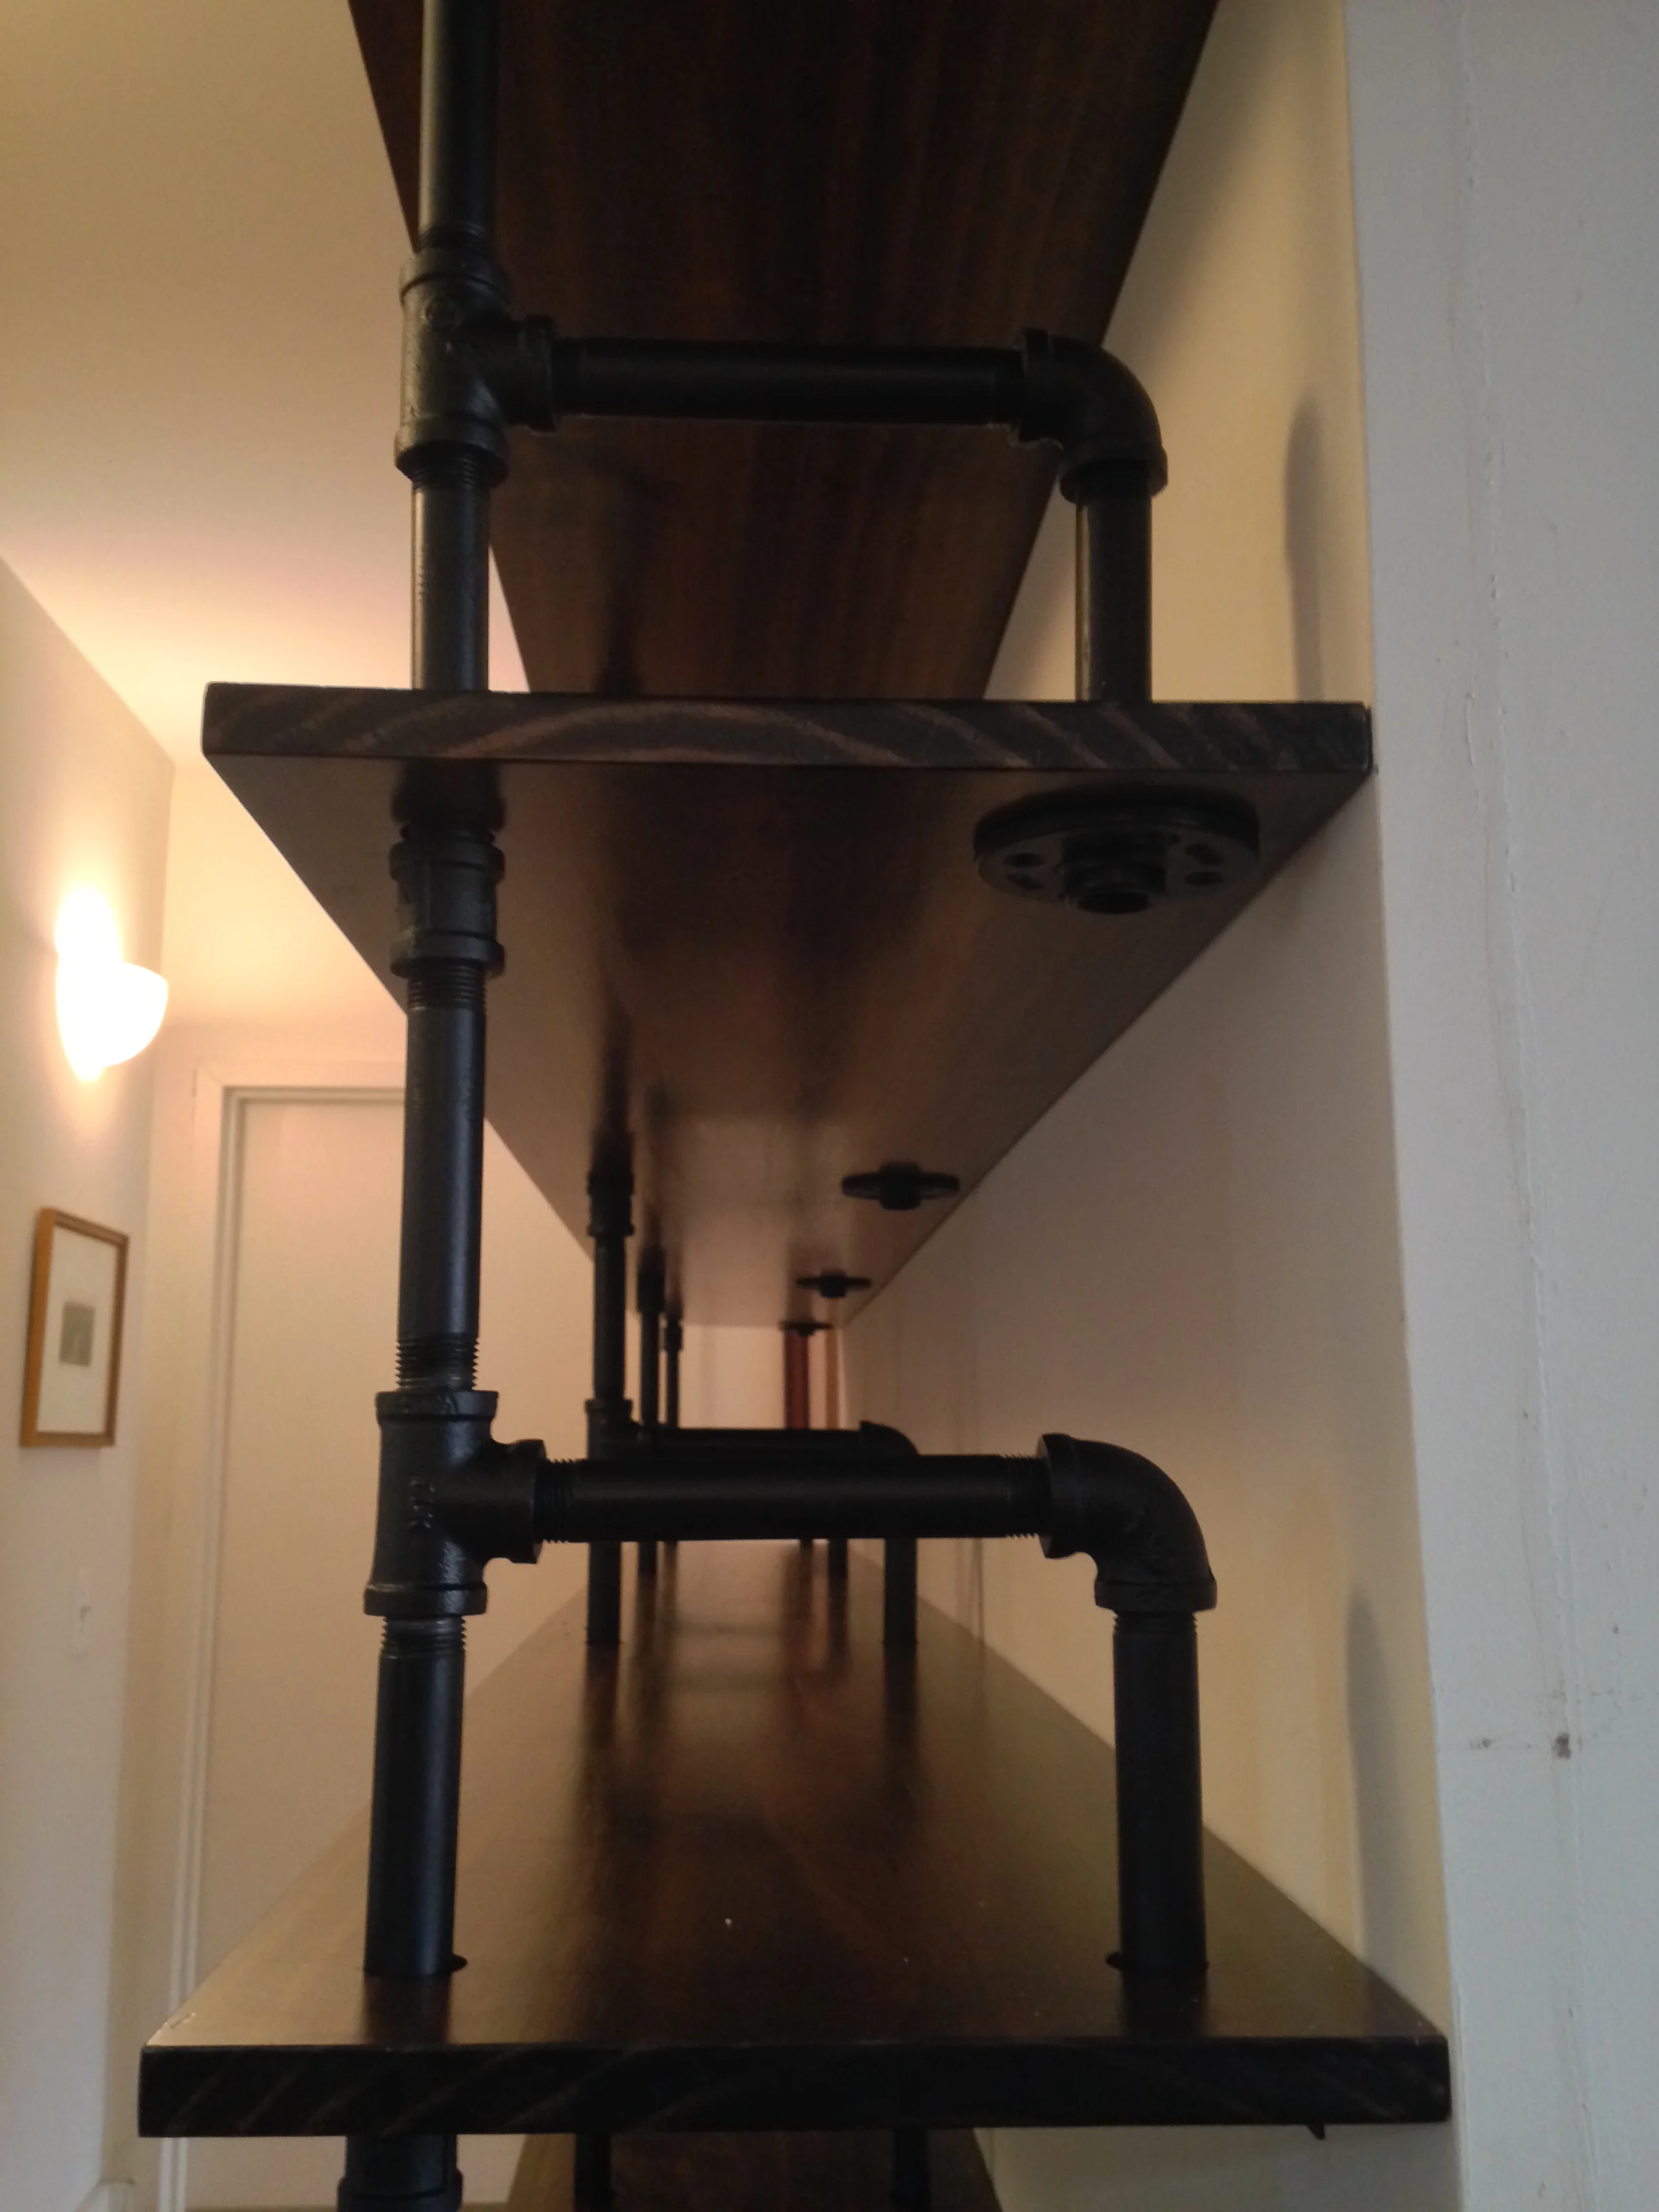
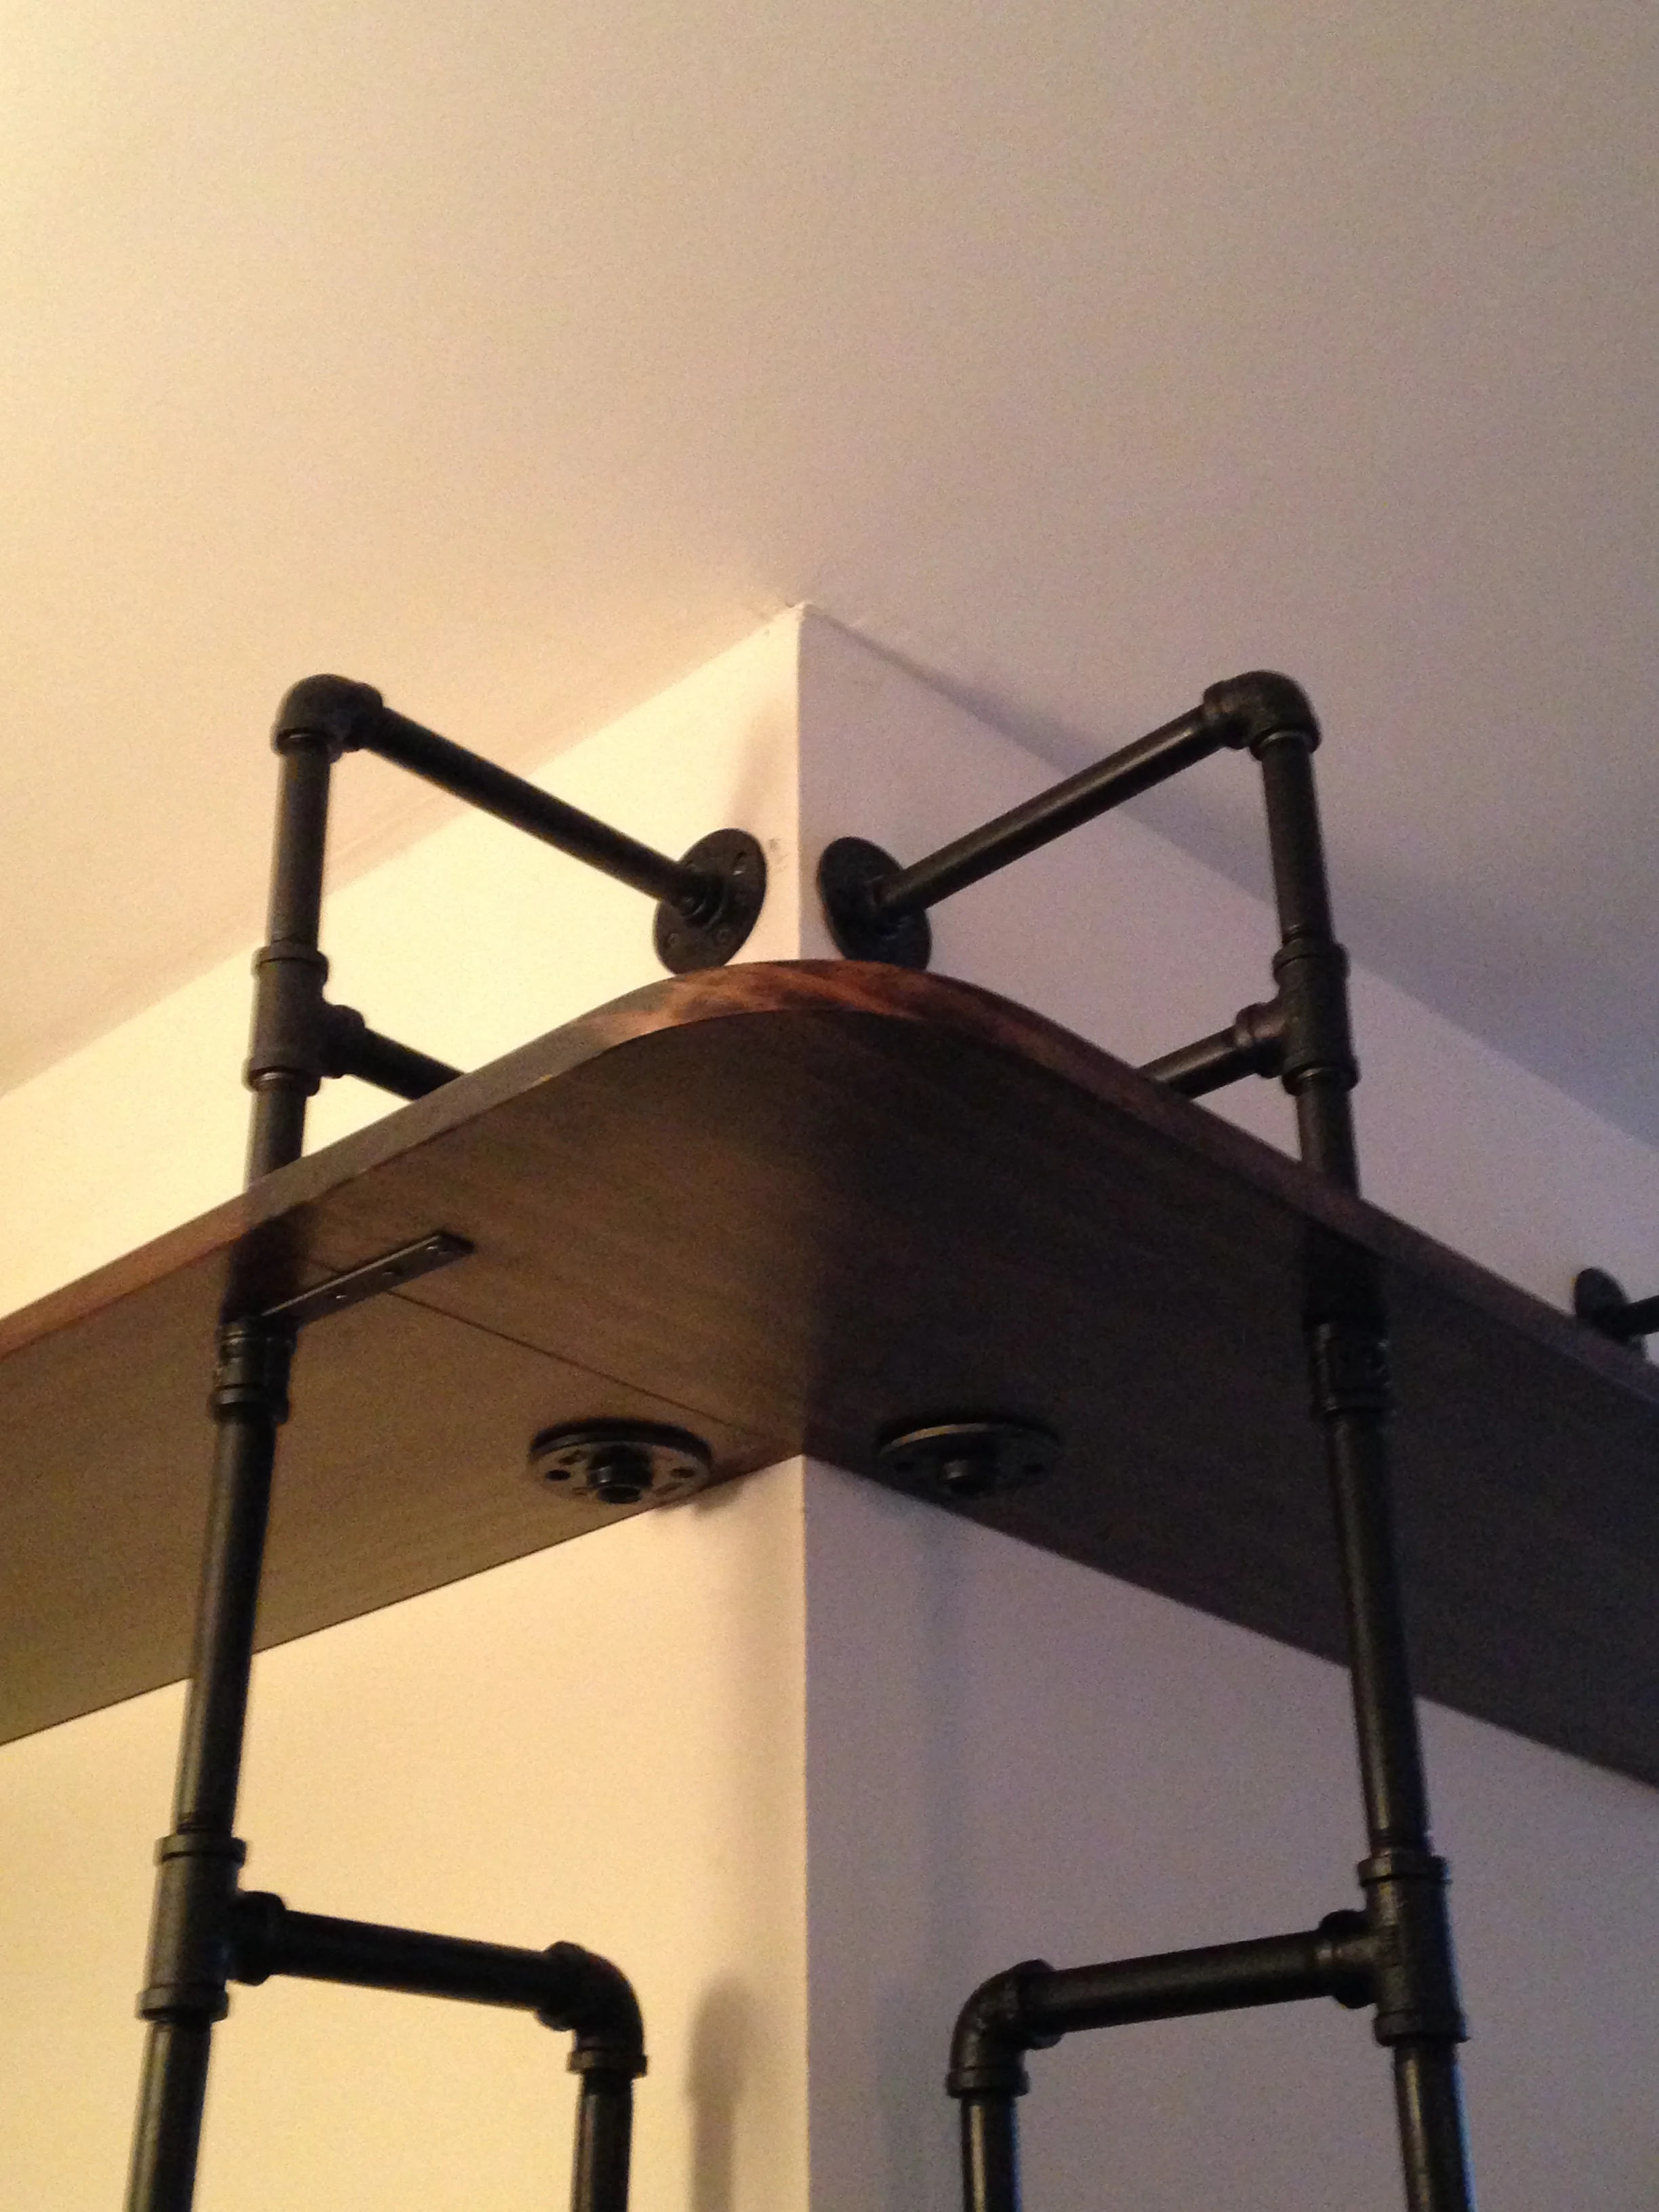
The client came to us with a request for a built in shelving unit for the hallway in her South Harlem apartment. She was interested in pipe shelving but wanted it to be a bit more refined than the basic raw metal pipe and wood that she had seen in the past. She also wanted it to have built in book ends and wondered if it was possible. After a going through few different design options and figuring out the details we were ready to start building the unit.
Initial sketches
We started out with some sketches to get a basic idea of the possibilities
The existing space
After some discussion with the client we decided to wrap the shelves around the corner, into the living room
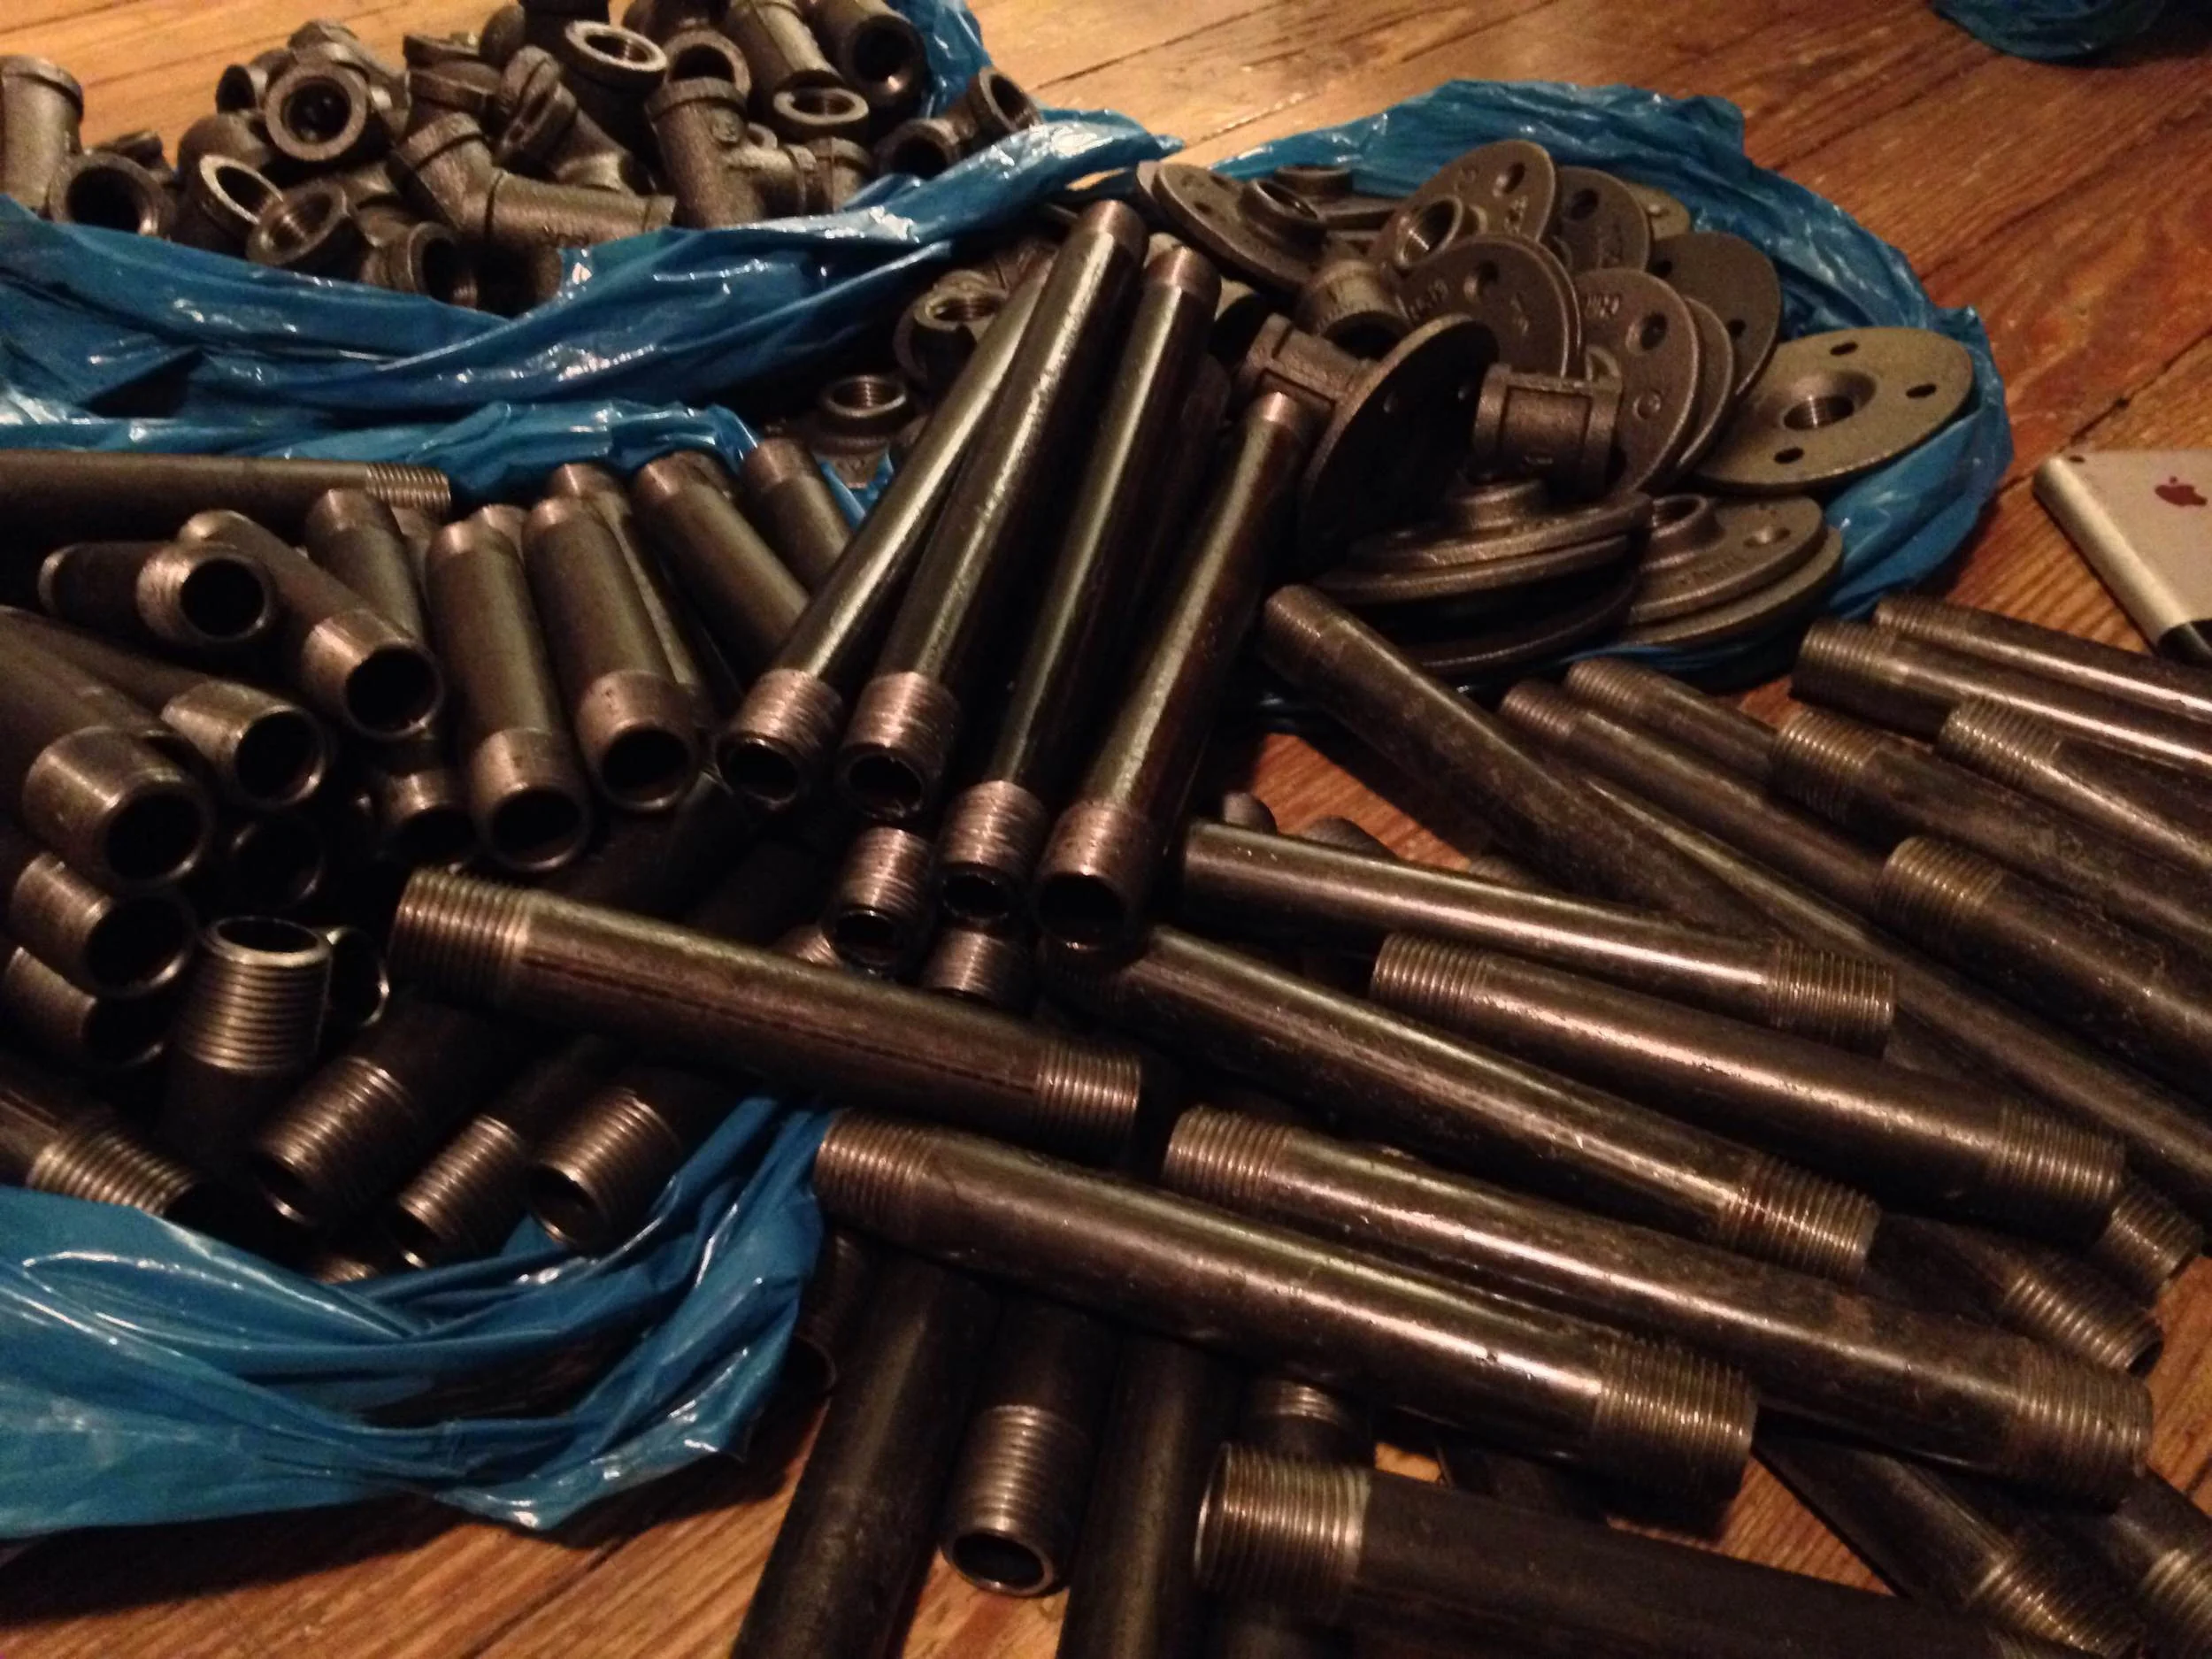
A big pile of pipes
We picked up the load of pipes from across the river- at least 150 lbs of metal. We didn't have access to the car so we had to fetch them on our bikes! We got some good exercise that day.
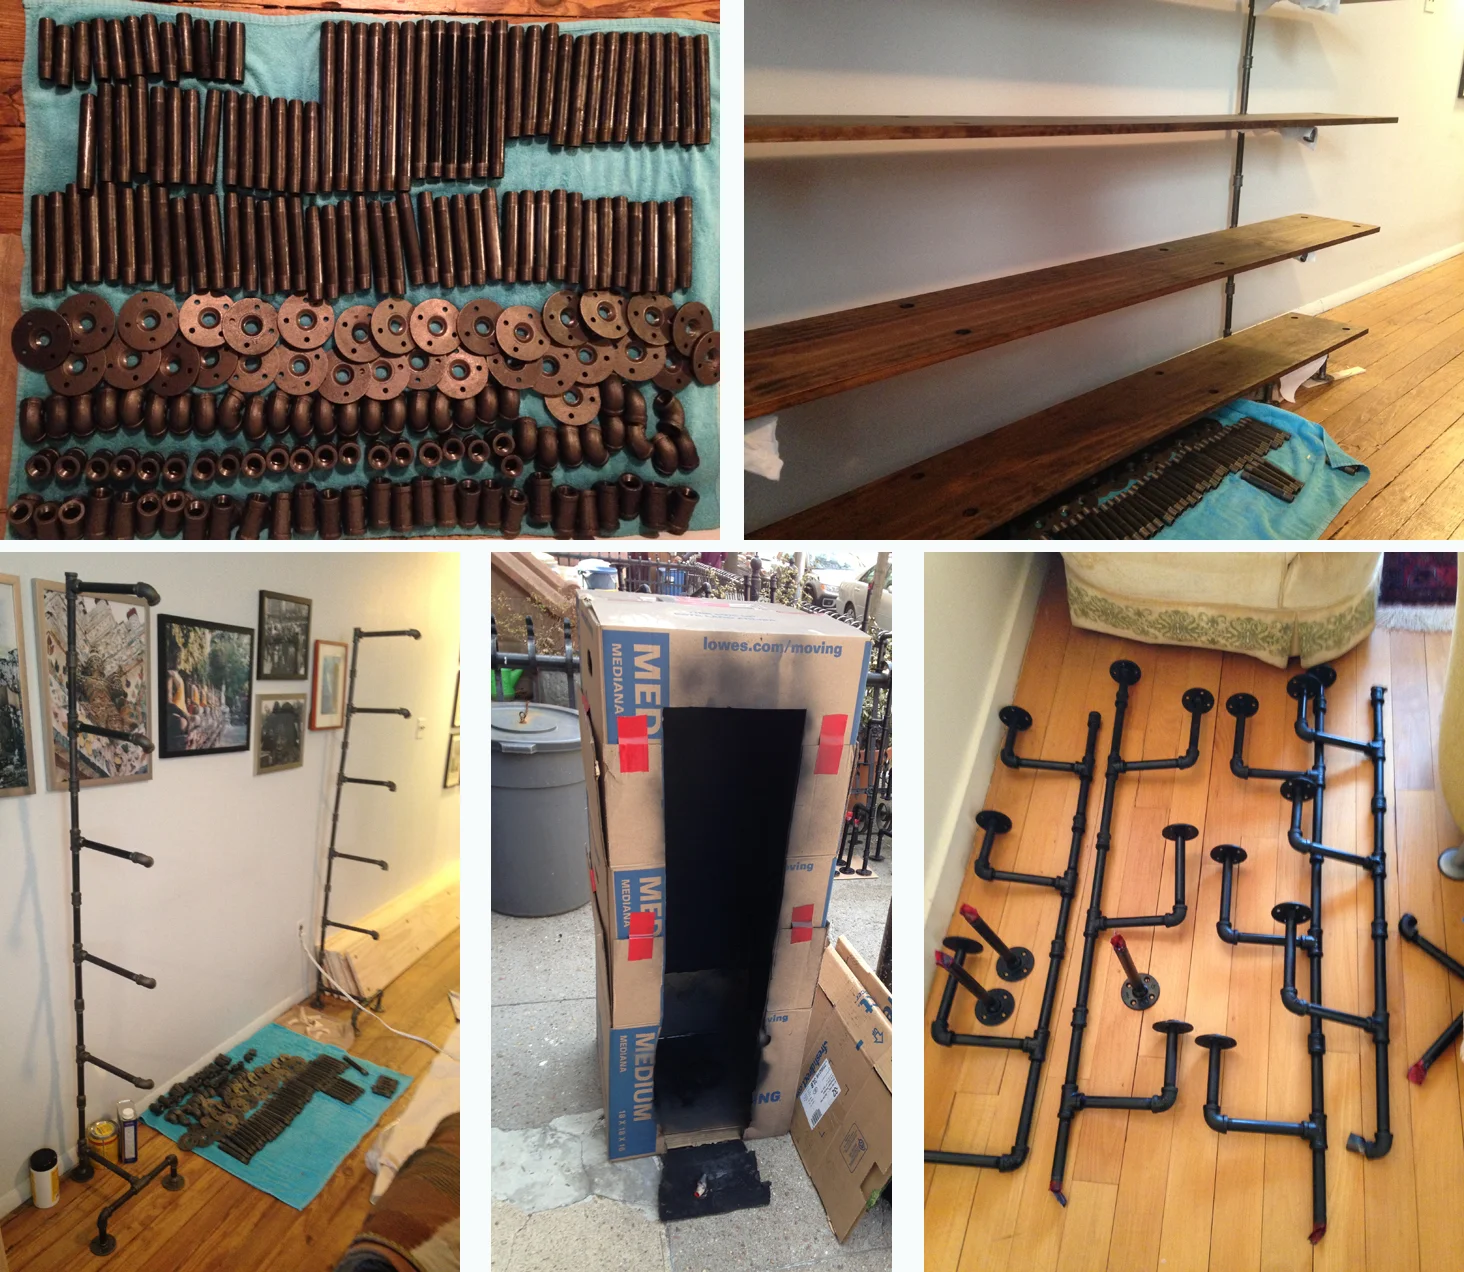
Preperation process
After laying everything out we used the pipes to build a drying rack to lay the 8 foot long boards on while they dry during staining and polyurethaning. We then built a cardboard spray booth to paint the pipes black for a nice uniform finish.
Picking up black pipe pieces
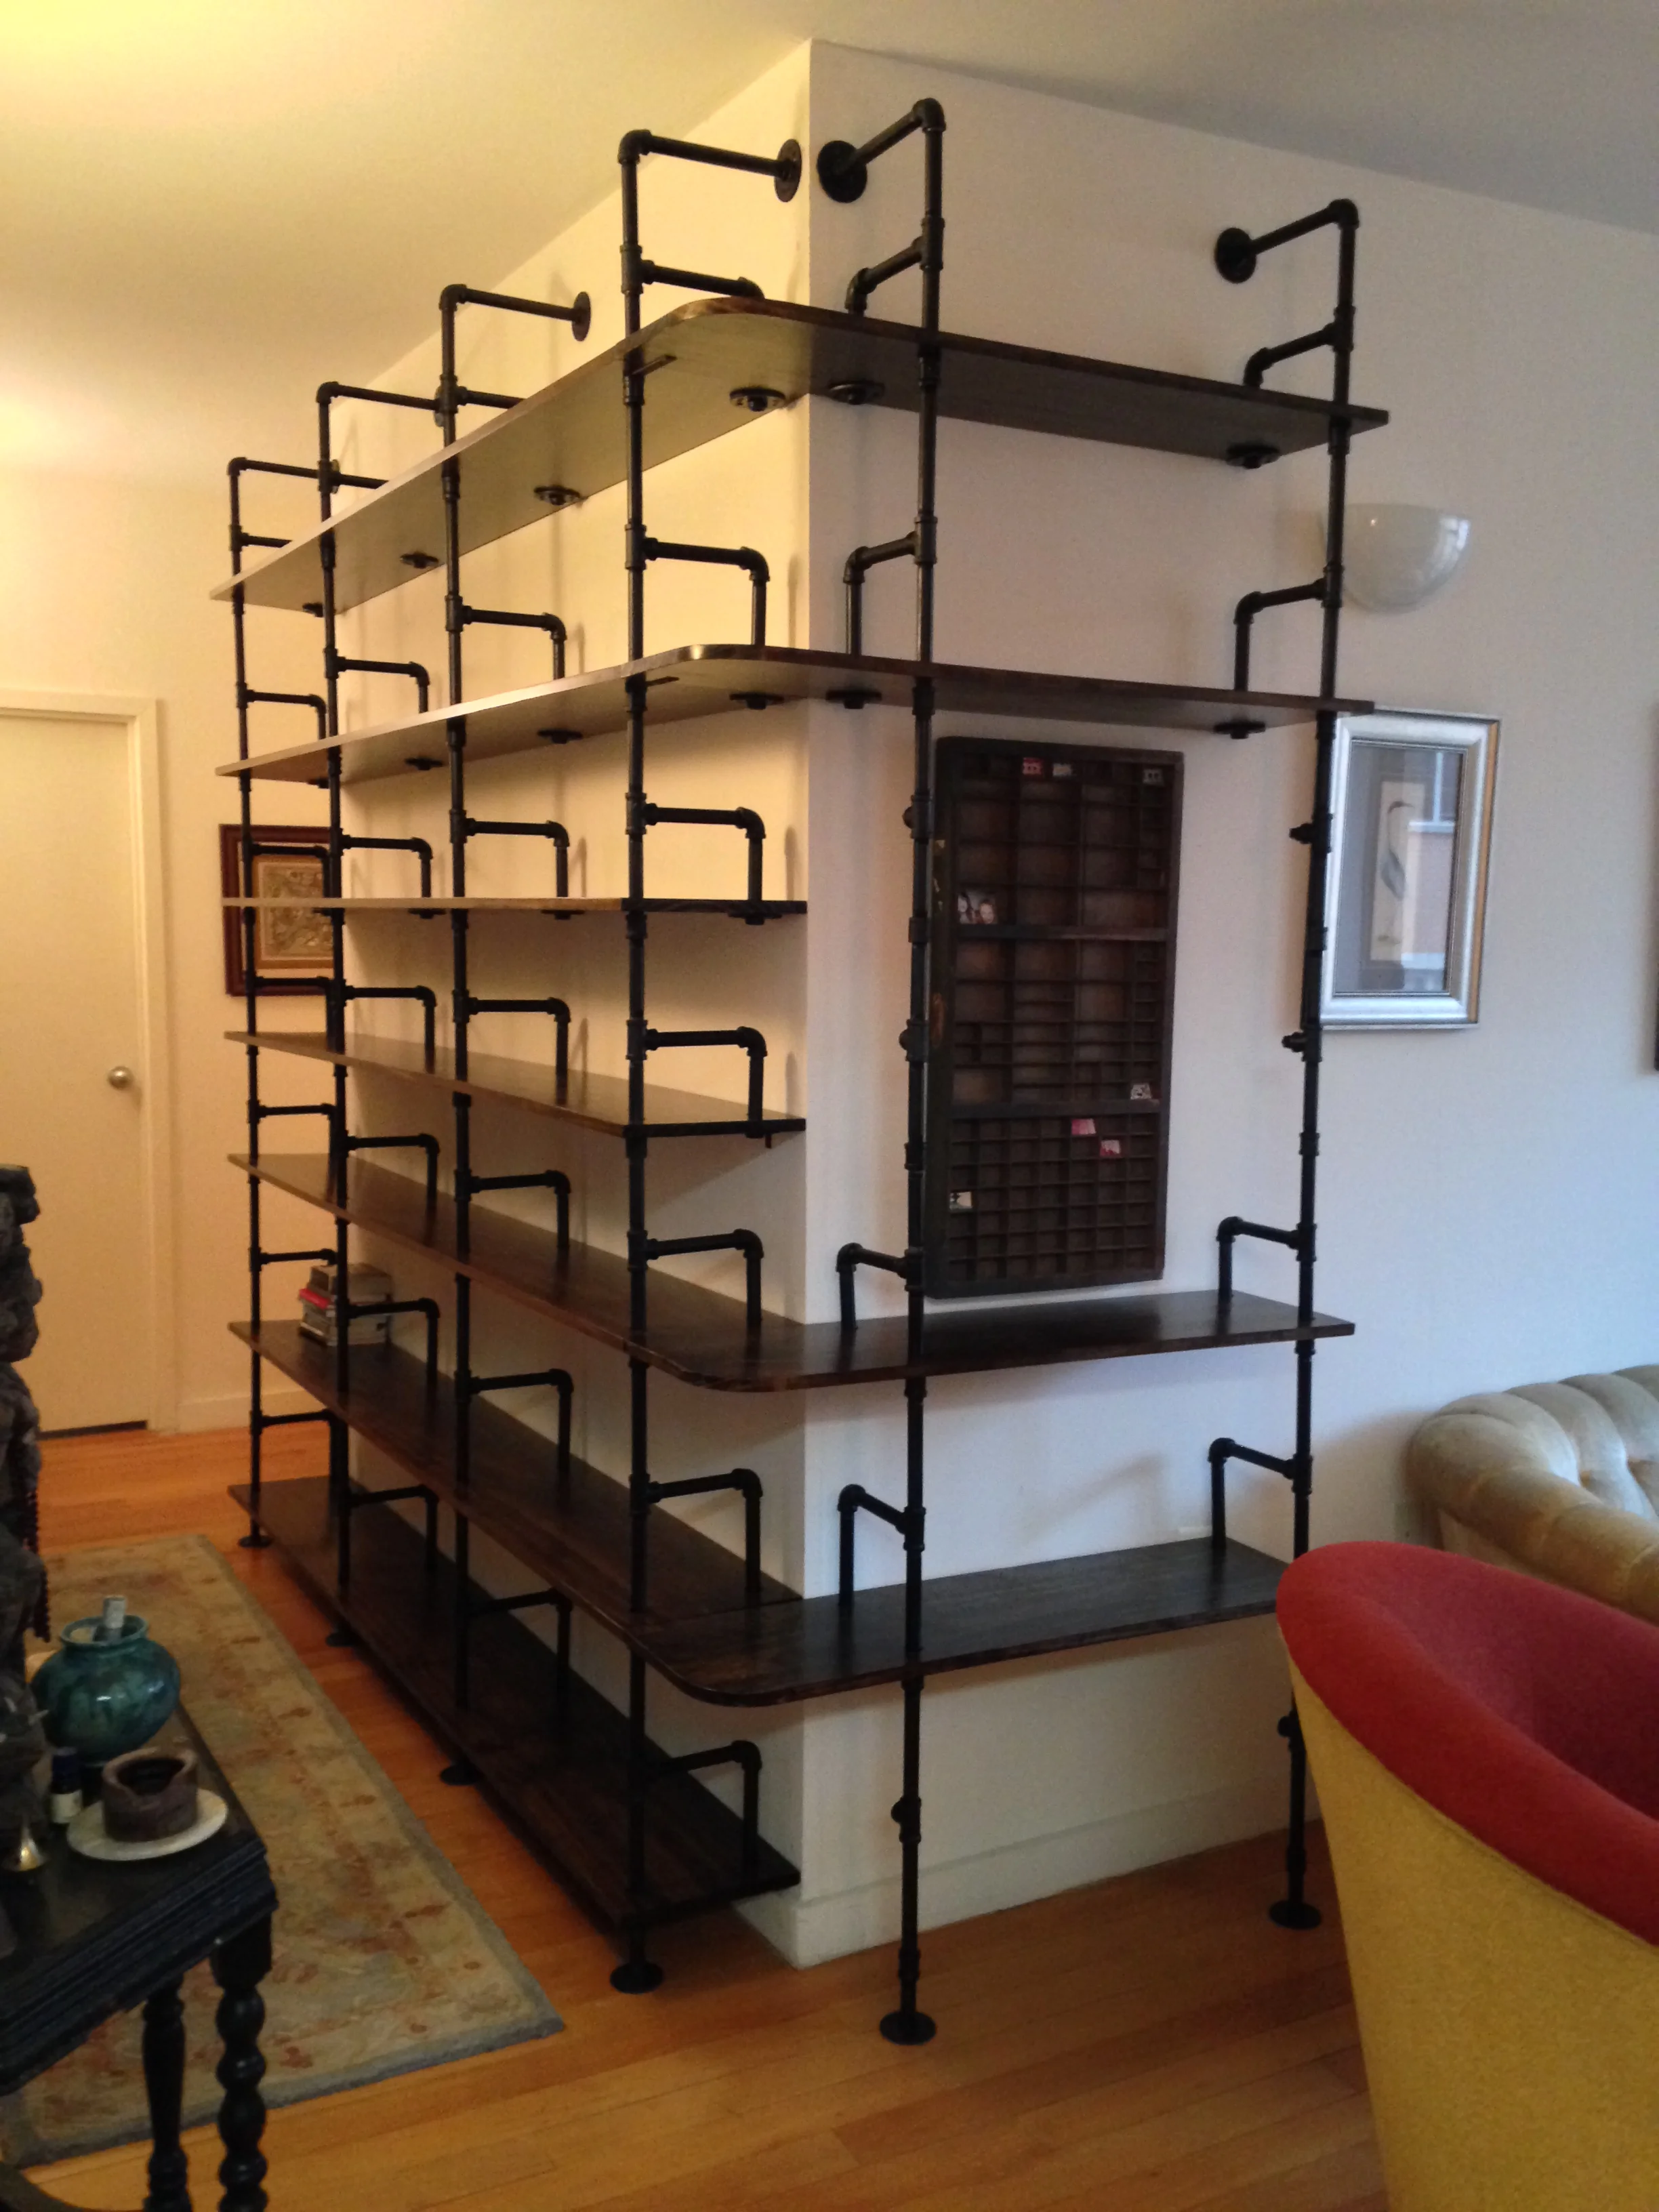
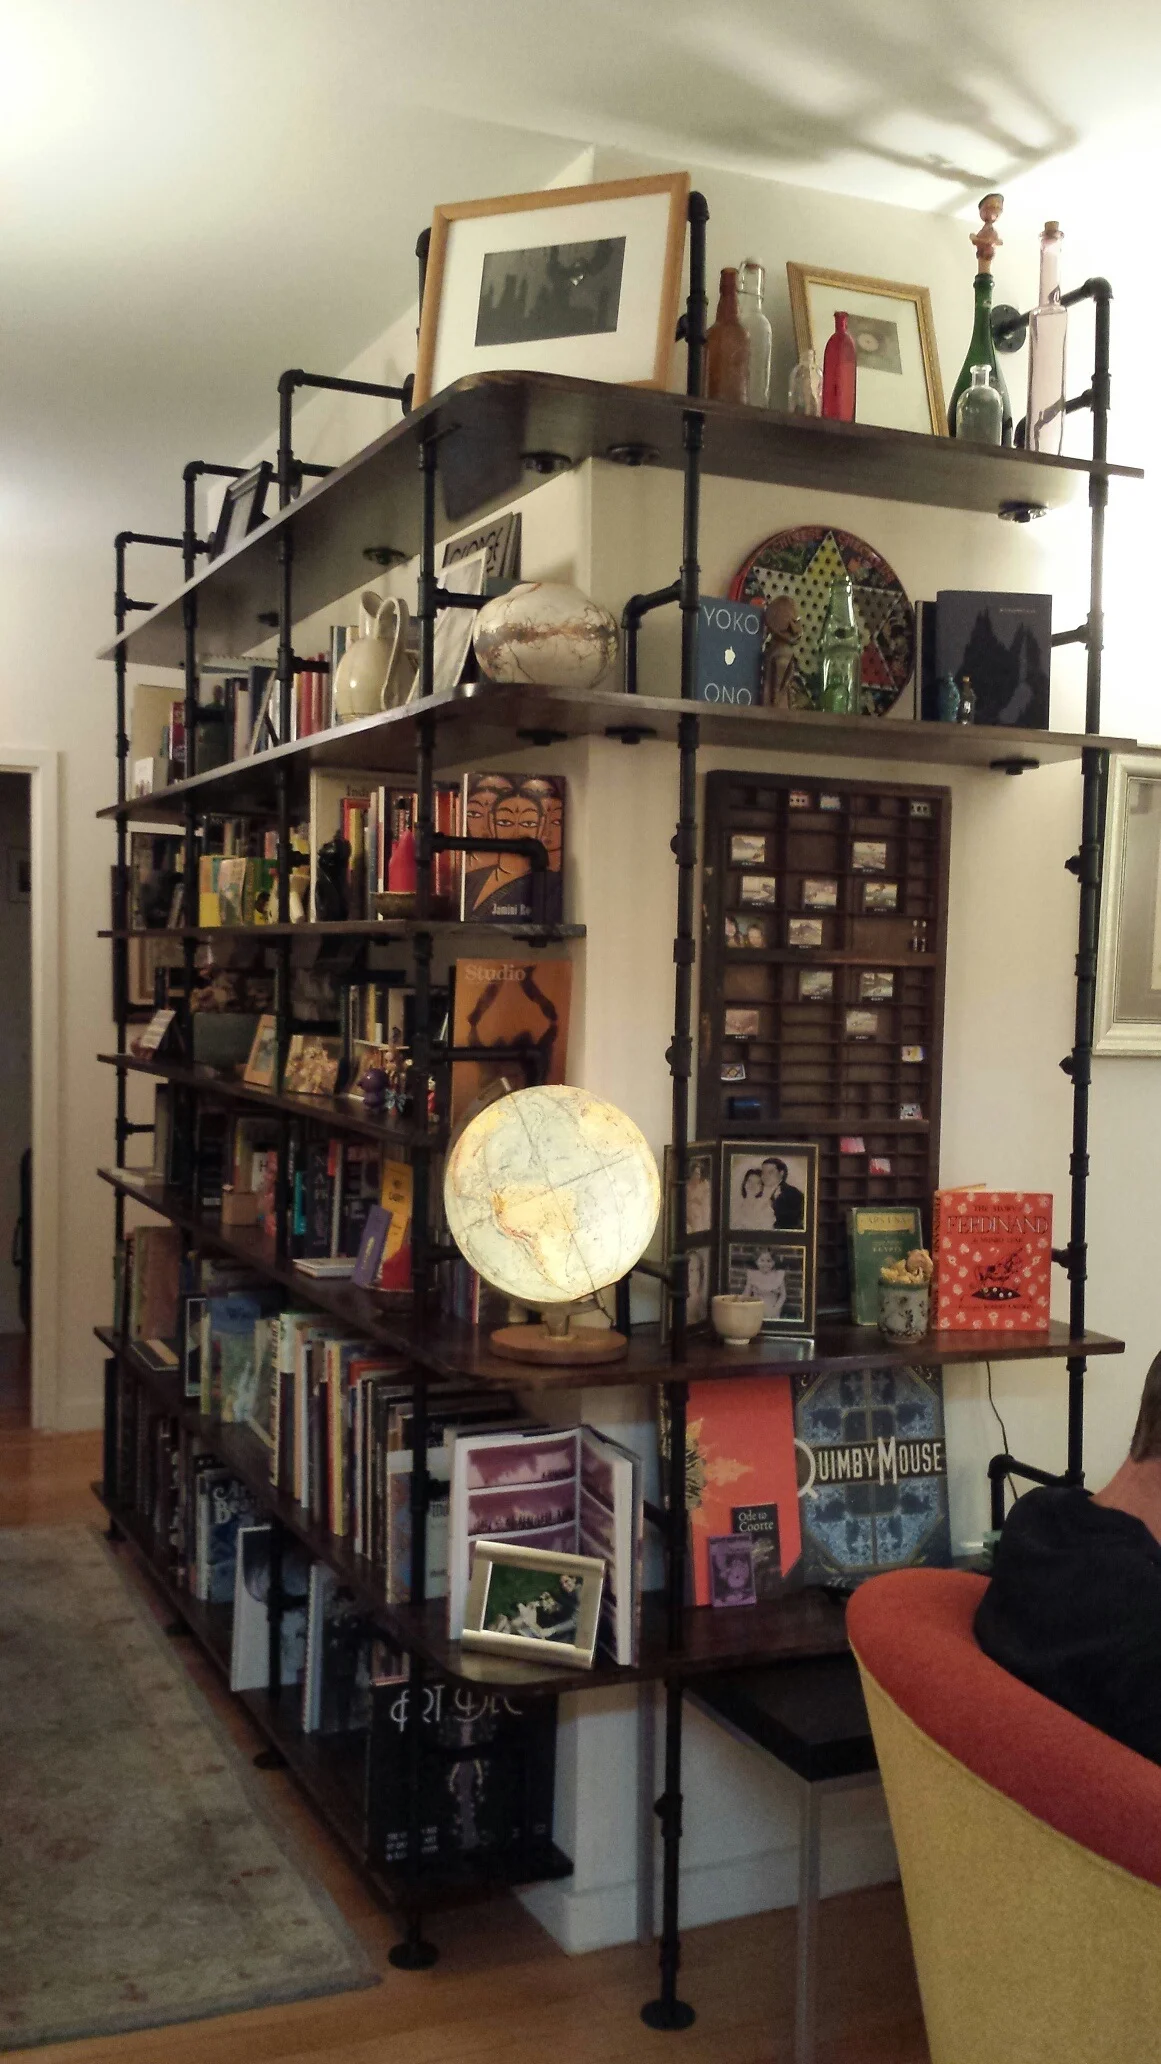
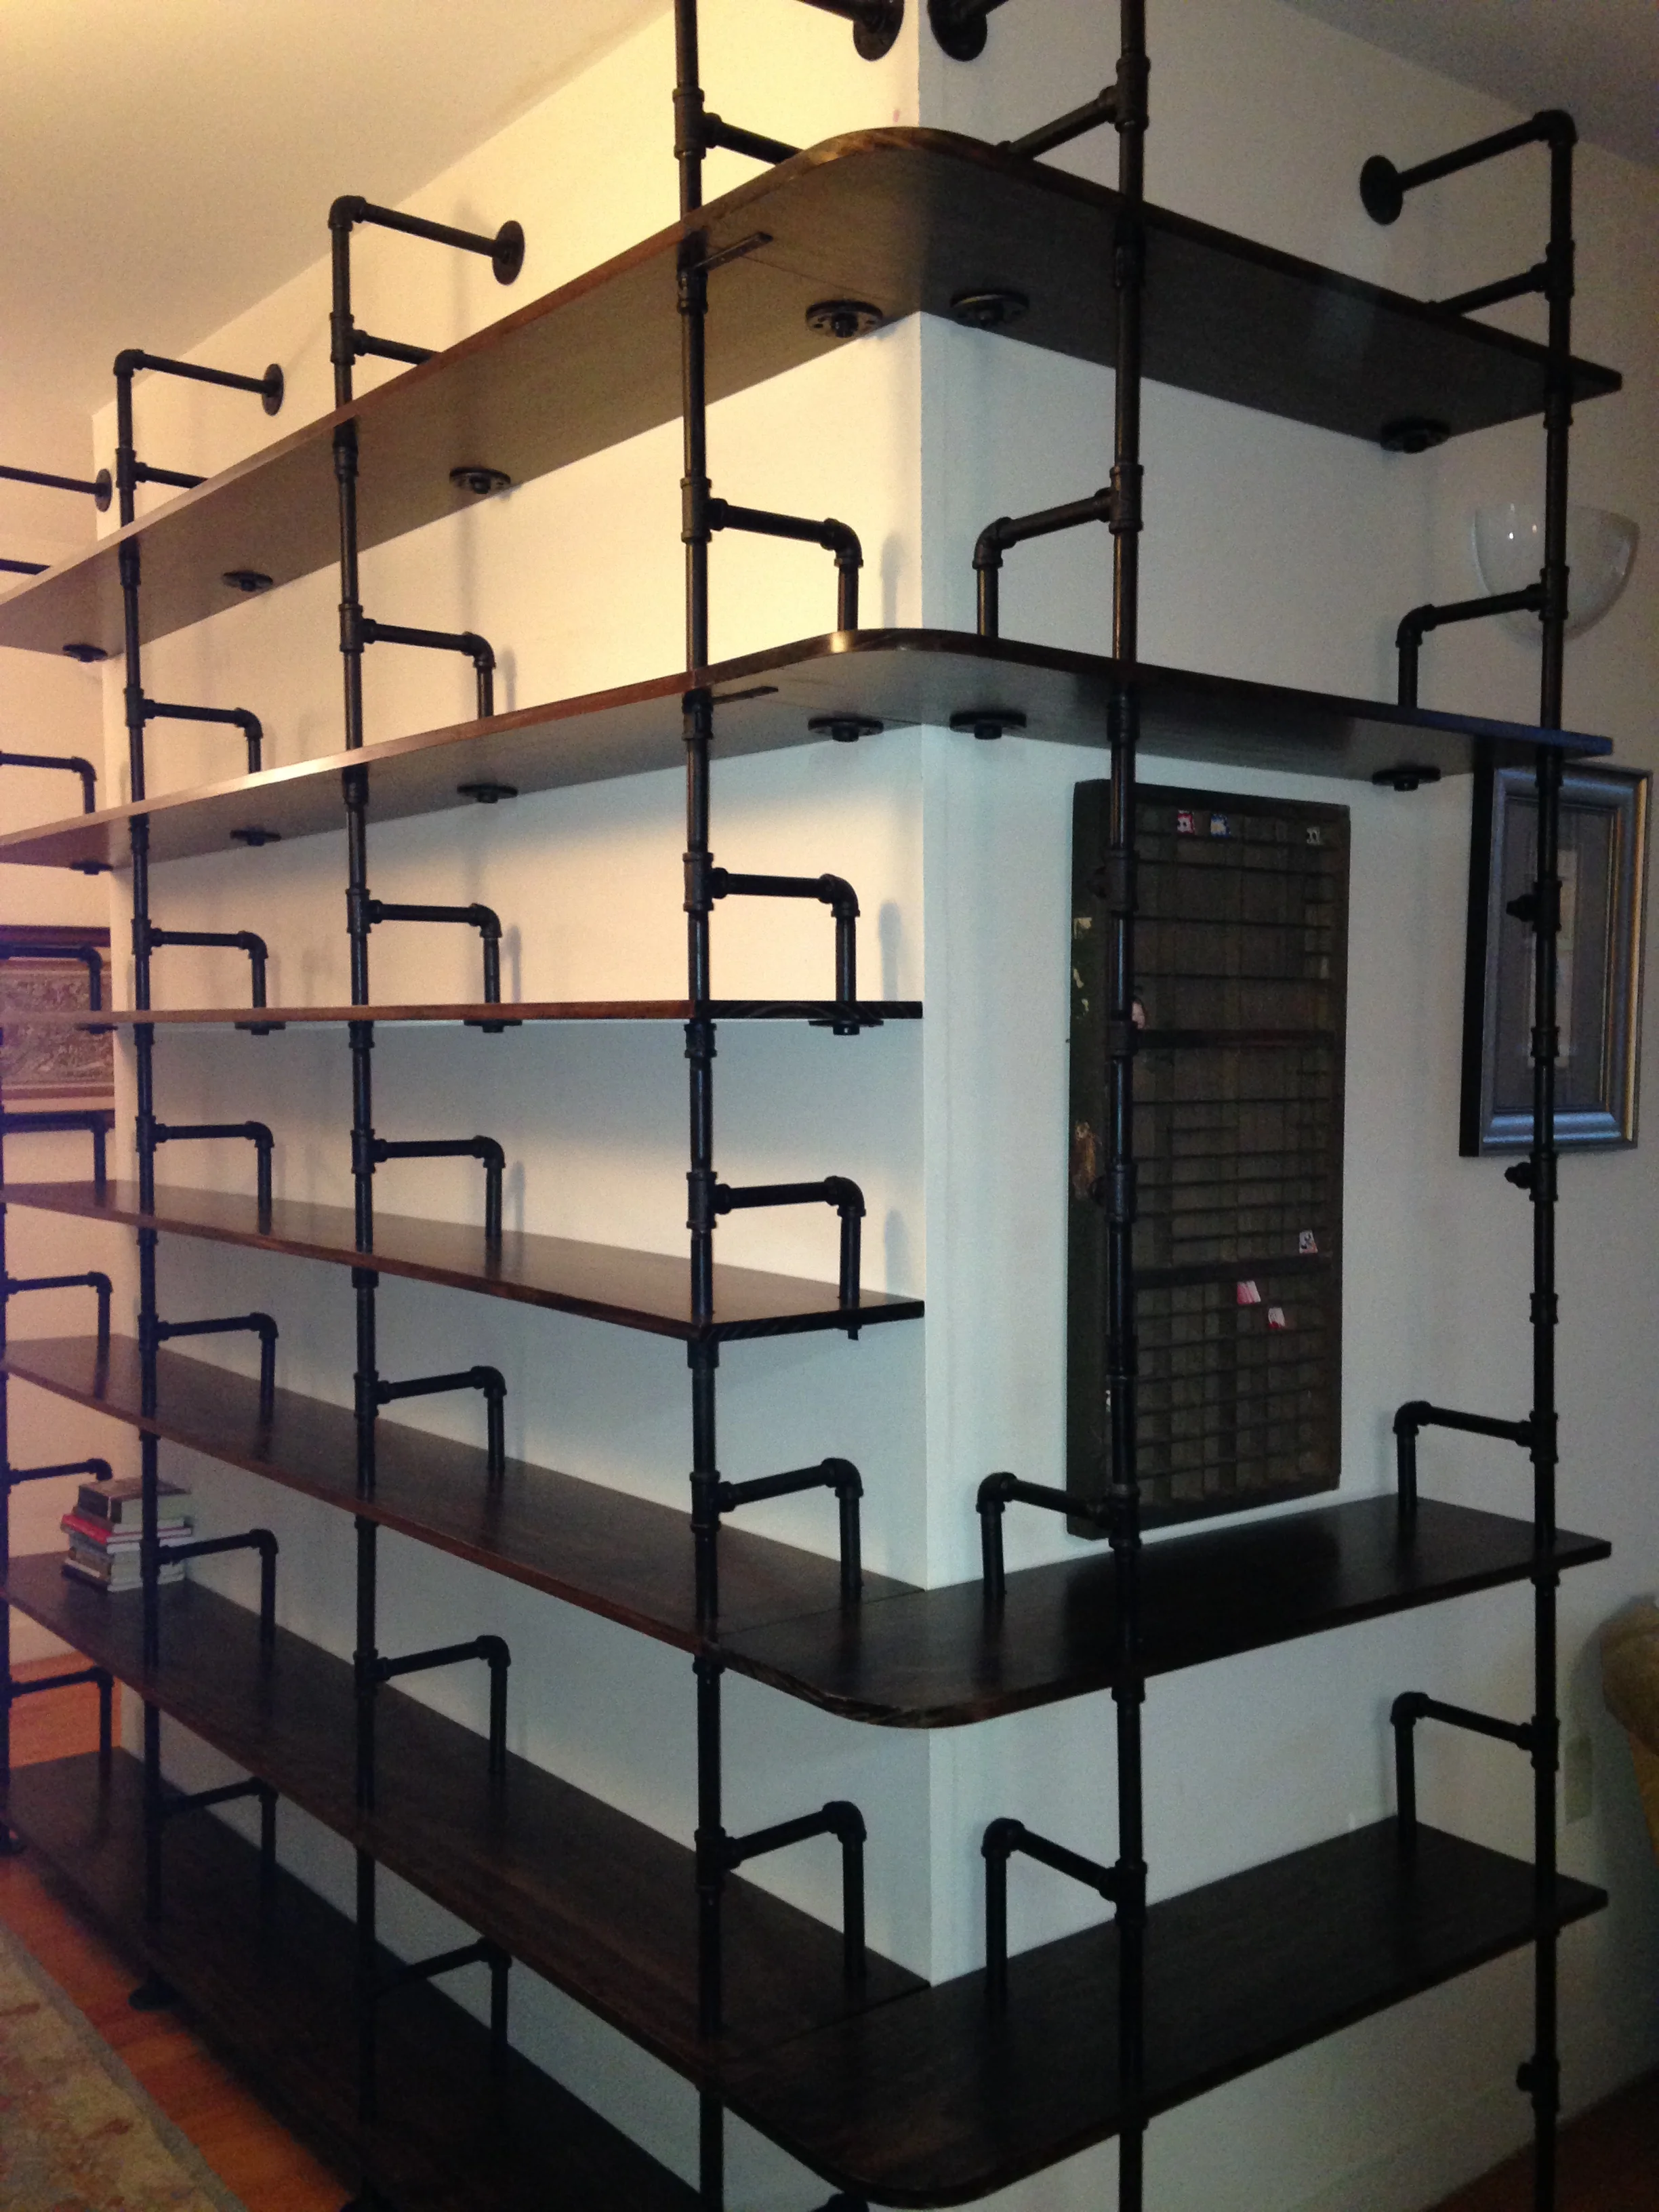
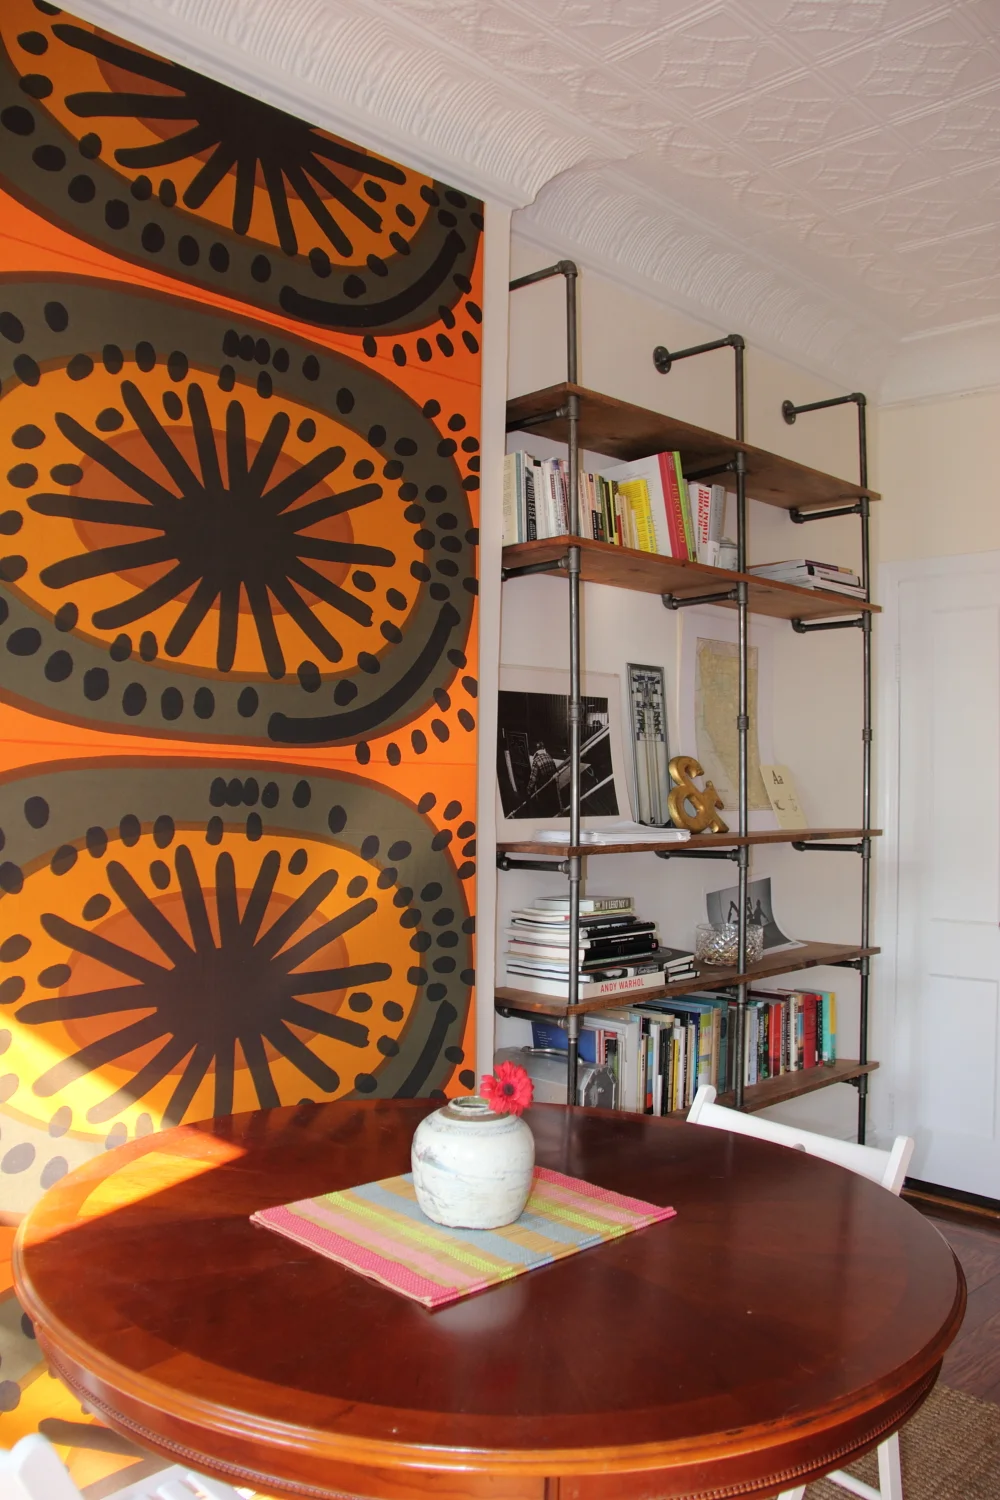
masterpiece shelving
black pipe shelving system is finished!
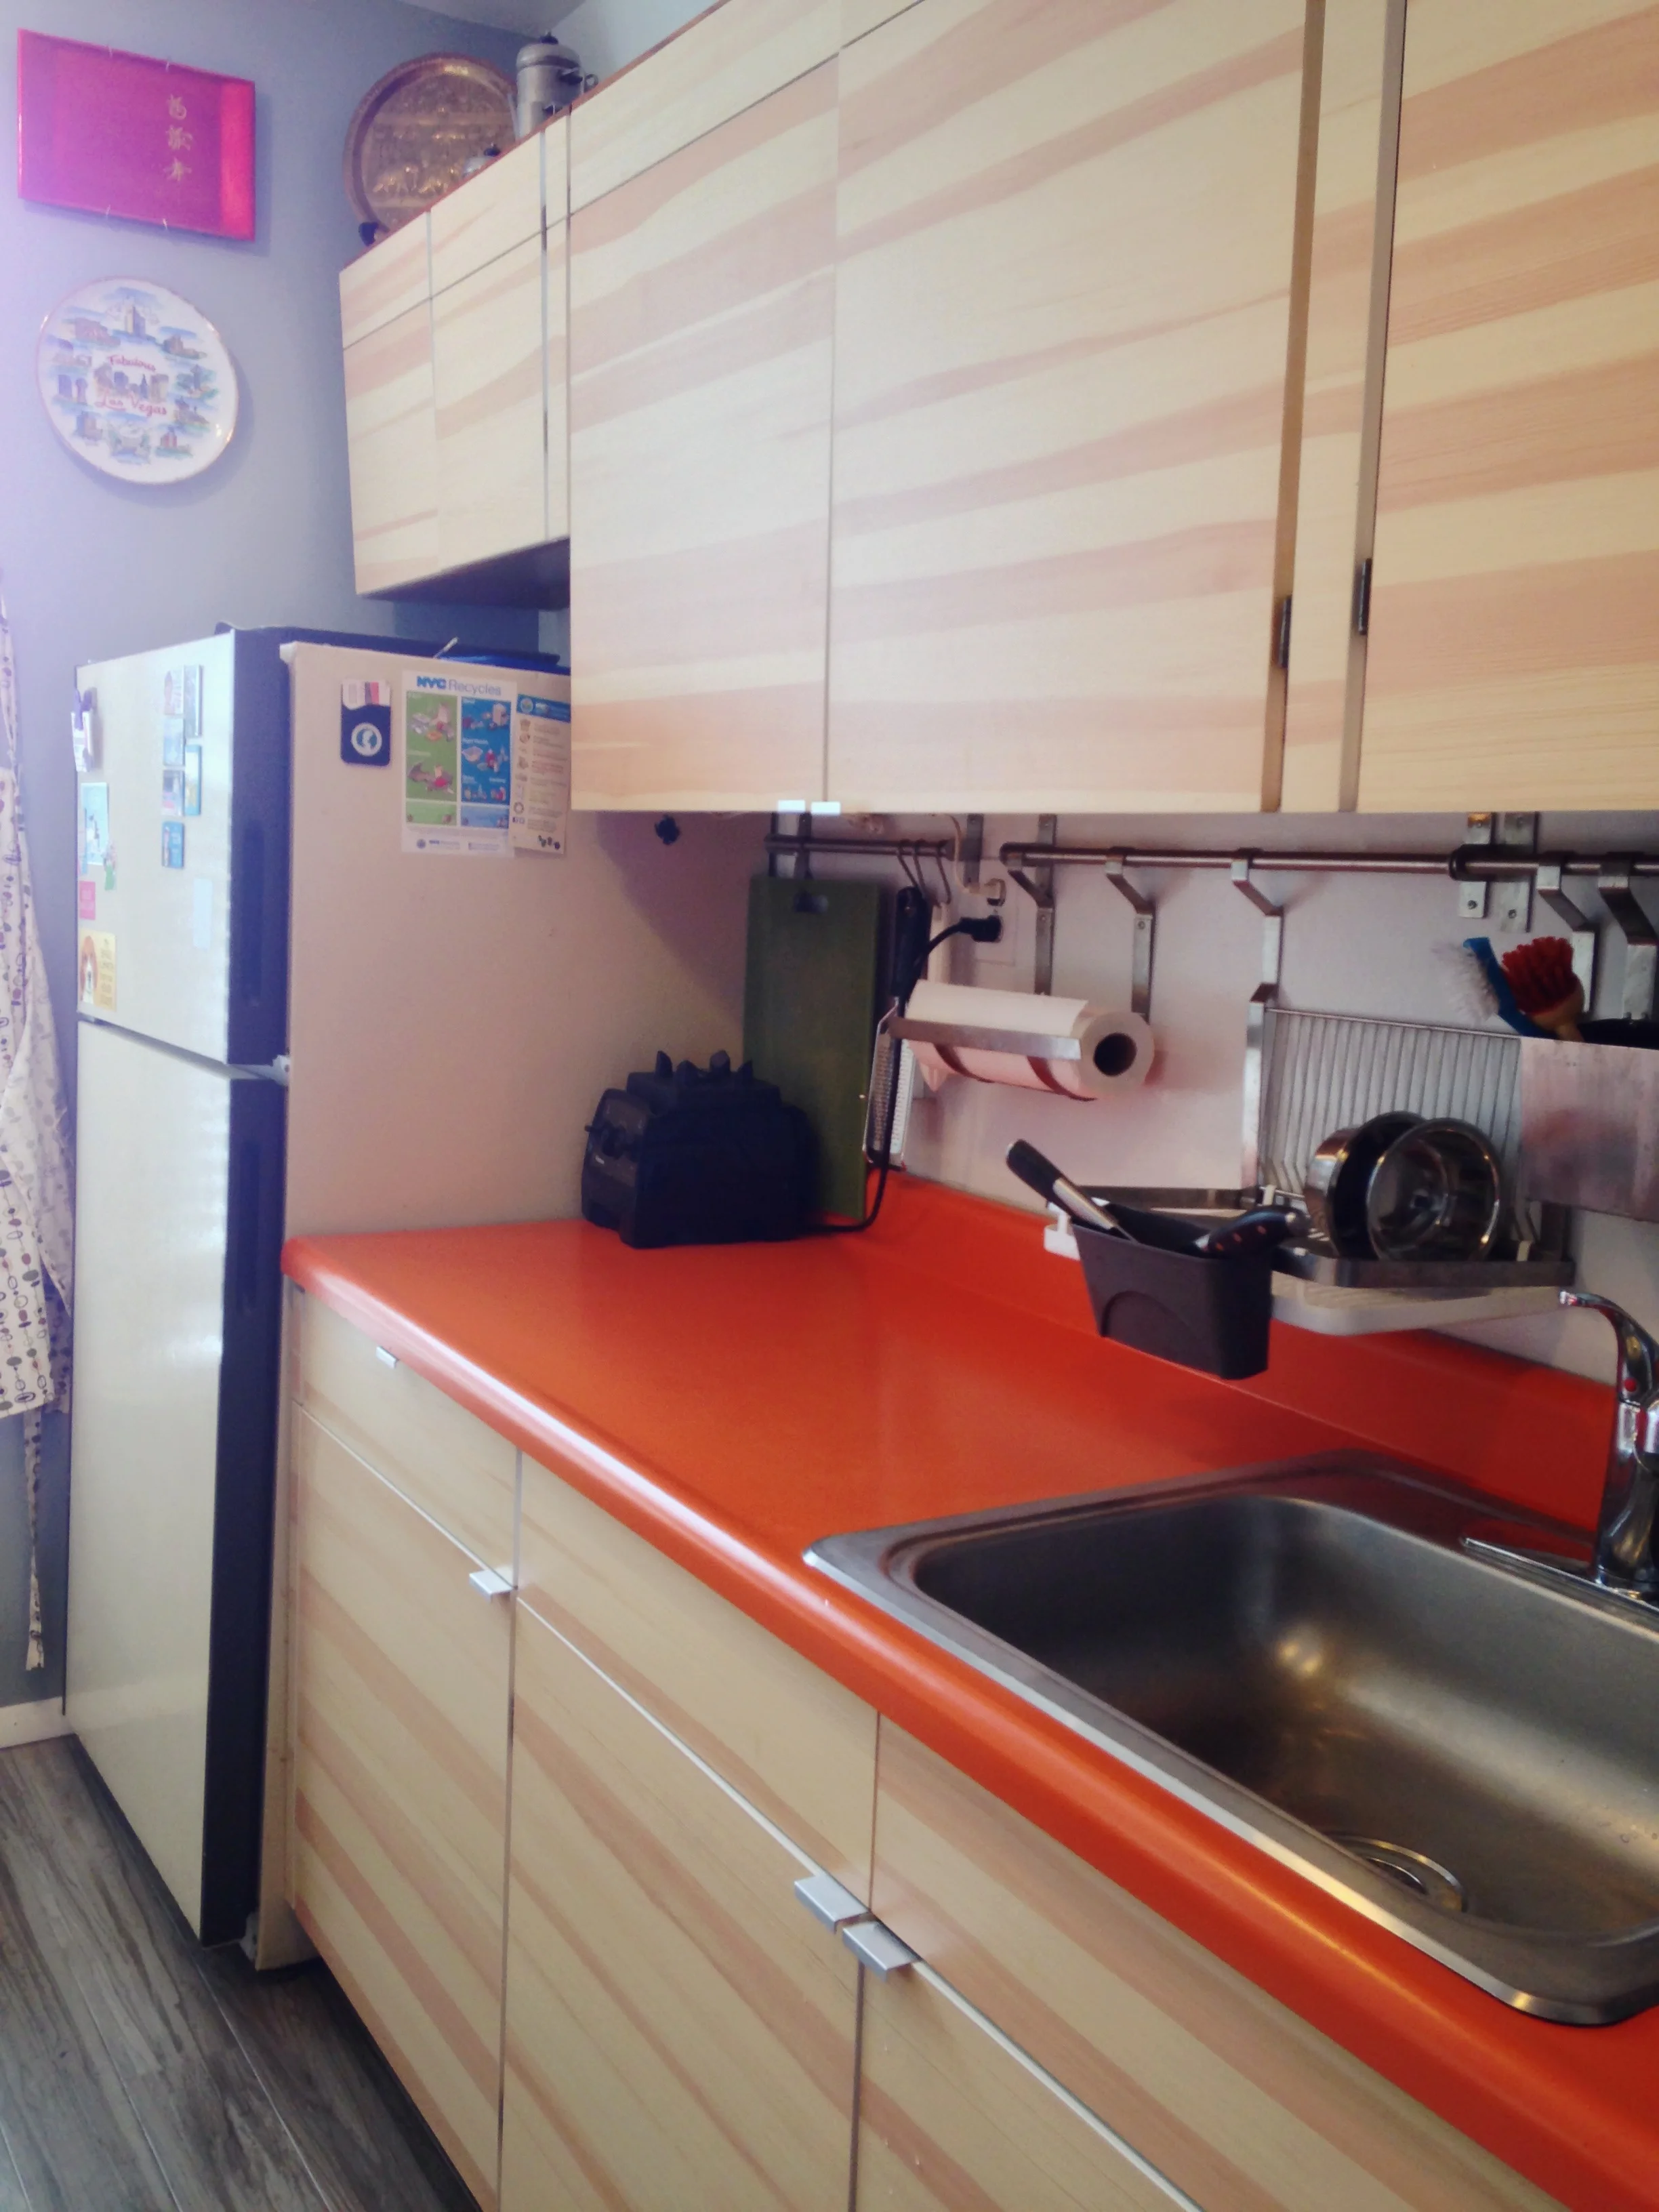
Small kitchen facelift
The goal for this job is to transform this drab kitchen filled with a load of mix matched finishes and appliances into a new contemporary looking kitchen that might encourage more (and more enjoyable) use. The trick was to do this with a super low budget - we're talking super, super low, basically non existent. Oh yeah, we also had to do this without permanently altering or demolishing any existing elements because the tenant didn't want to risk getting in trouble with the landlord and loosing any security deposit.
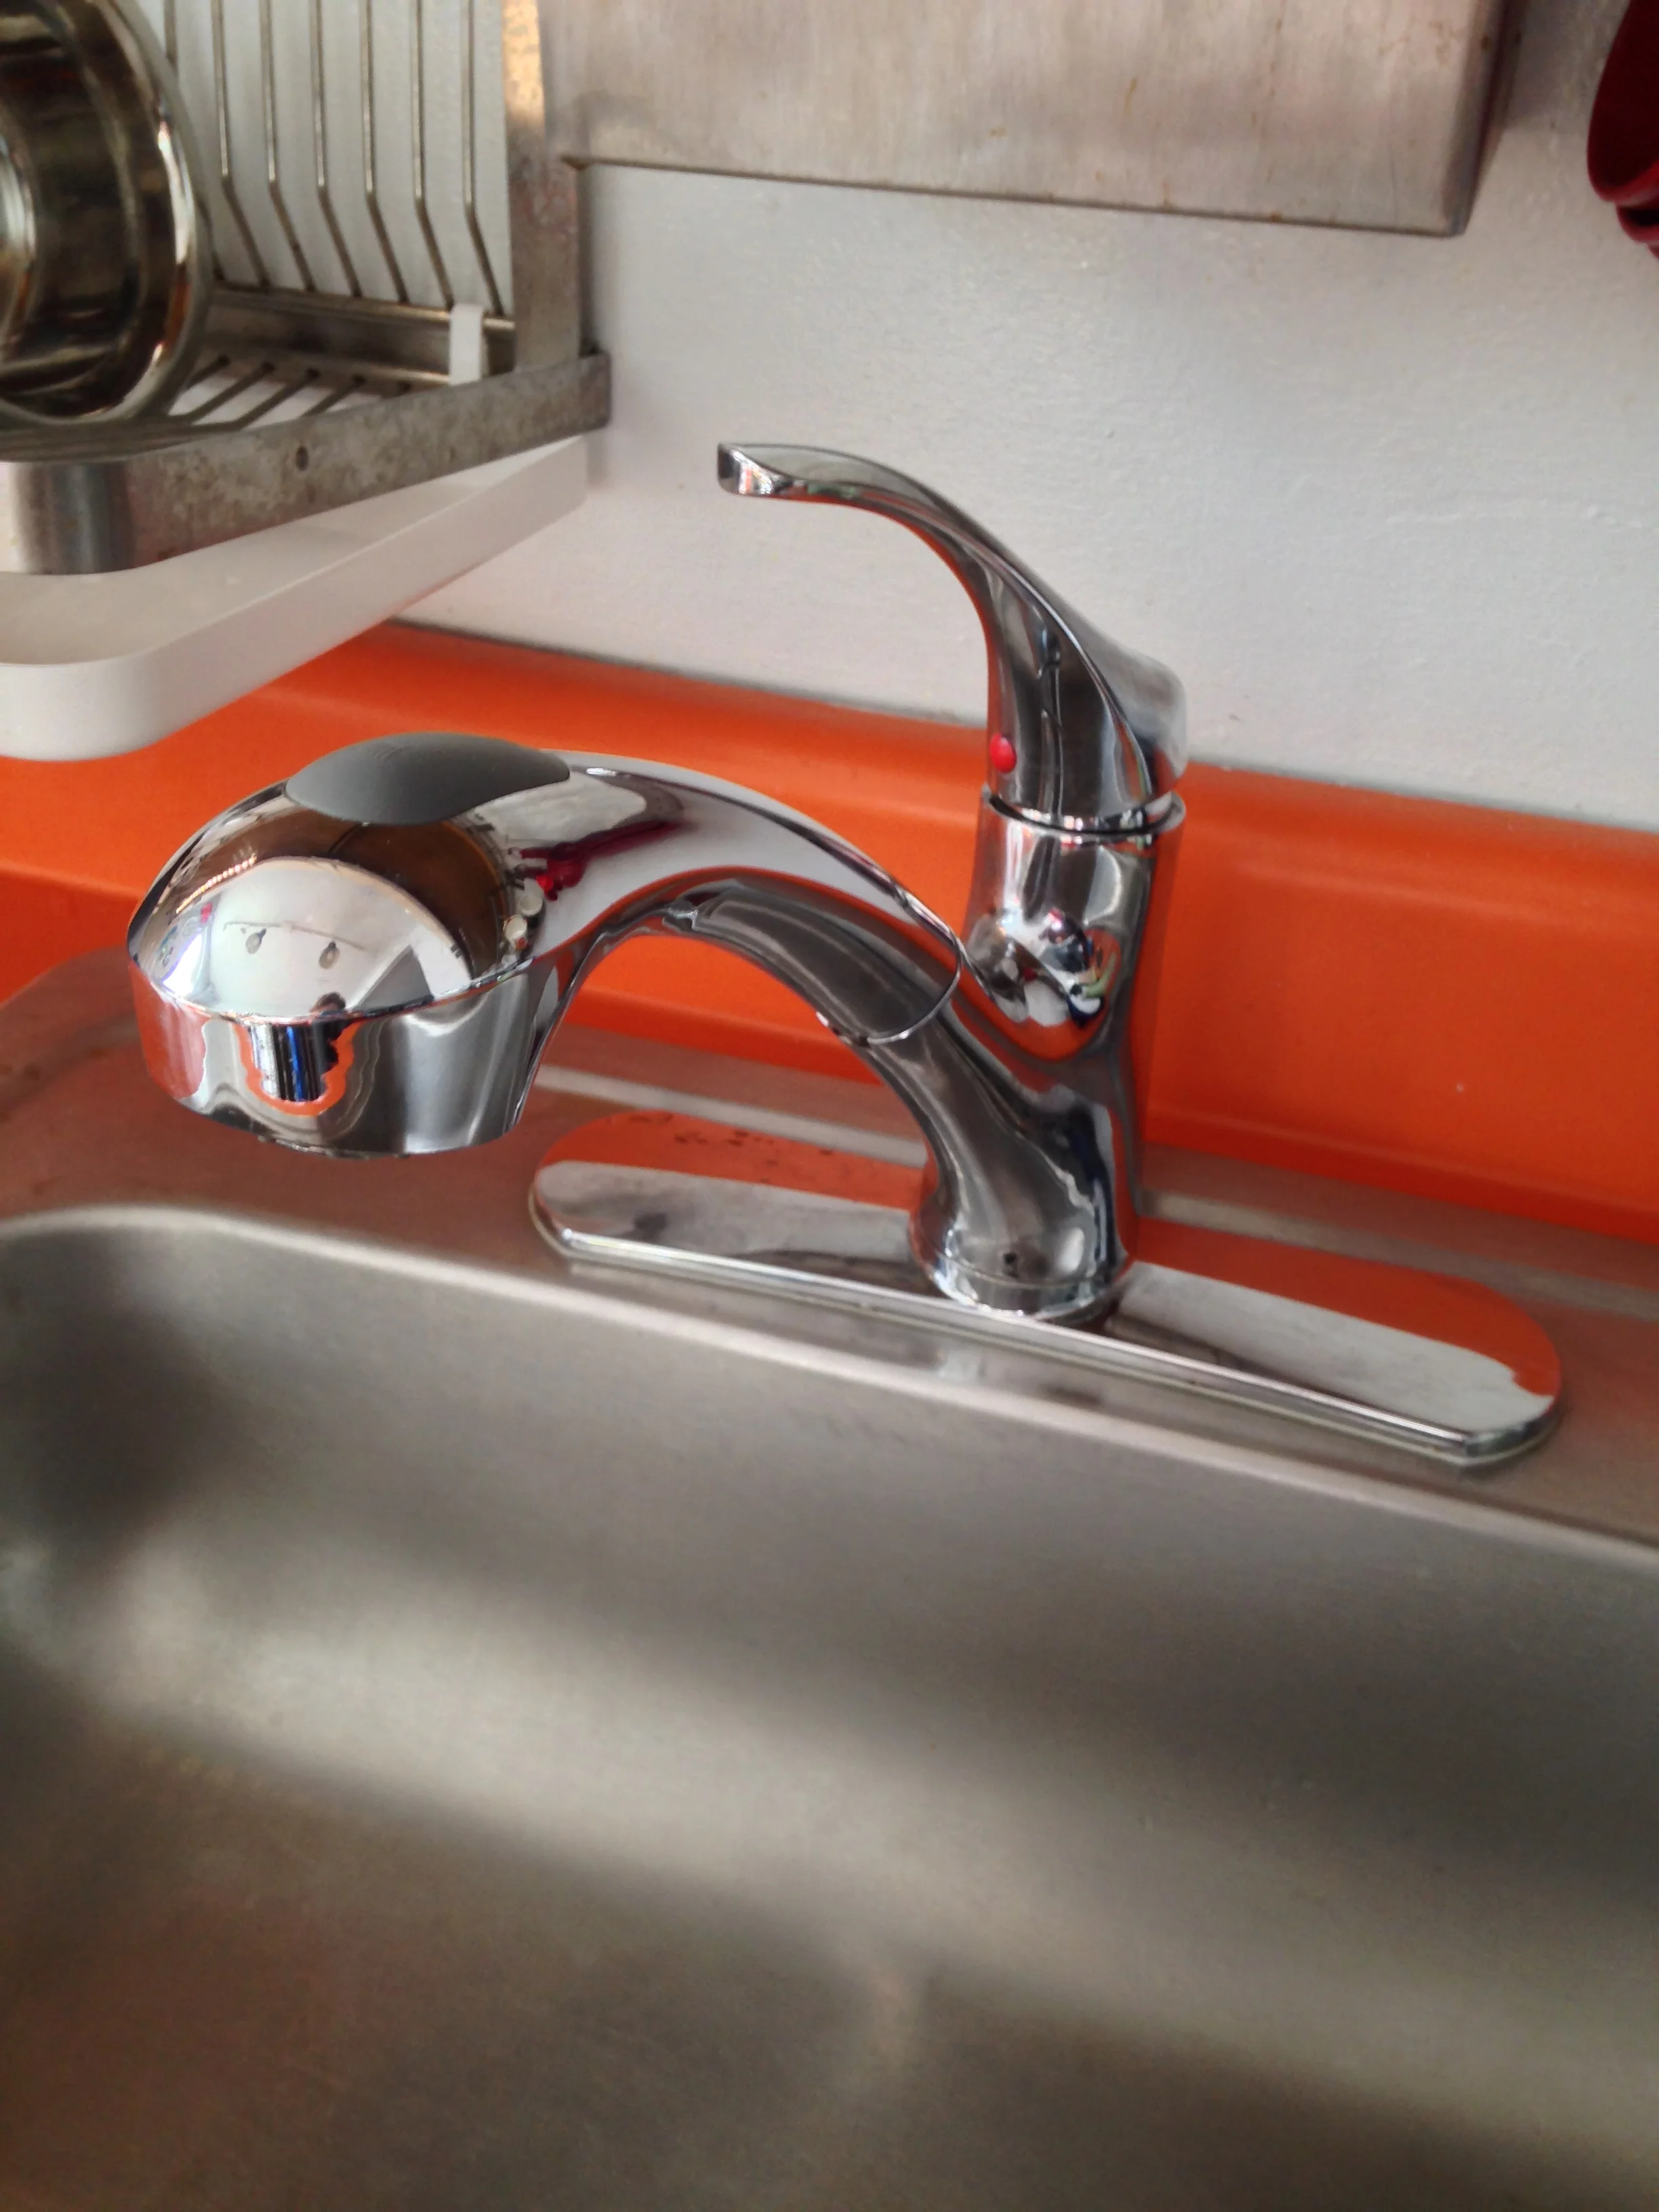
Replace the faucet
The absolute first and most necessary thing was to remove the bottom of the line, low hung faucet with this shiny new model with a pull out sprayer head. The old one was so low that you couldn't fit a standard pot under the spout to wash it out.
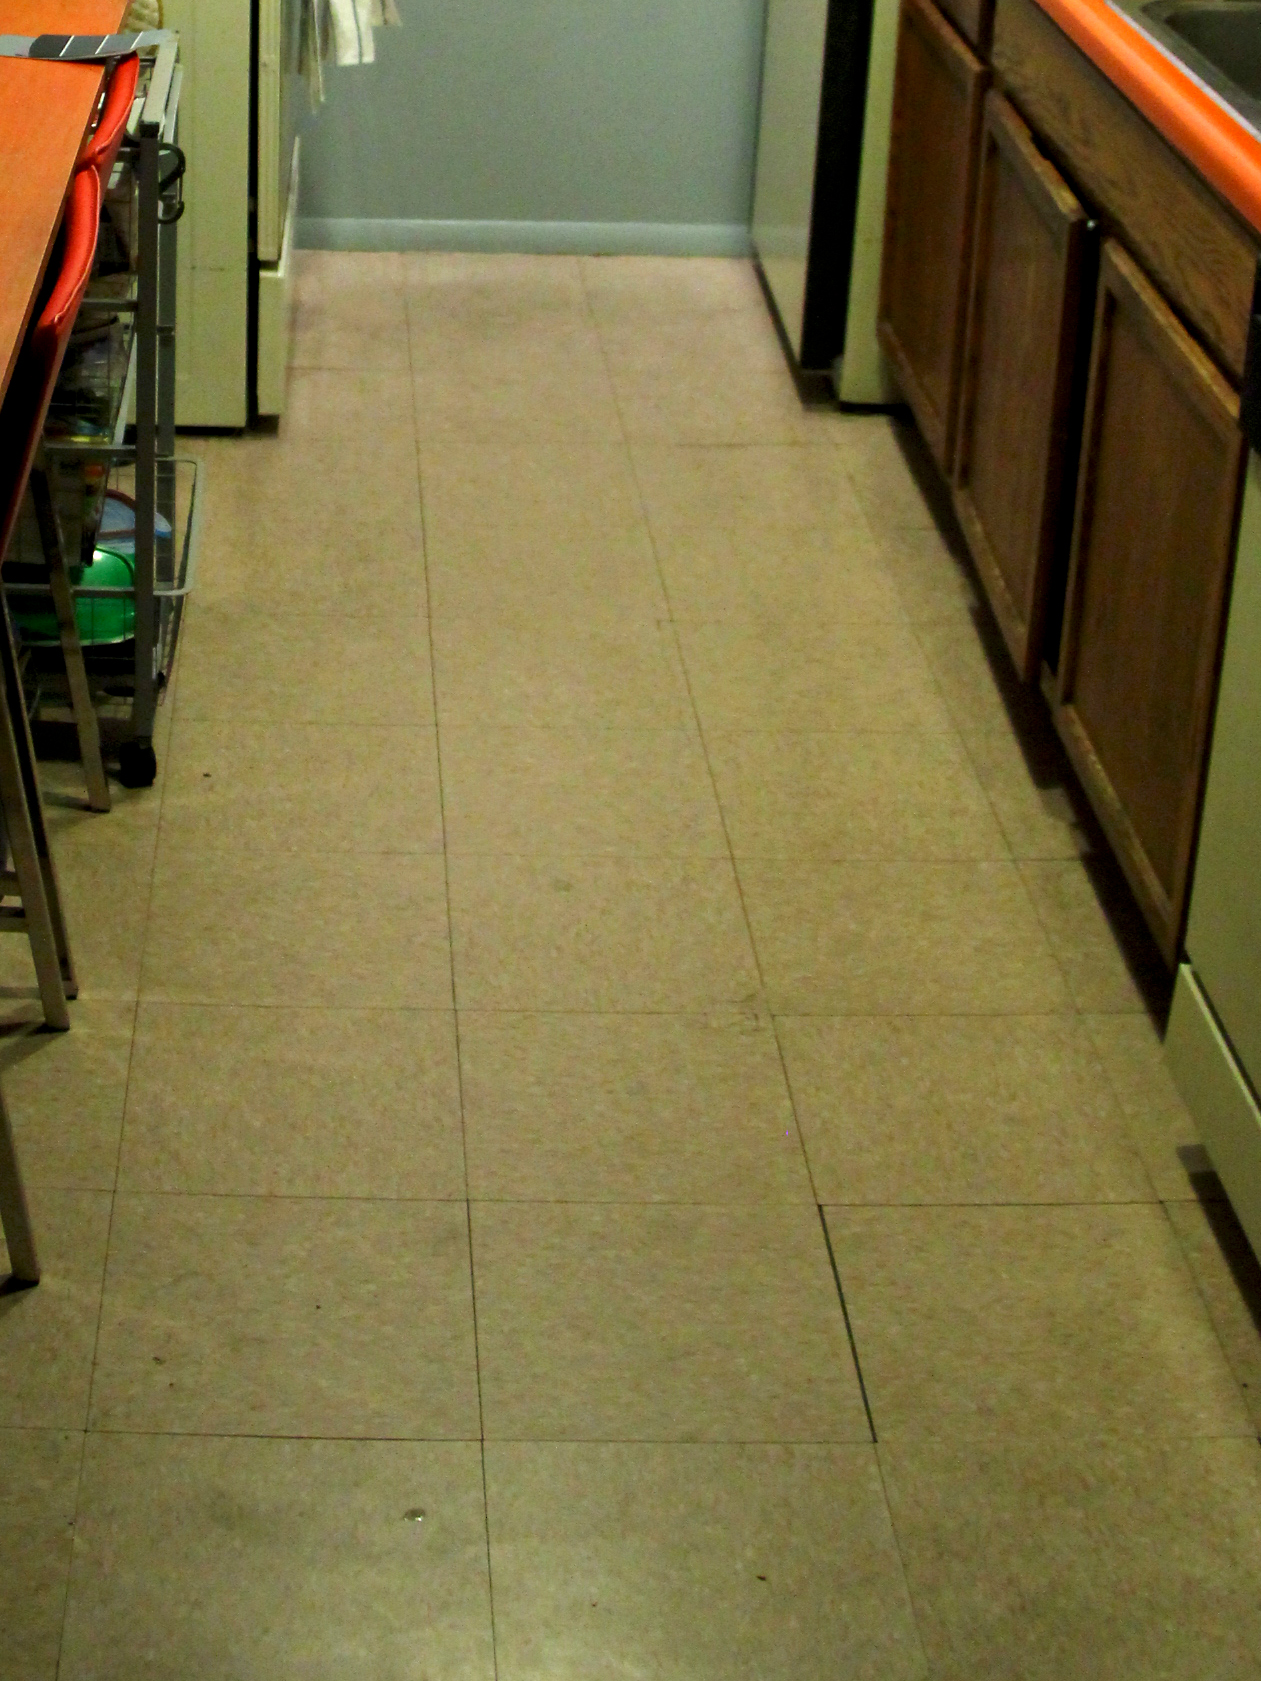
Existing floor
This floor was installed prior to move-in, 8 years ago. We're not sure what was there before, but it couldn't be any worse that what they installed. This grubby vinyl tile is cracked and never looks clean, even after an aggressive scrubbing. Its very sad and just makes you want to leave the room
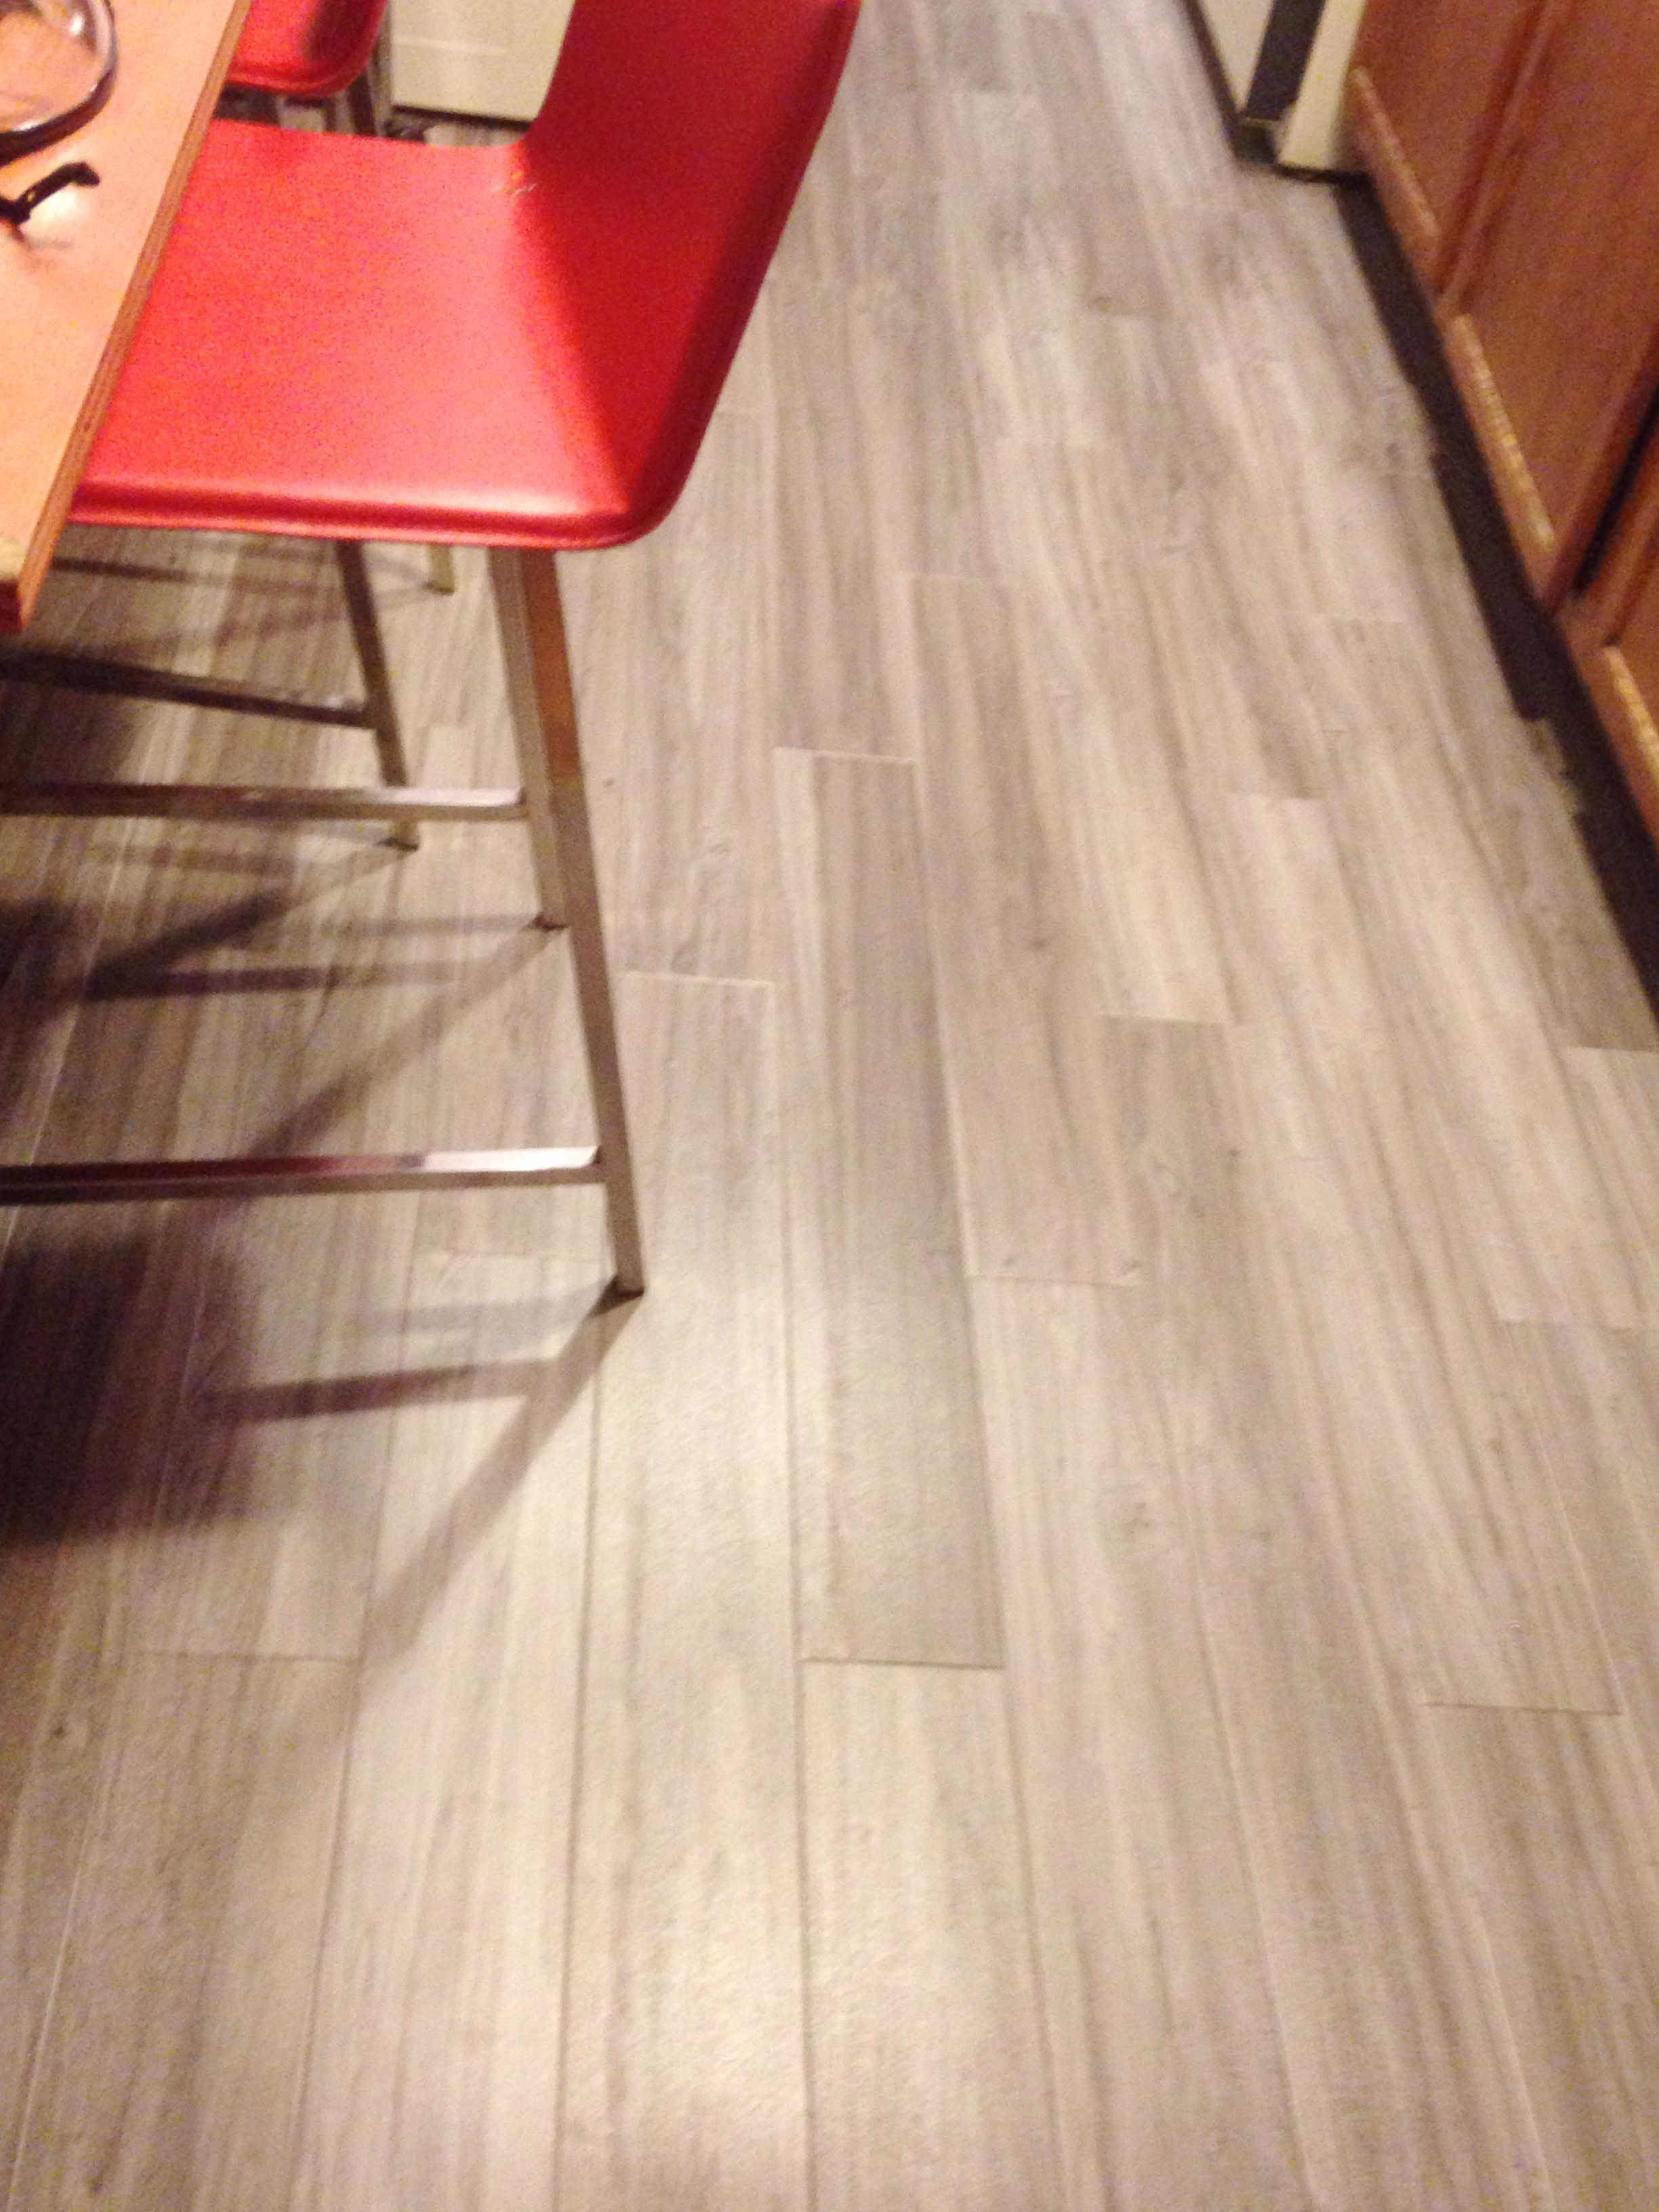
New Happy floor! In just a few hours!
At the big box hardware store we happened to find, on sale, some cool interlocking "TrafficMASTER Allure Ultra" vinyl tile in a gray wood pattern. Its actually 3 foot long planks that lock together to create a waterproof surface. Perfect for a kitchen where lots of drips and spills happen, particularly due to the fact that the resident dog likes to separate her food, on the floor, so she can clearly pick out her favorite morsels.
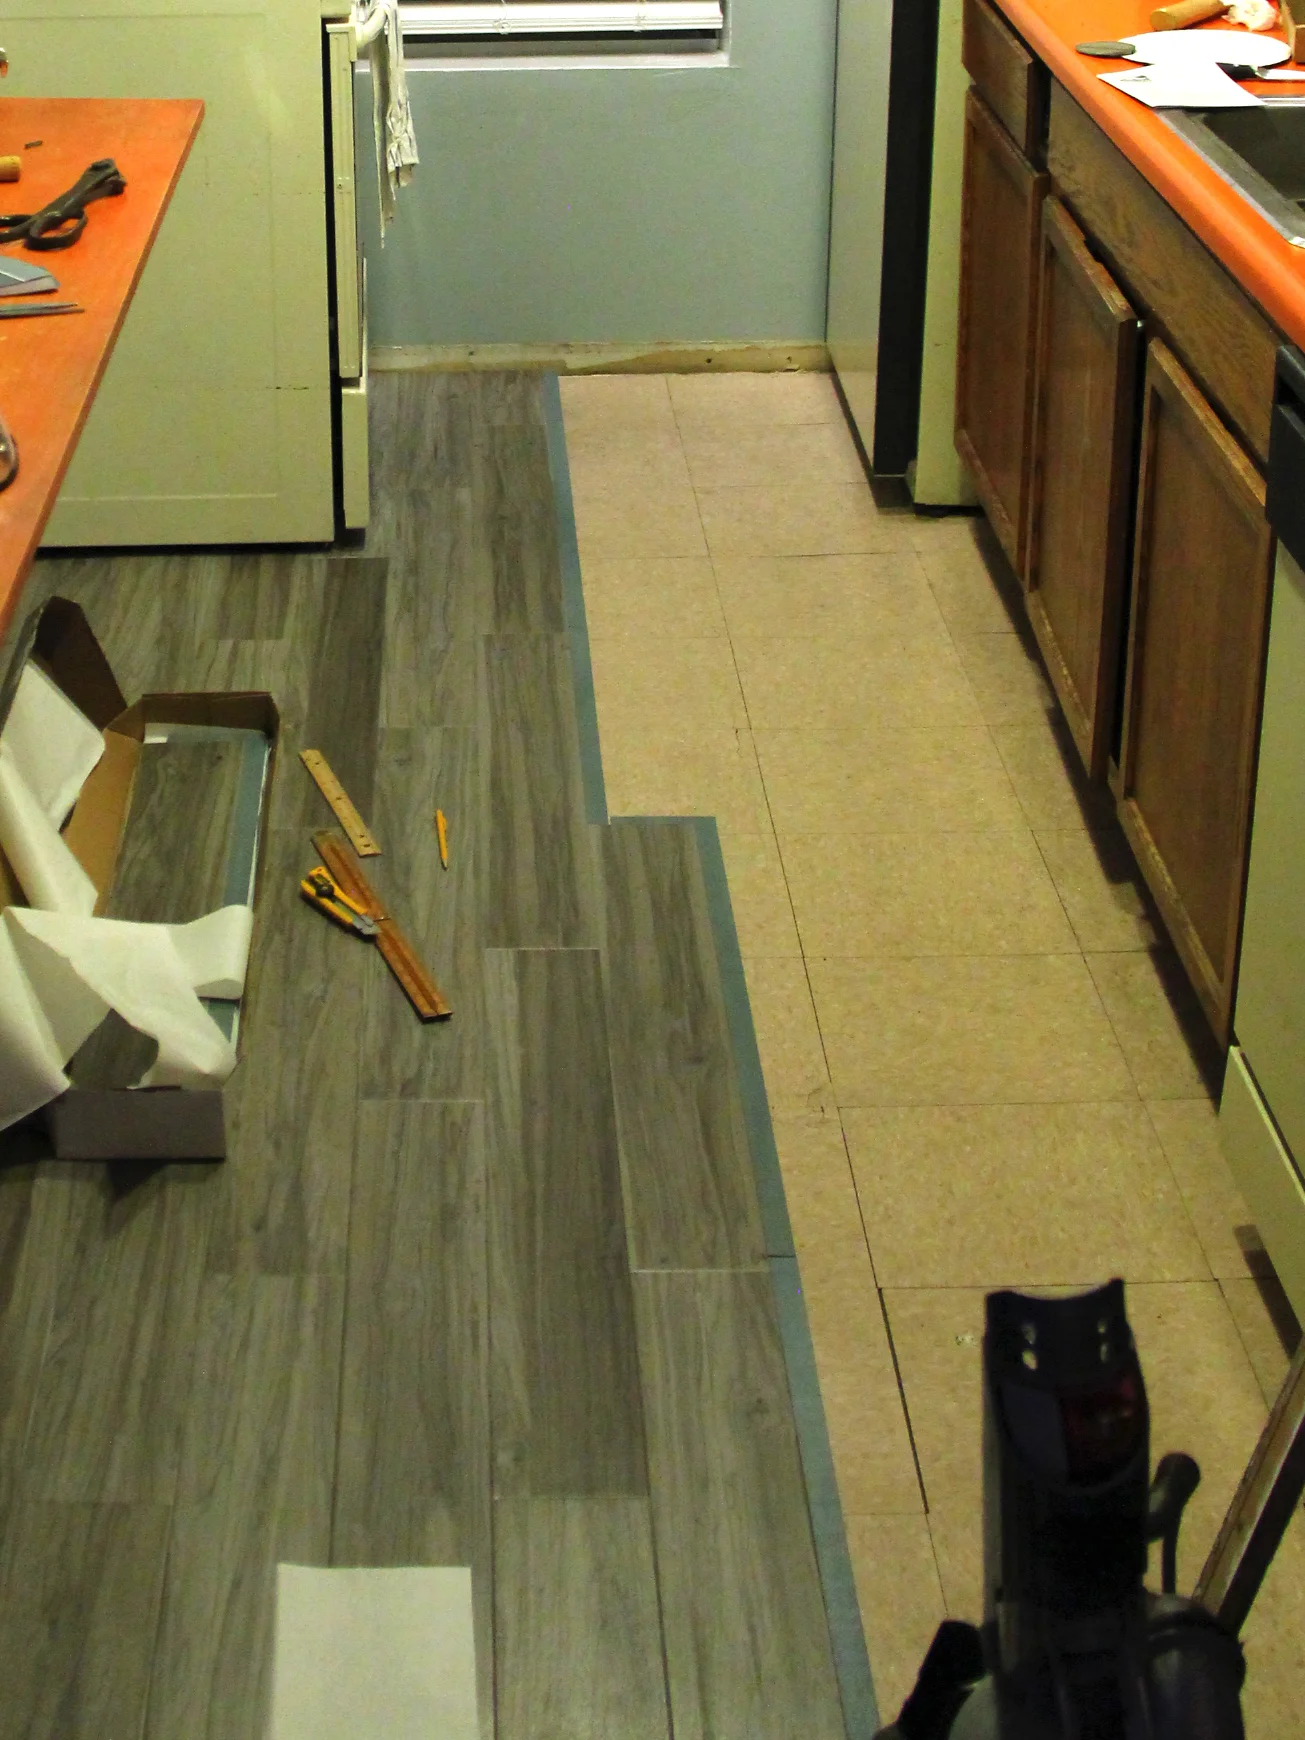
Floor installation
This product was so easy to install. You just lay each panel down next to the last. We didn't even have to remove the old tile since the Trafficmaster is so thin.
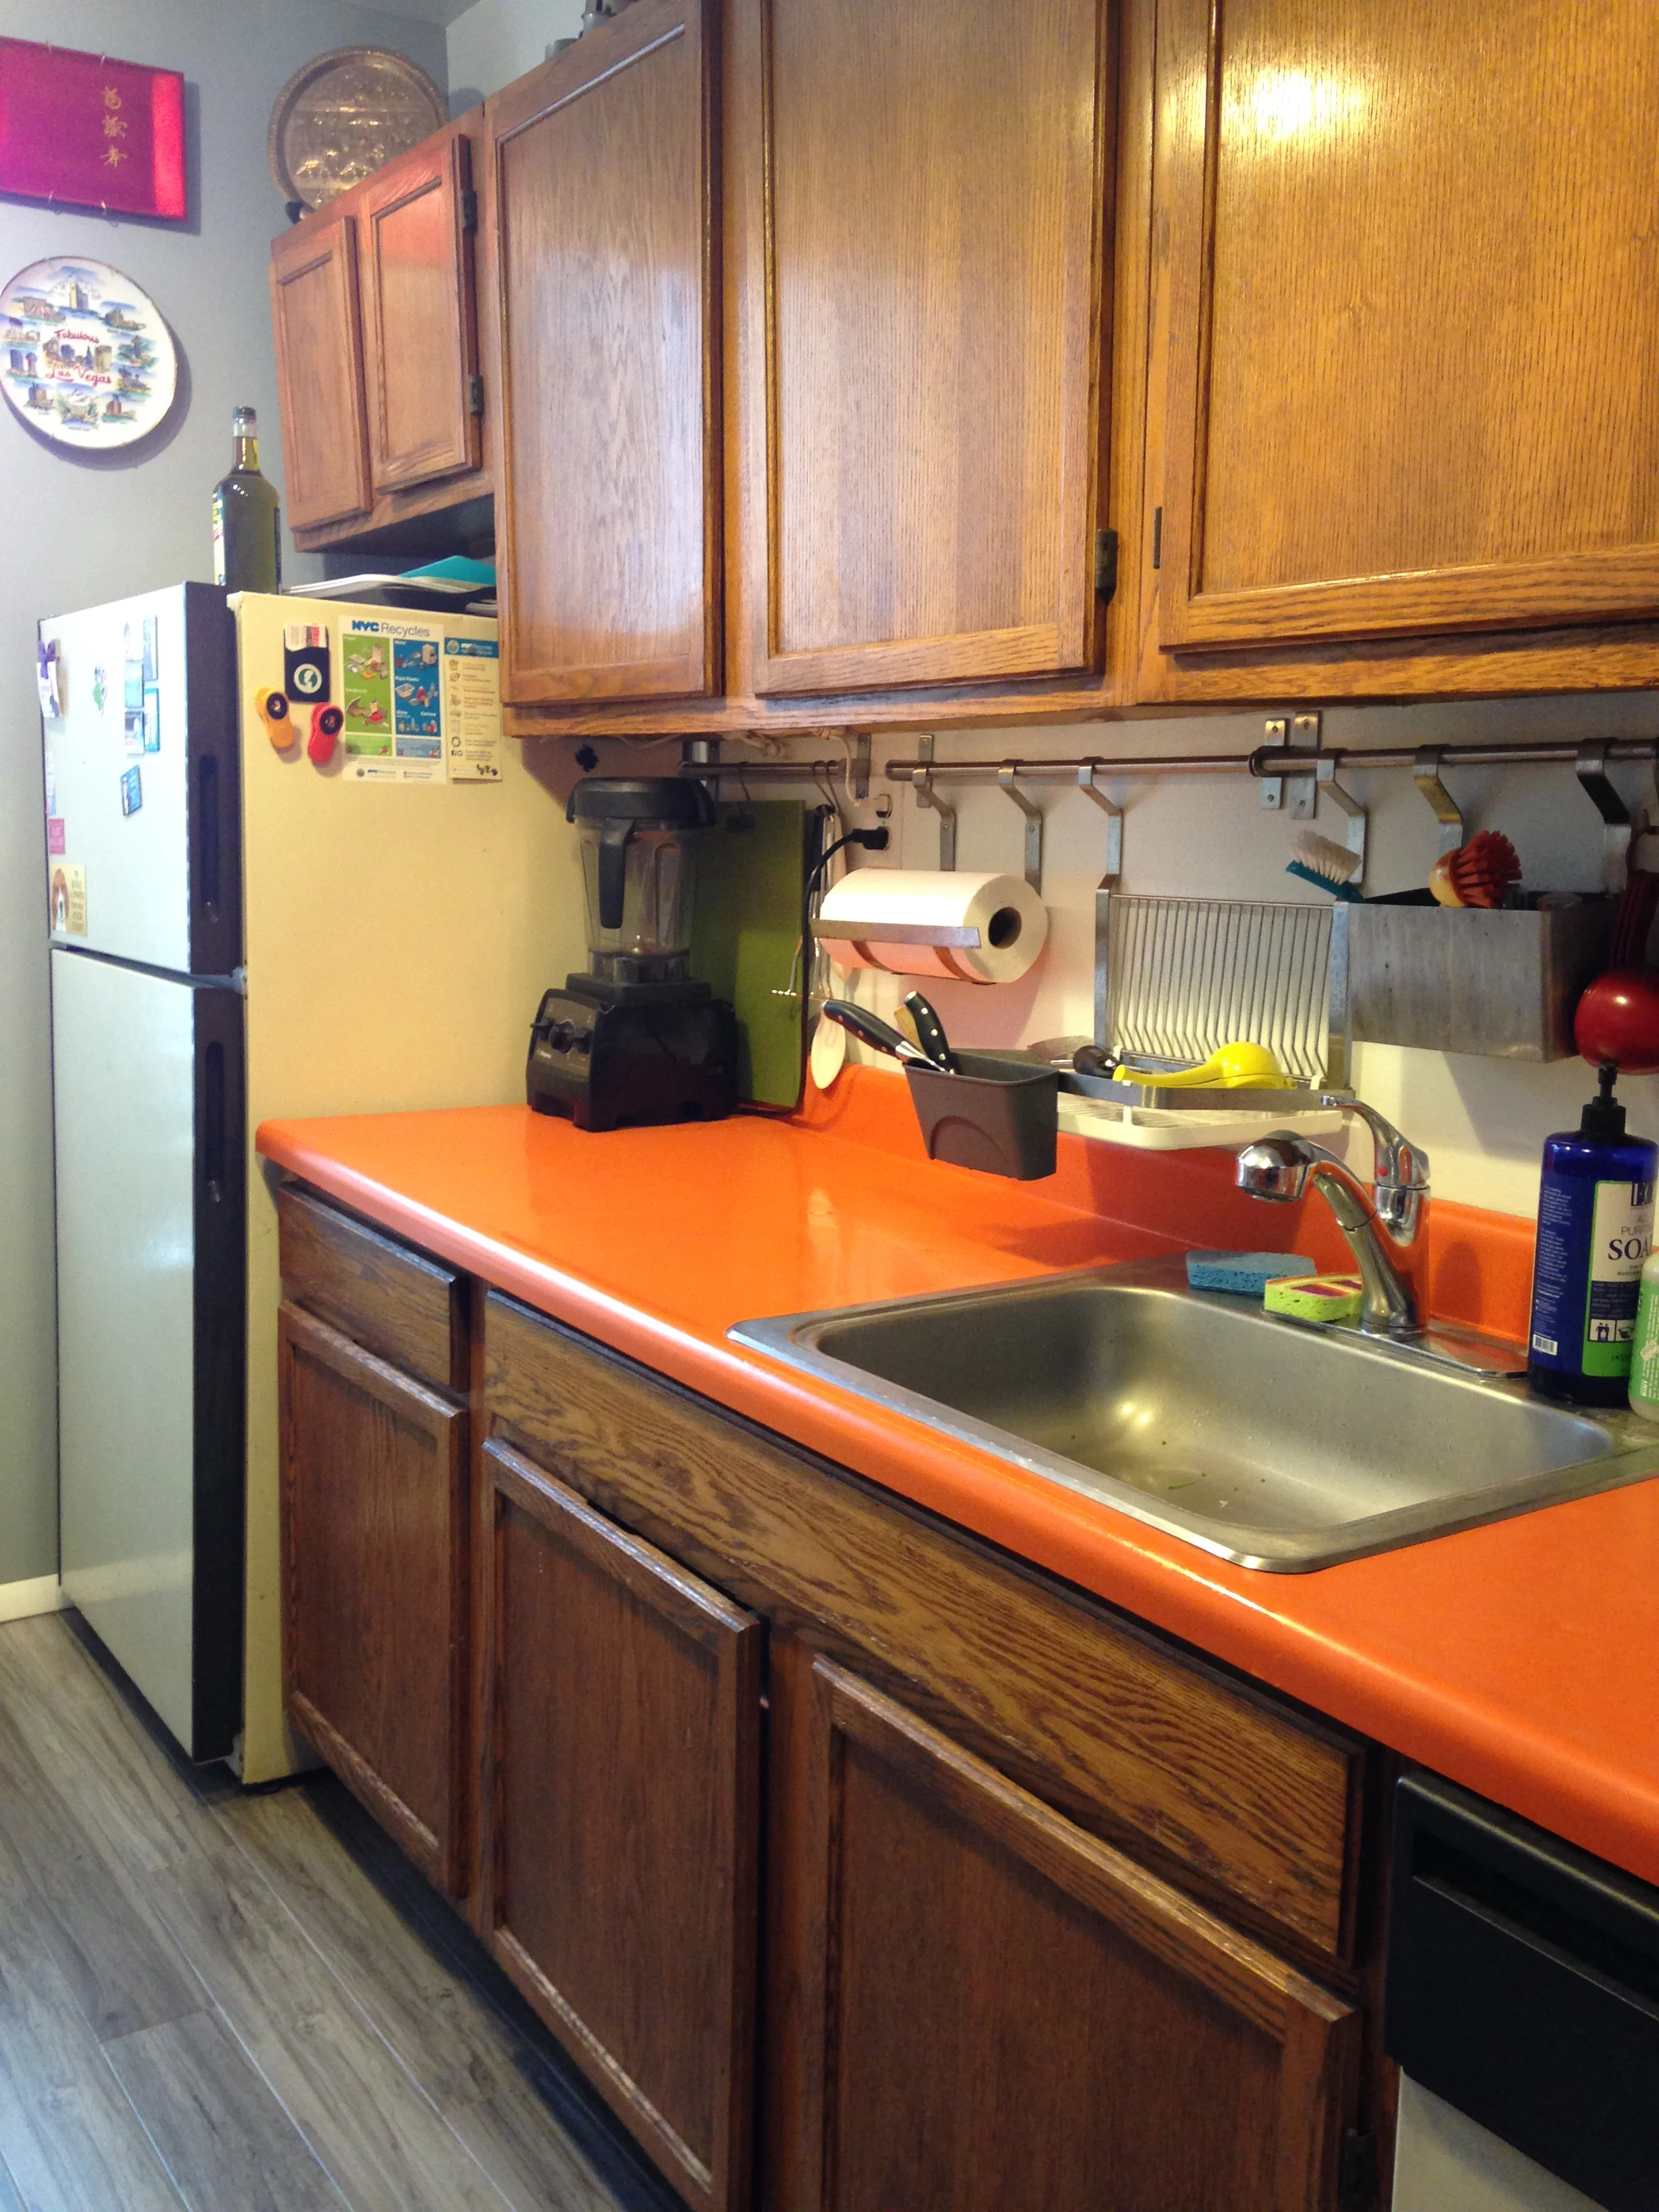
Now for the cabinets
The existing cabinets were old and dark and were just not the right thing for a small kitchen with only one window. By just replacing the fronts we can keep the cost down and the tenant can store the old fronts to re-attach if necessary, when (or if) she ever moves out.
The orange counter top is a definite keeper. It has probably been around since the 70's but its in pretty good shape and is bright and happy. Orange also happens to be one of the tenants favorite colors.
Cabinet fronts replaced
One trip to the Ikea As-Is department and we had what we needed. There was a huge pile of cabinet doors, still in their boxes, just waiting there for us to take home - for only $2 each! They were not the exact size we needed but with a little "cutting and pasting" we were sure they would work just fine. After a days work the fronts were replaced.
There is a lot of wood grain happening in the kitchen so the next step will be to either paint the doors or cover them with a product like Panyl - peel and stick vinyl that was designed specifically with Ikea products in mind. We will post a picture when we're done
Interior Design - Carroll Gardens Apartment
House Husbands for Hire was engaged by a client to organize and decorate her Brooklyn one bedroom apartment. She came to us with great ideas and a collection of beautiful things that she needed help to display. In addition to fixing damaged furniture, framing and hanging art and installing new light fixtures, we converted a closet to a fabulous new workspace.
Vintage fabric display
Our client was lucky enough to own a large piece of vintage Marimekko
fabric. It was languishing away unnoticed, folded up in a closet. She
decided she wanted to display it and our challenge was to find the right
way to protect this rare piece while featuring it in her apartment.
While looking for materials to custom build a frame, we discovered an
old theatrical set piece at Build it Green in Gowanus. The fit was
perfect! Here is Douglas Kay carefully hand-stretching the fabric to the frame.
before - Vintage fabric display
Vintage fabric display - After
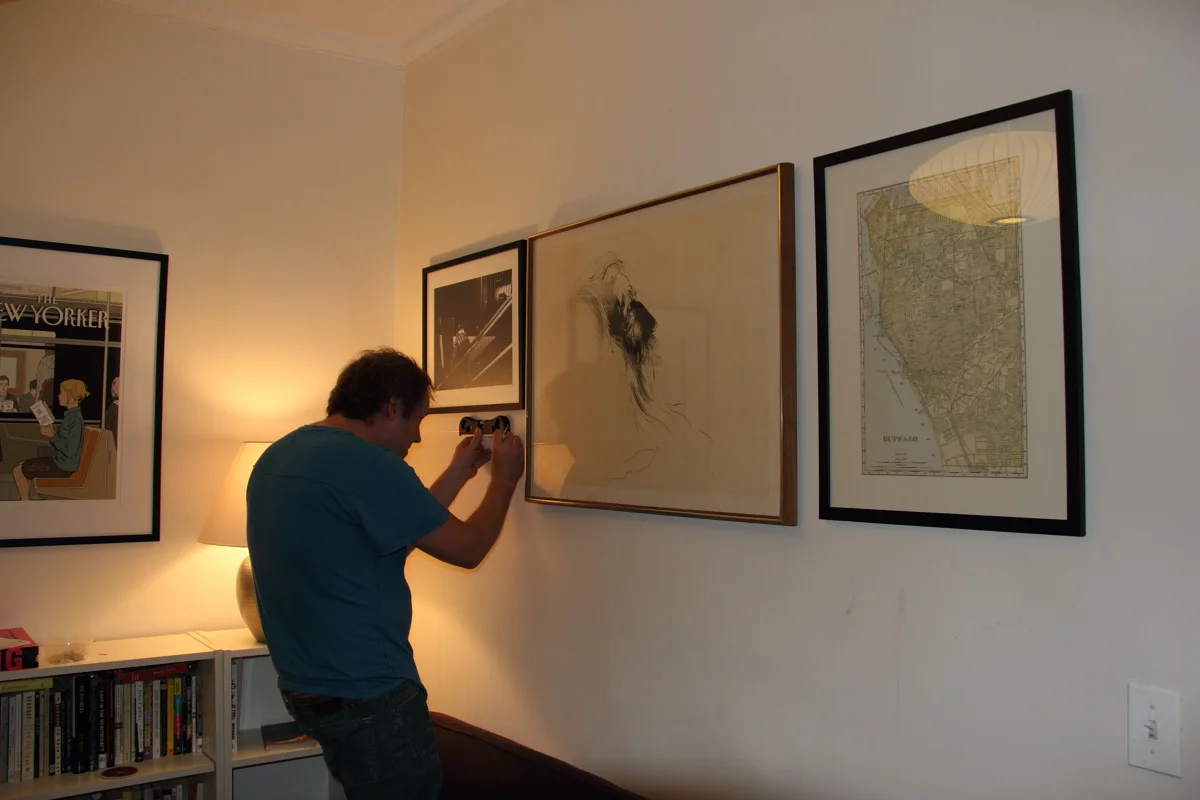
Douglas Kay
is living up to his reputation as a talented and meticulous hanger of framed
art. Here you see him carefully measuring levels so that the frames will
be perfectly aligned in his composition.
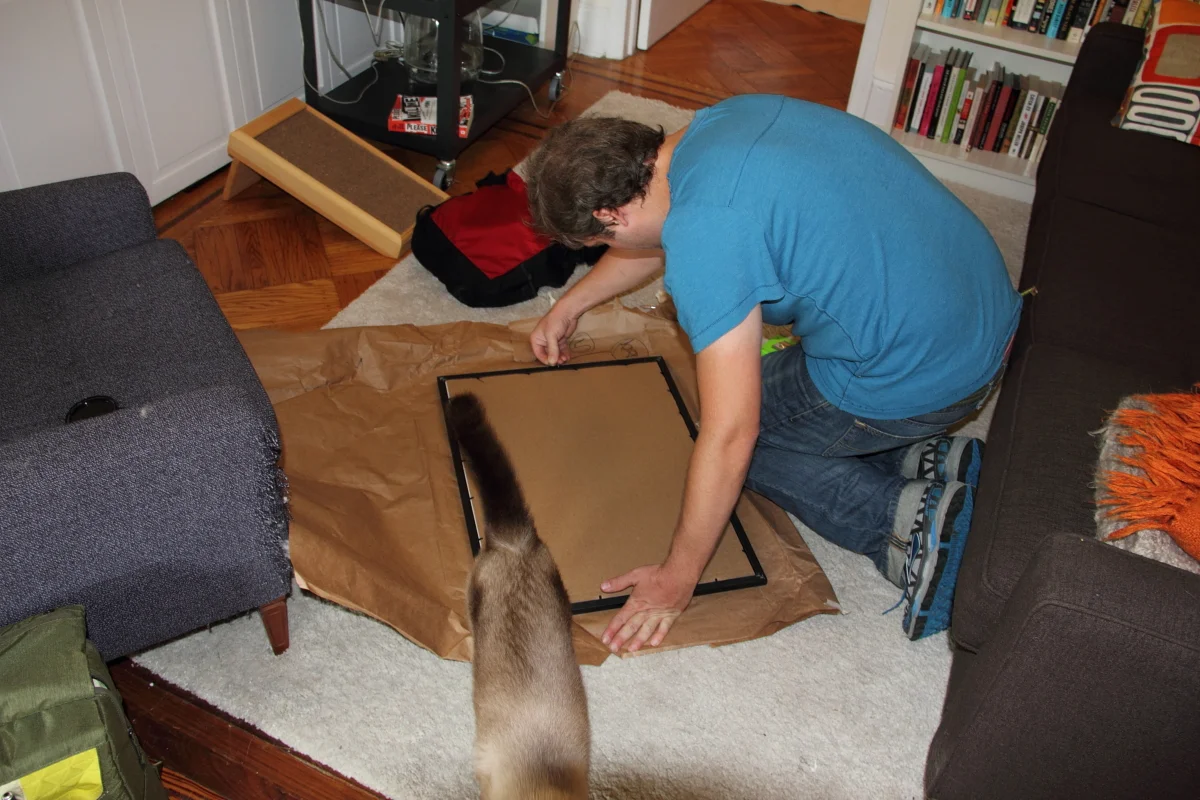
Our
client had several pieces of art that needed to be framed and hung. Now
that Oliver has approved the framing process - off to take a cat nap.
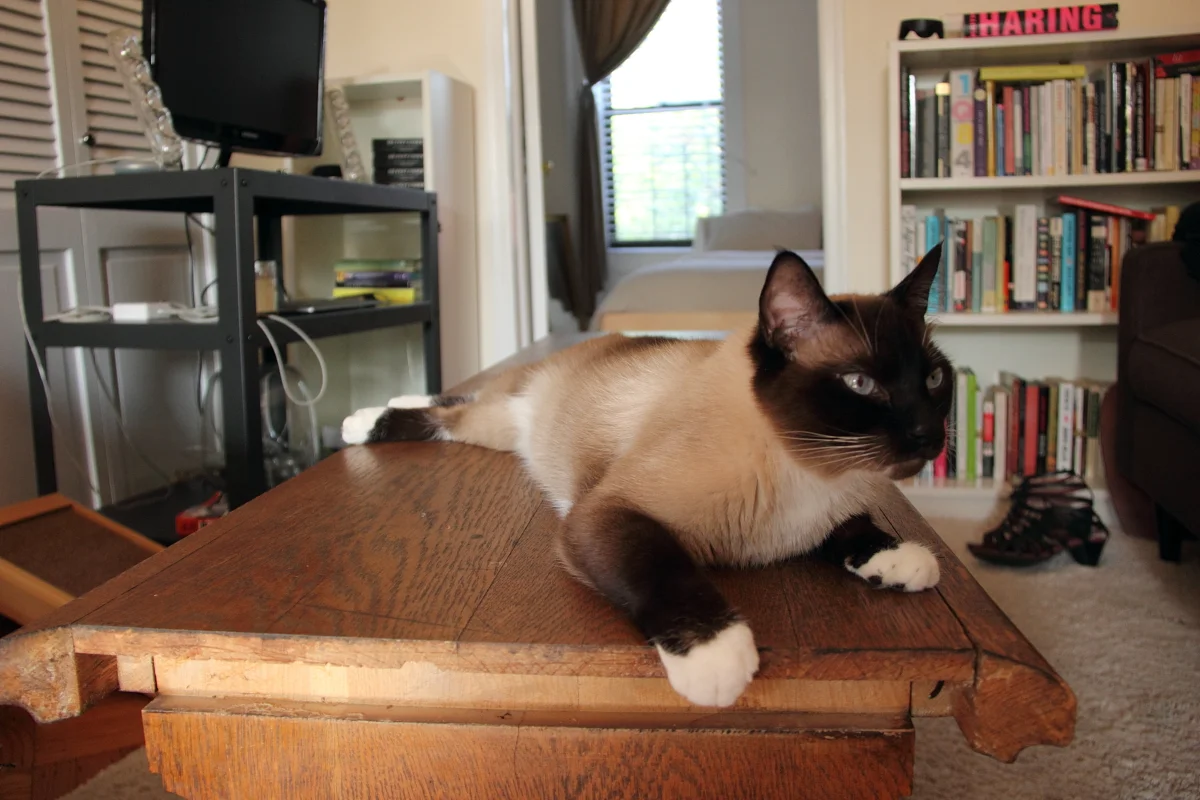
Furniture Repair
Our
client had a table that had been damaged in a previous move and wanted
it repaired. Oliver, the clients cat, reminds us of where the missing edge detail belongs.
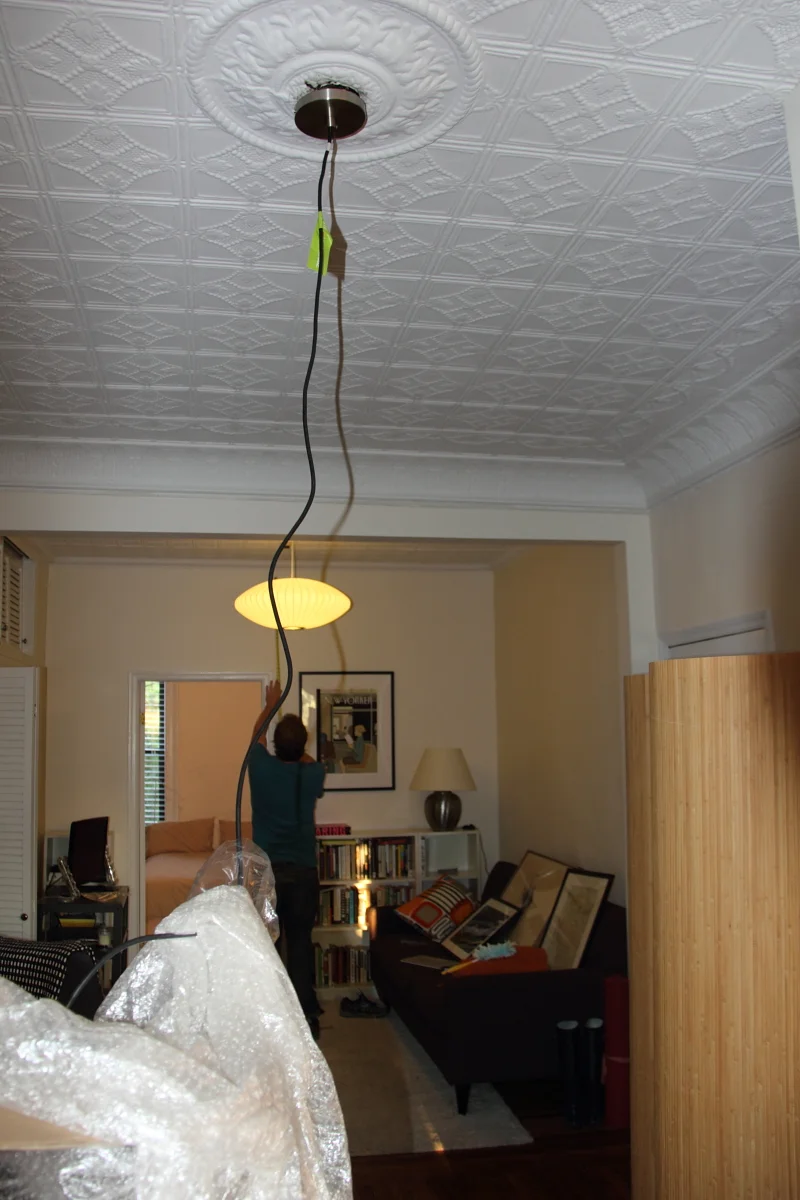
Now that the Nelson Saucer light has been installed, it's time for the CB2 globe pendant.
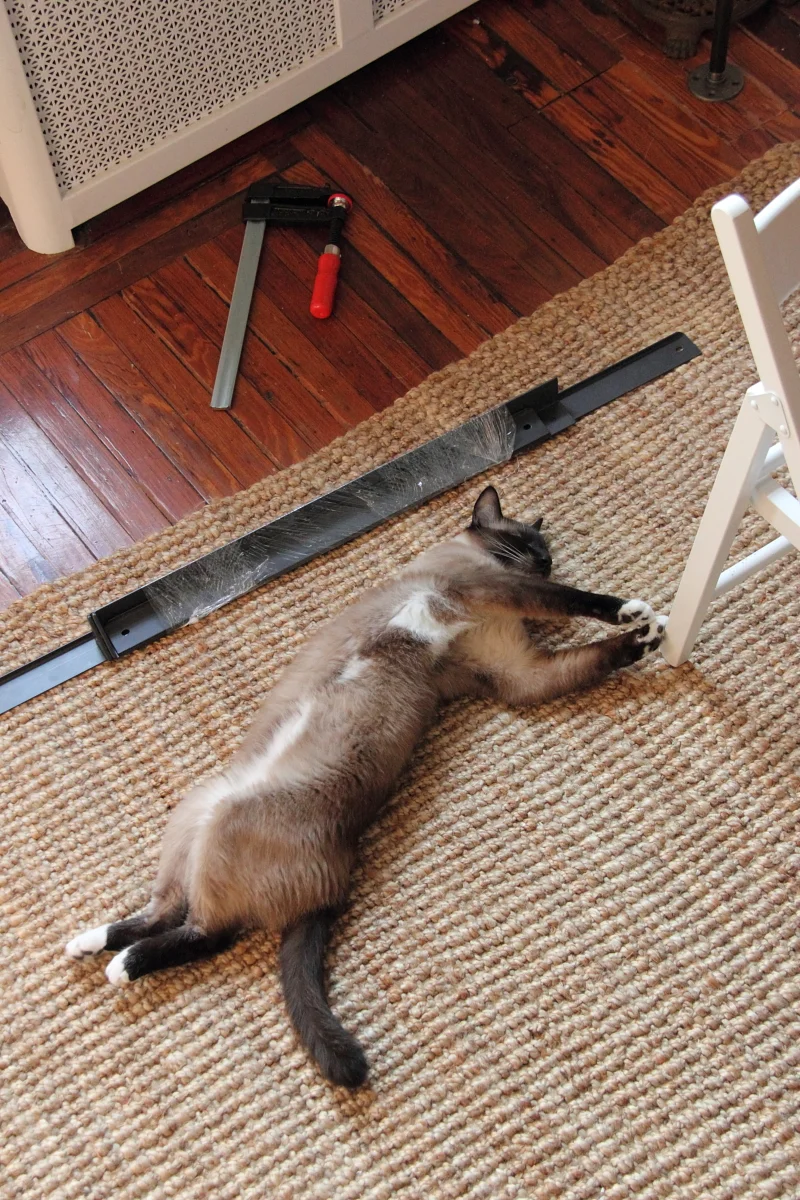
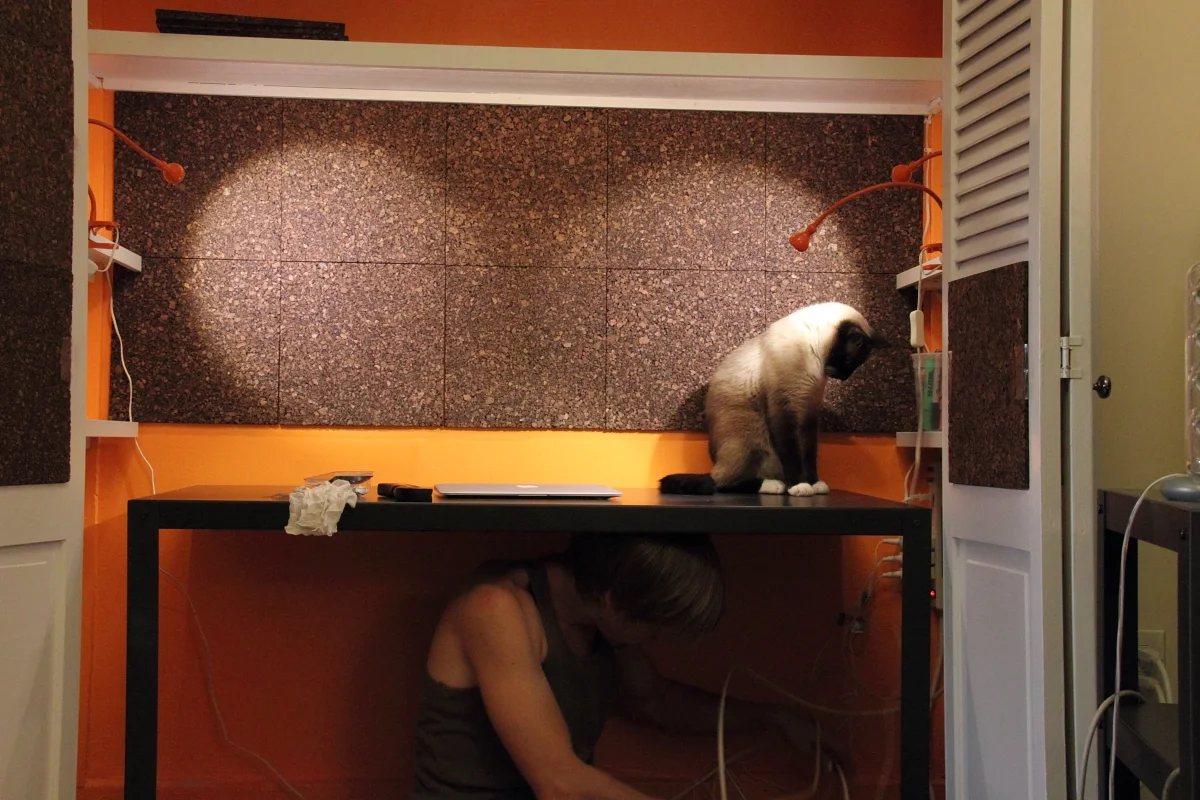
Working Cat
Someone has fallen asleep on the job . . .
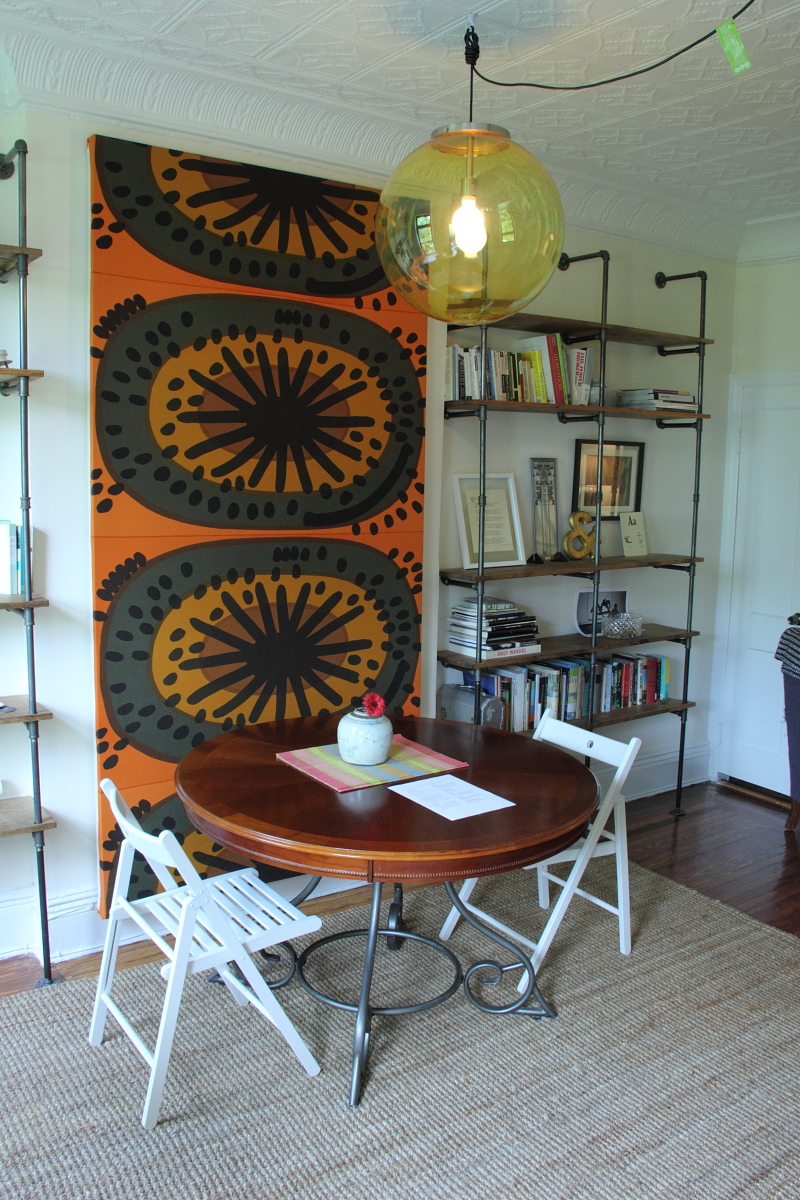
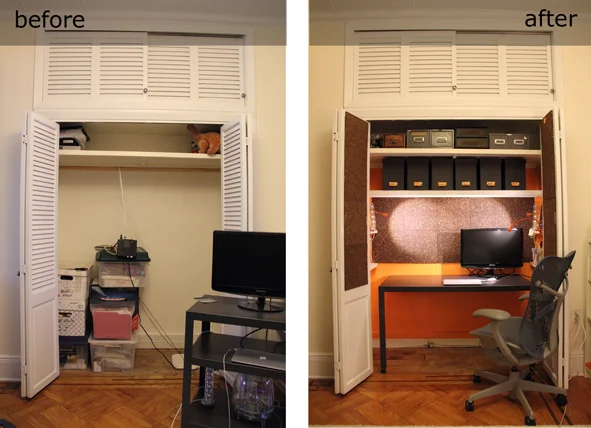
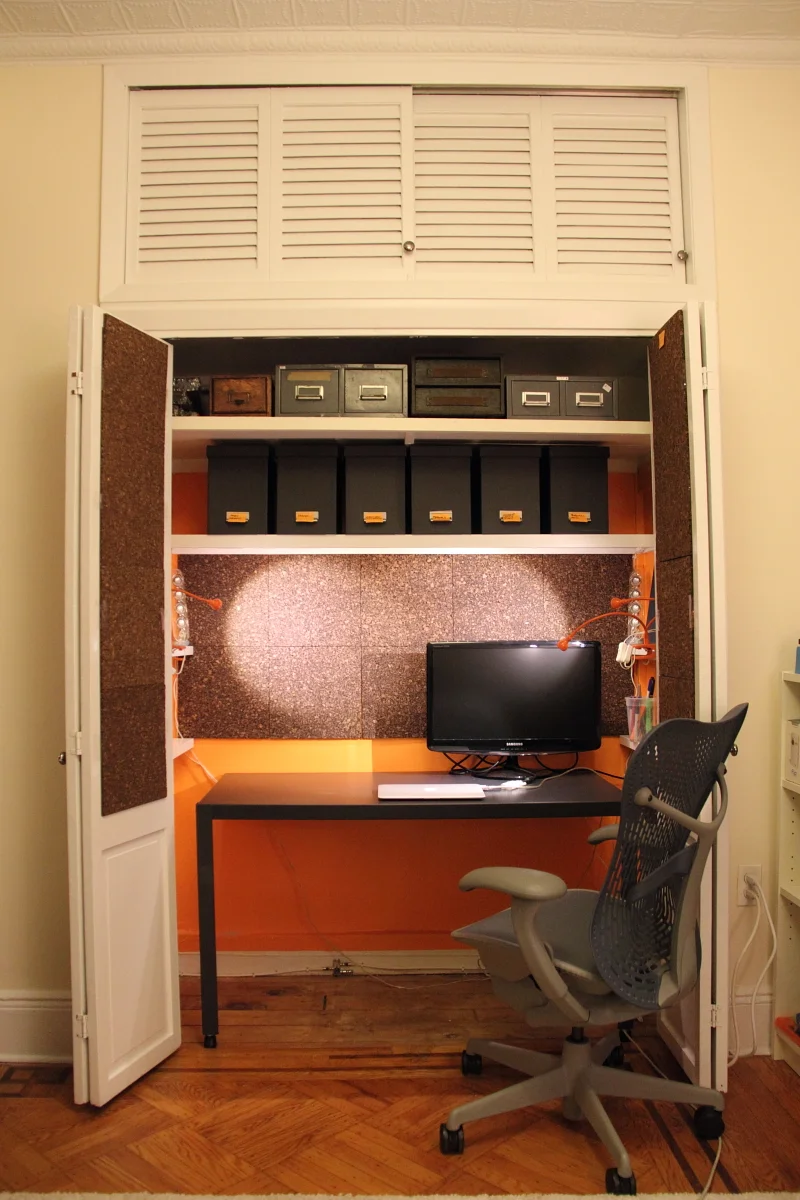
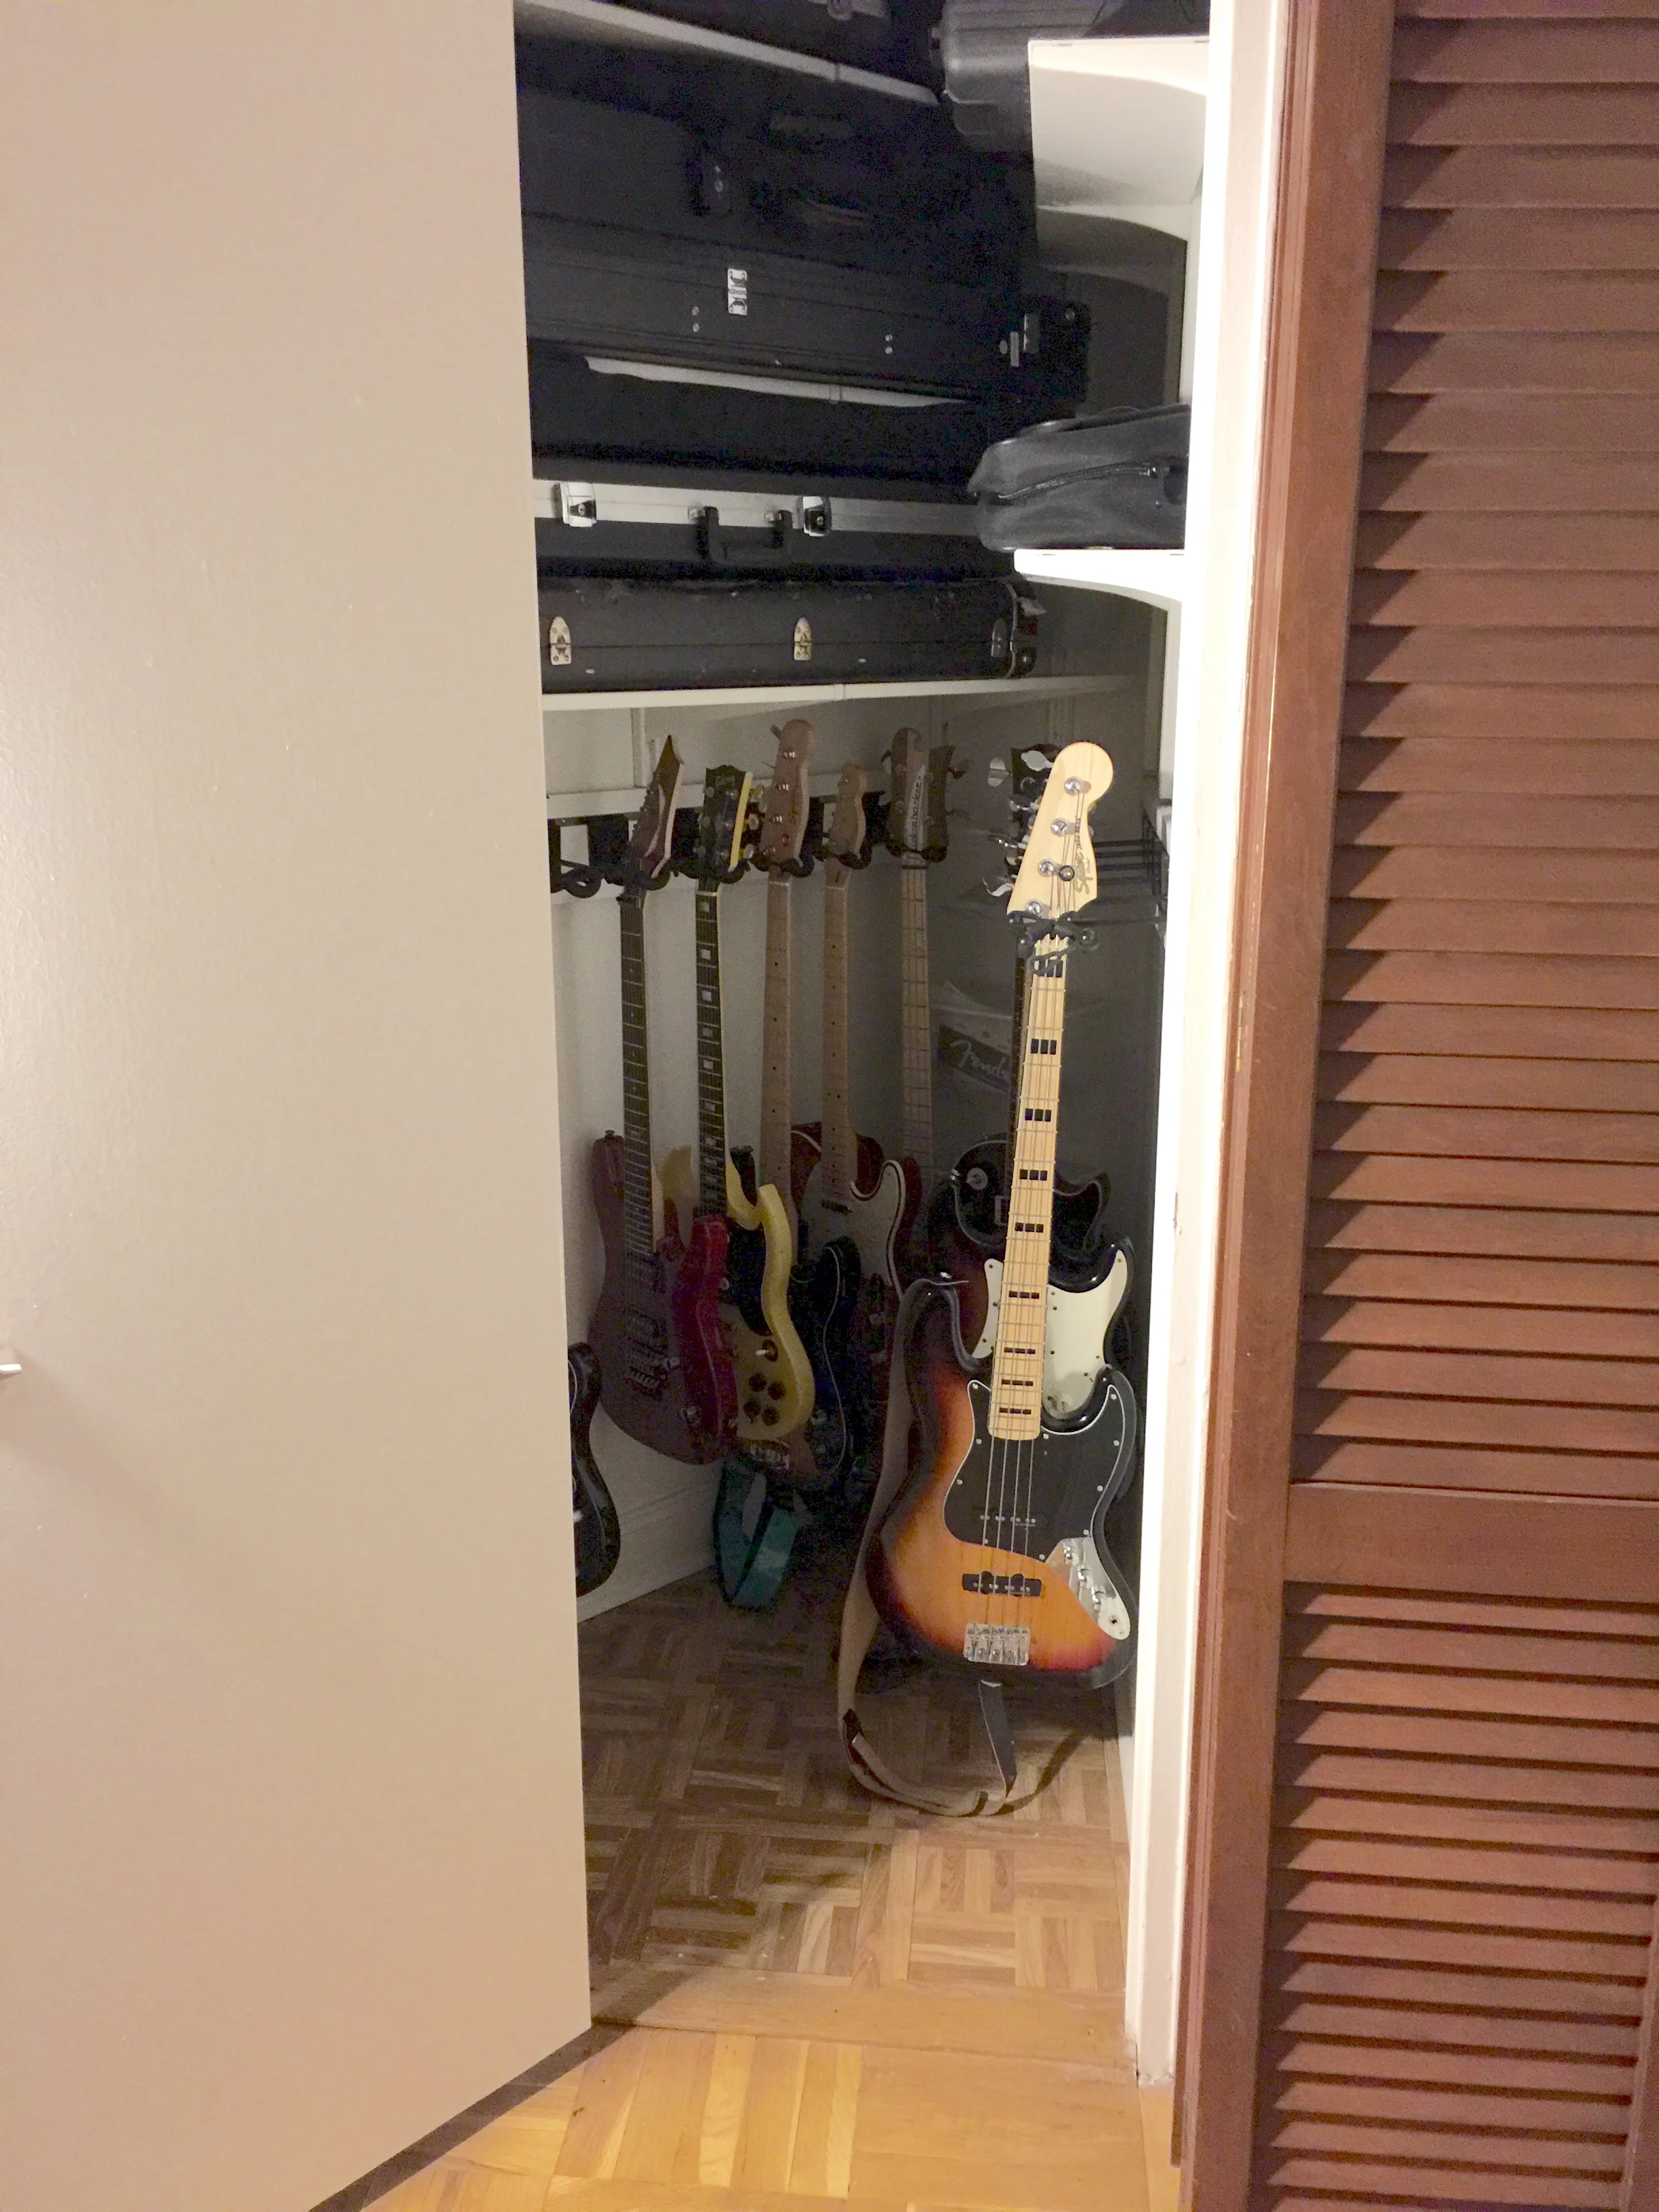
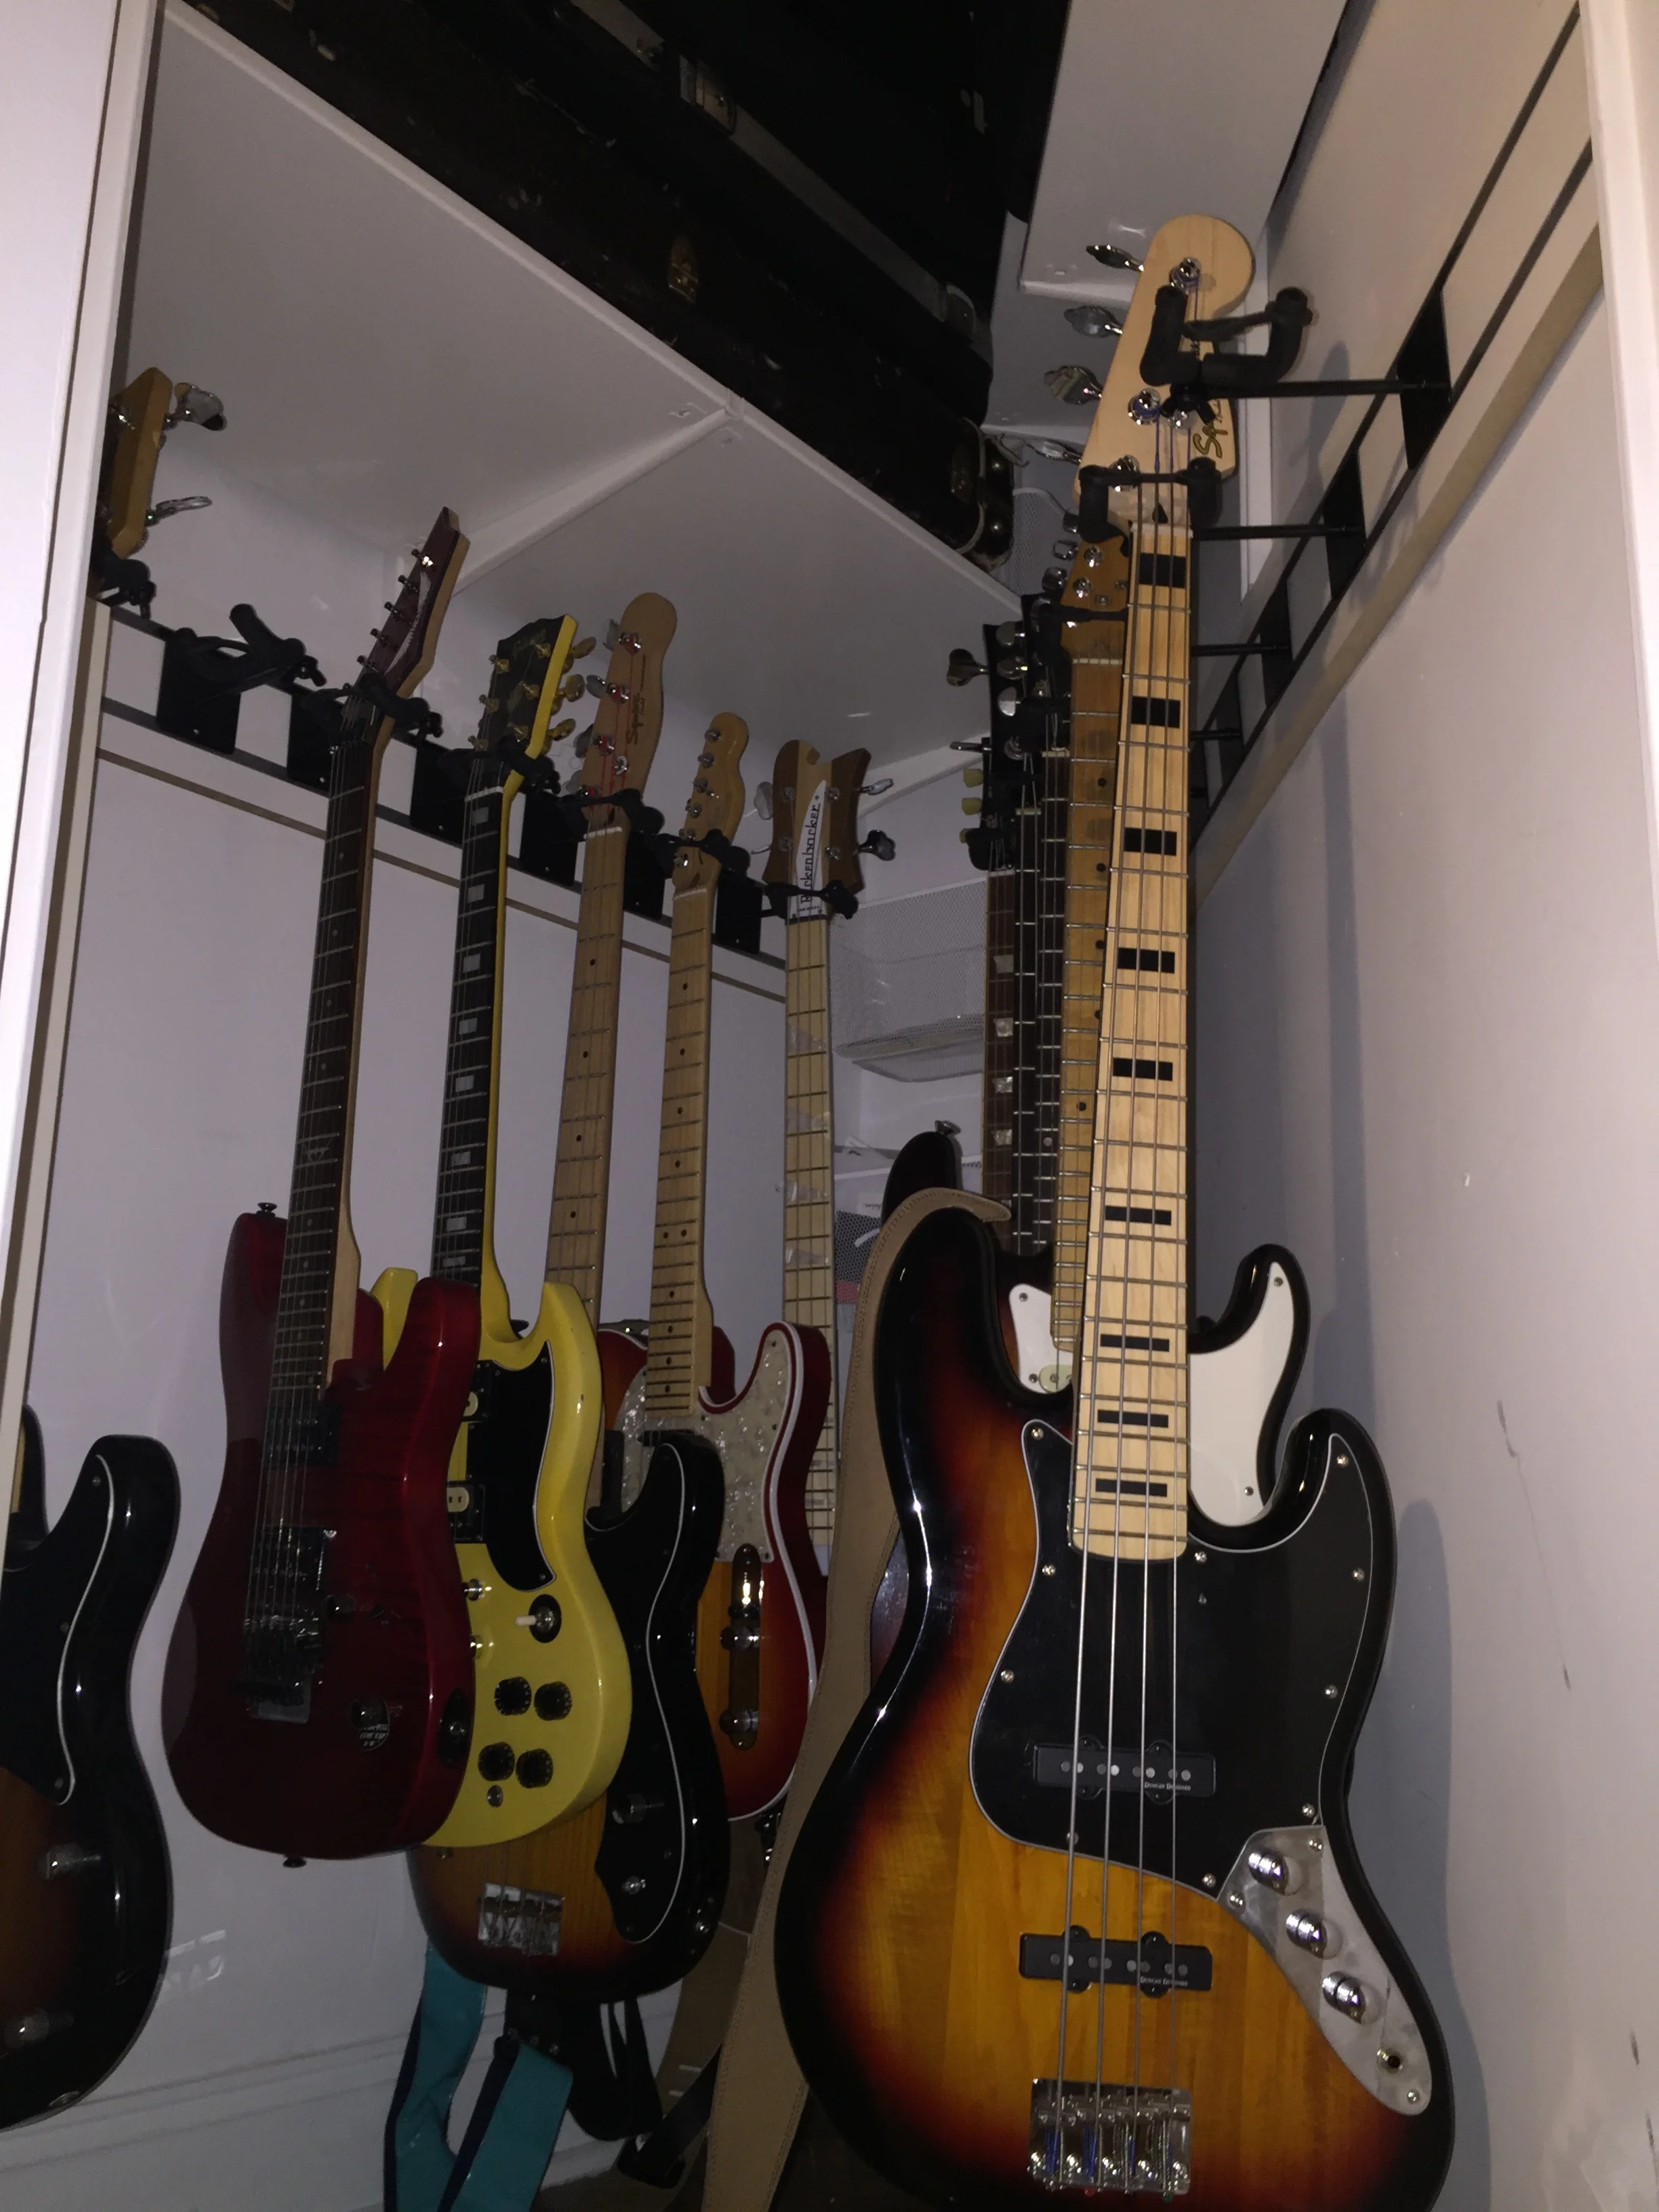
Turning a closet into a workspace
Our client is a writer who has a one bedroom apartment in Carroll
Gardens. She had a closet that she wasn't making the best use of and
wanted an office space to be able to focus on work and double as a media
center. We were able to organize the stuff in the closet to take up
less space while storing, build a desk and shelving, install cork panels
to do double duty as a bulletin board and attractive decoration, tame
the wild cables, and paint the interior walls to create a lovely media
center and office nook.
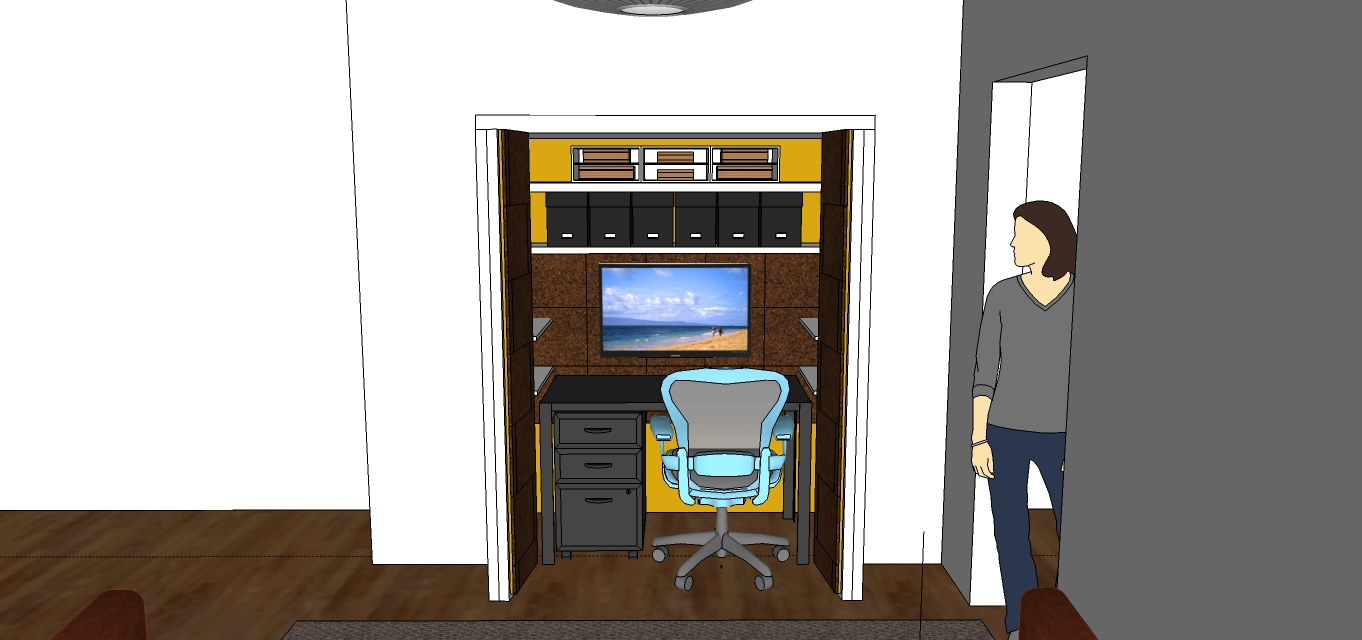
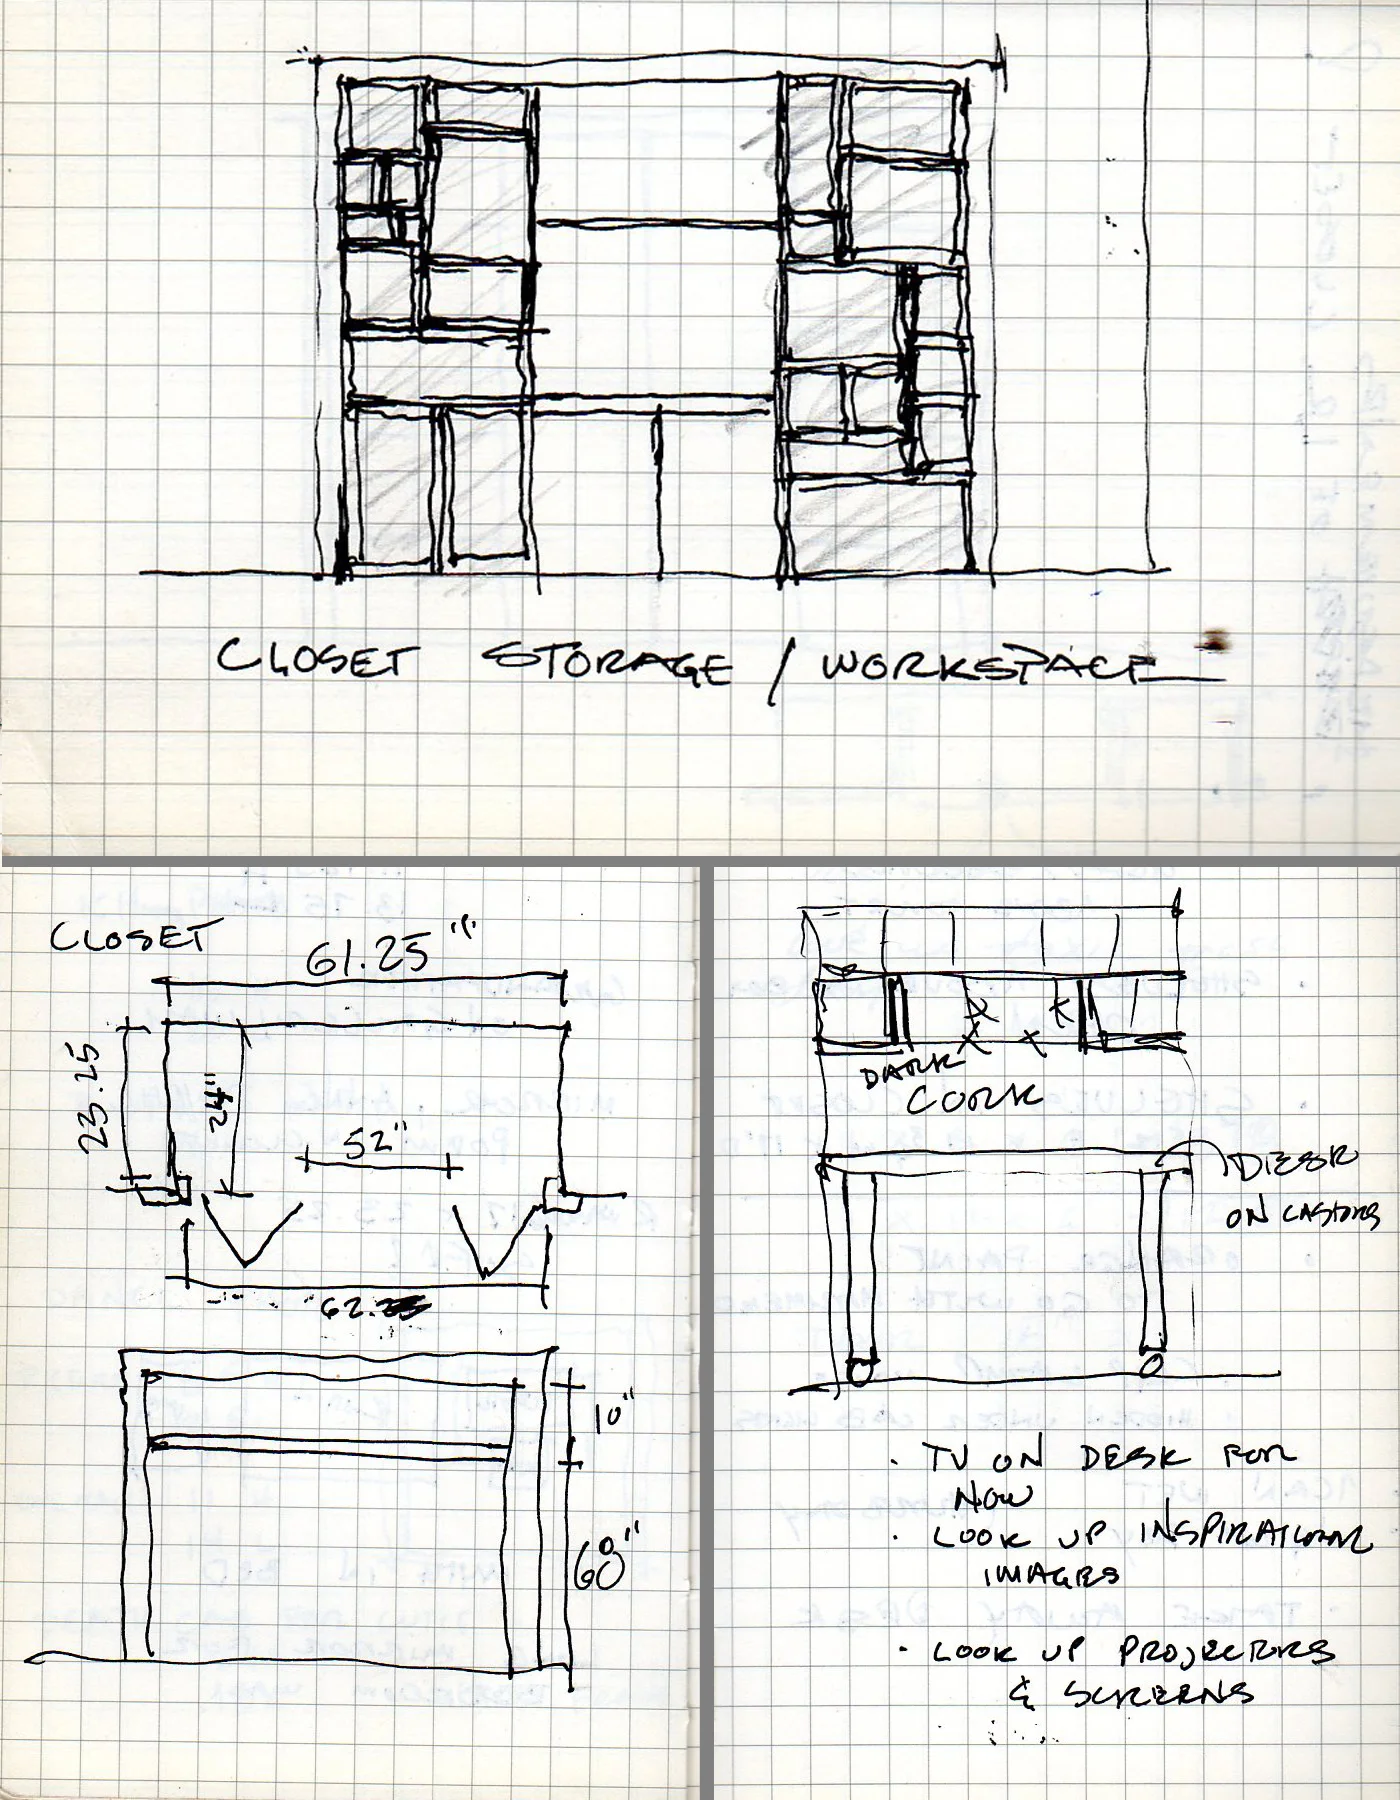
Turning a closet into a workspace and media center
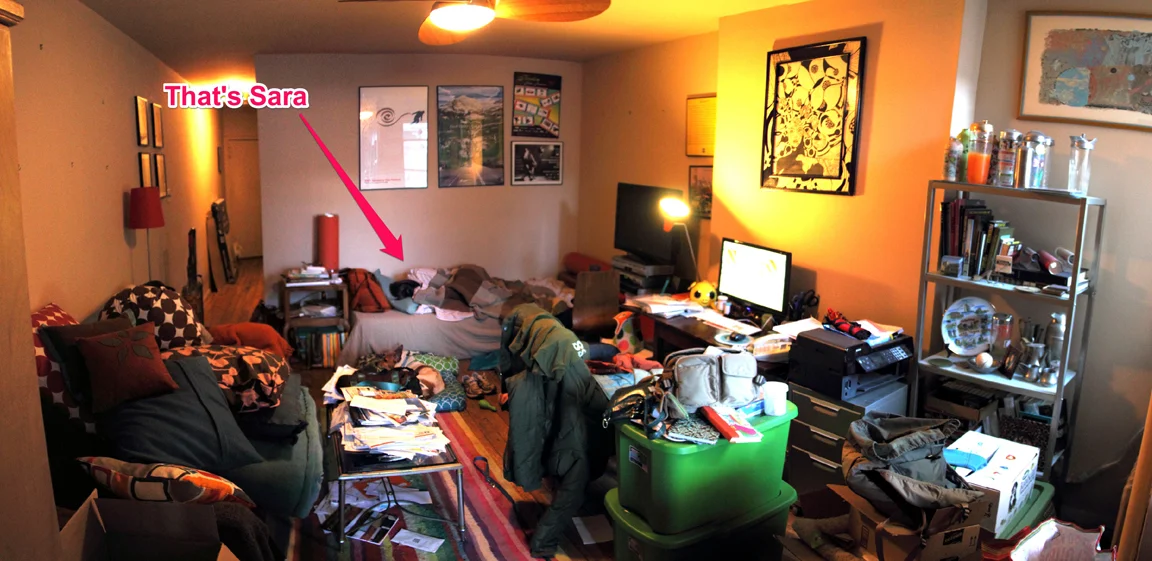
Living room found!
BEFORE:
When we got to Sara, not only was there a lot of disorder in her apartment, we also had a hard time finding HER under all the stuff. She needed major help organizing and getting rid of clutter so she put the Haus Husbands to work.
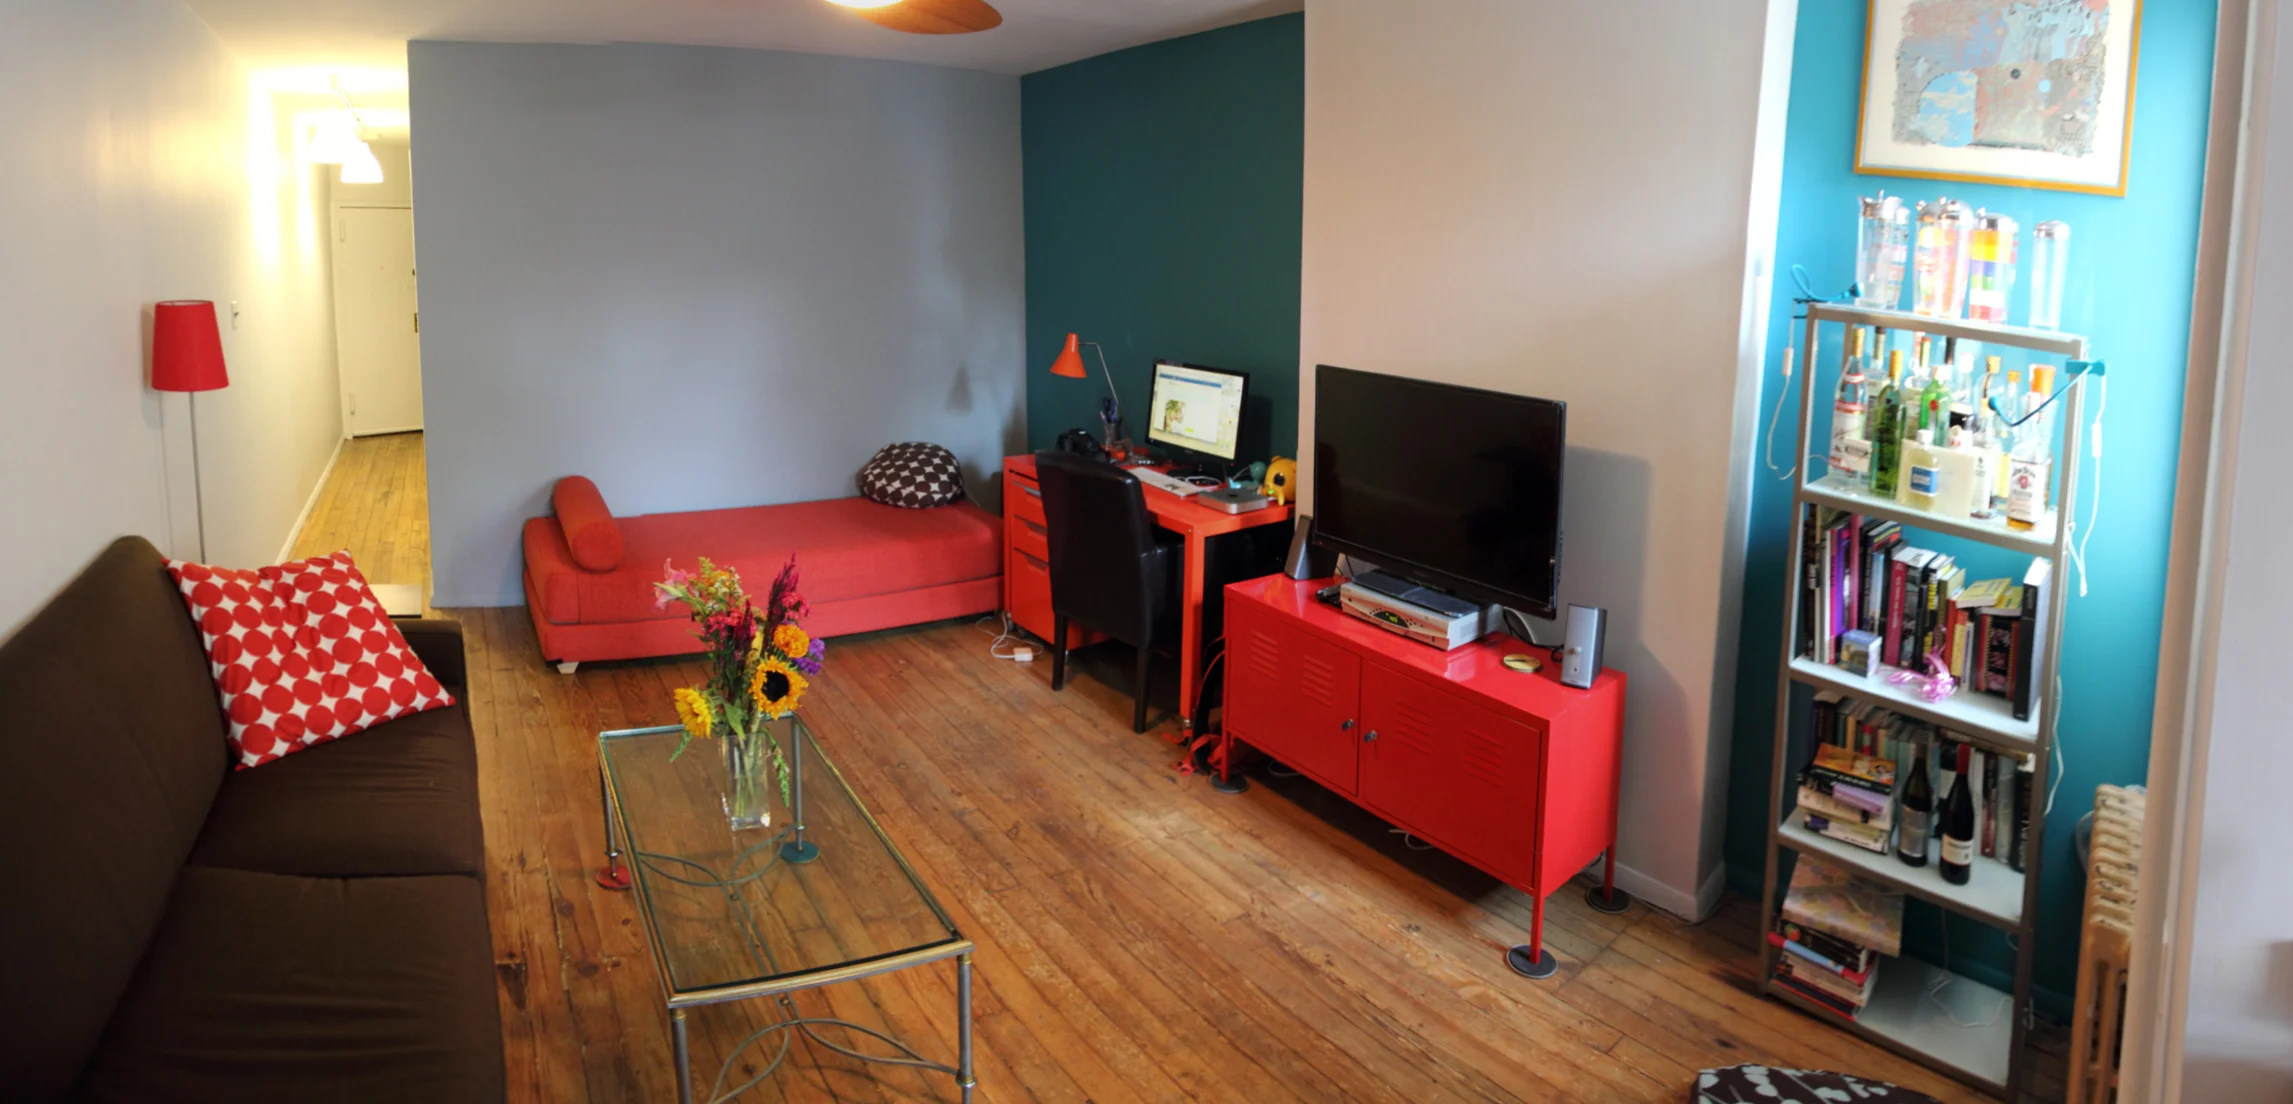
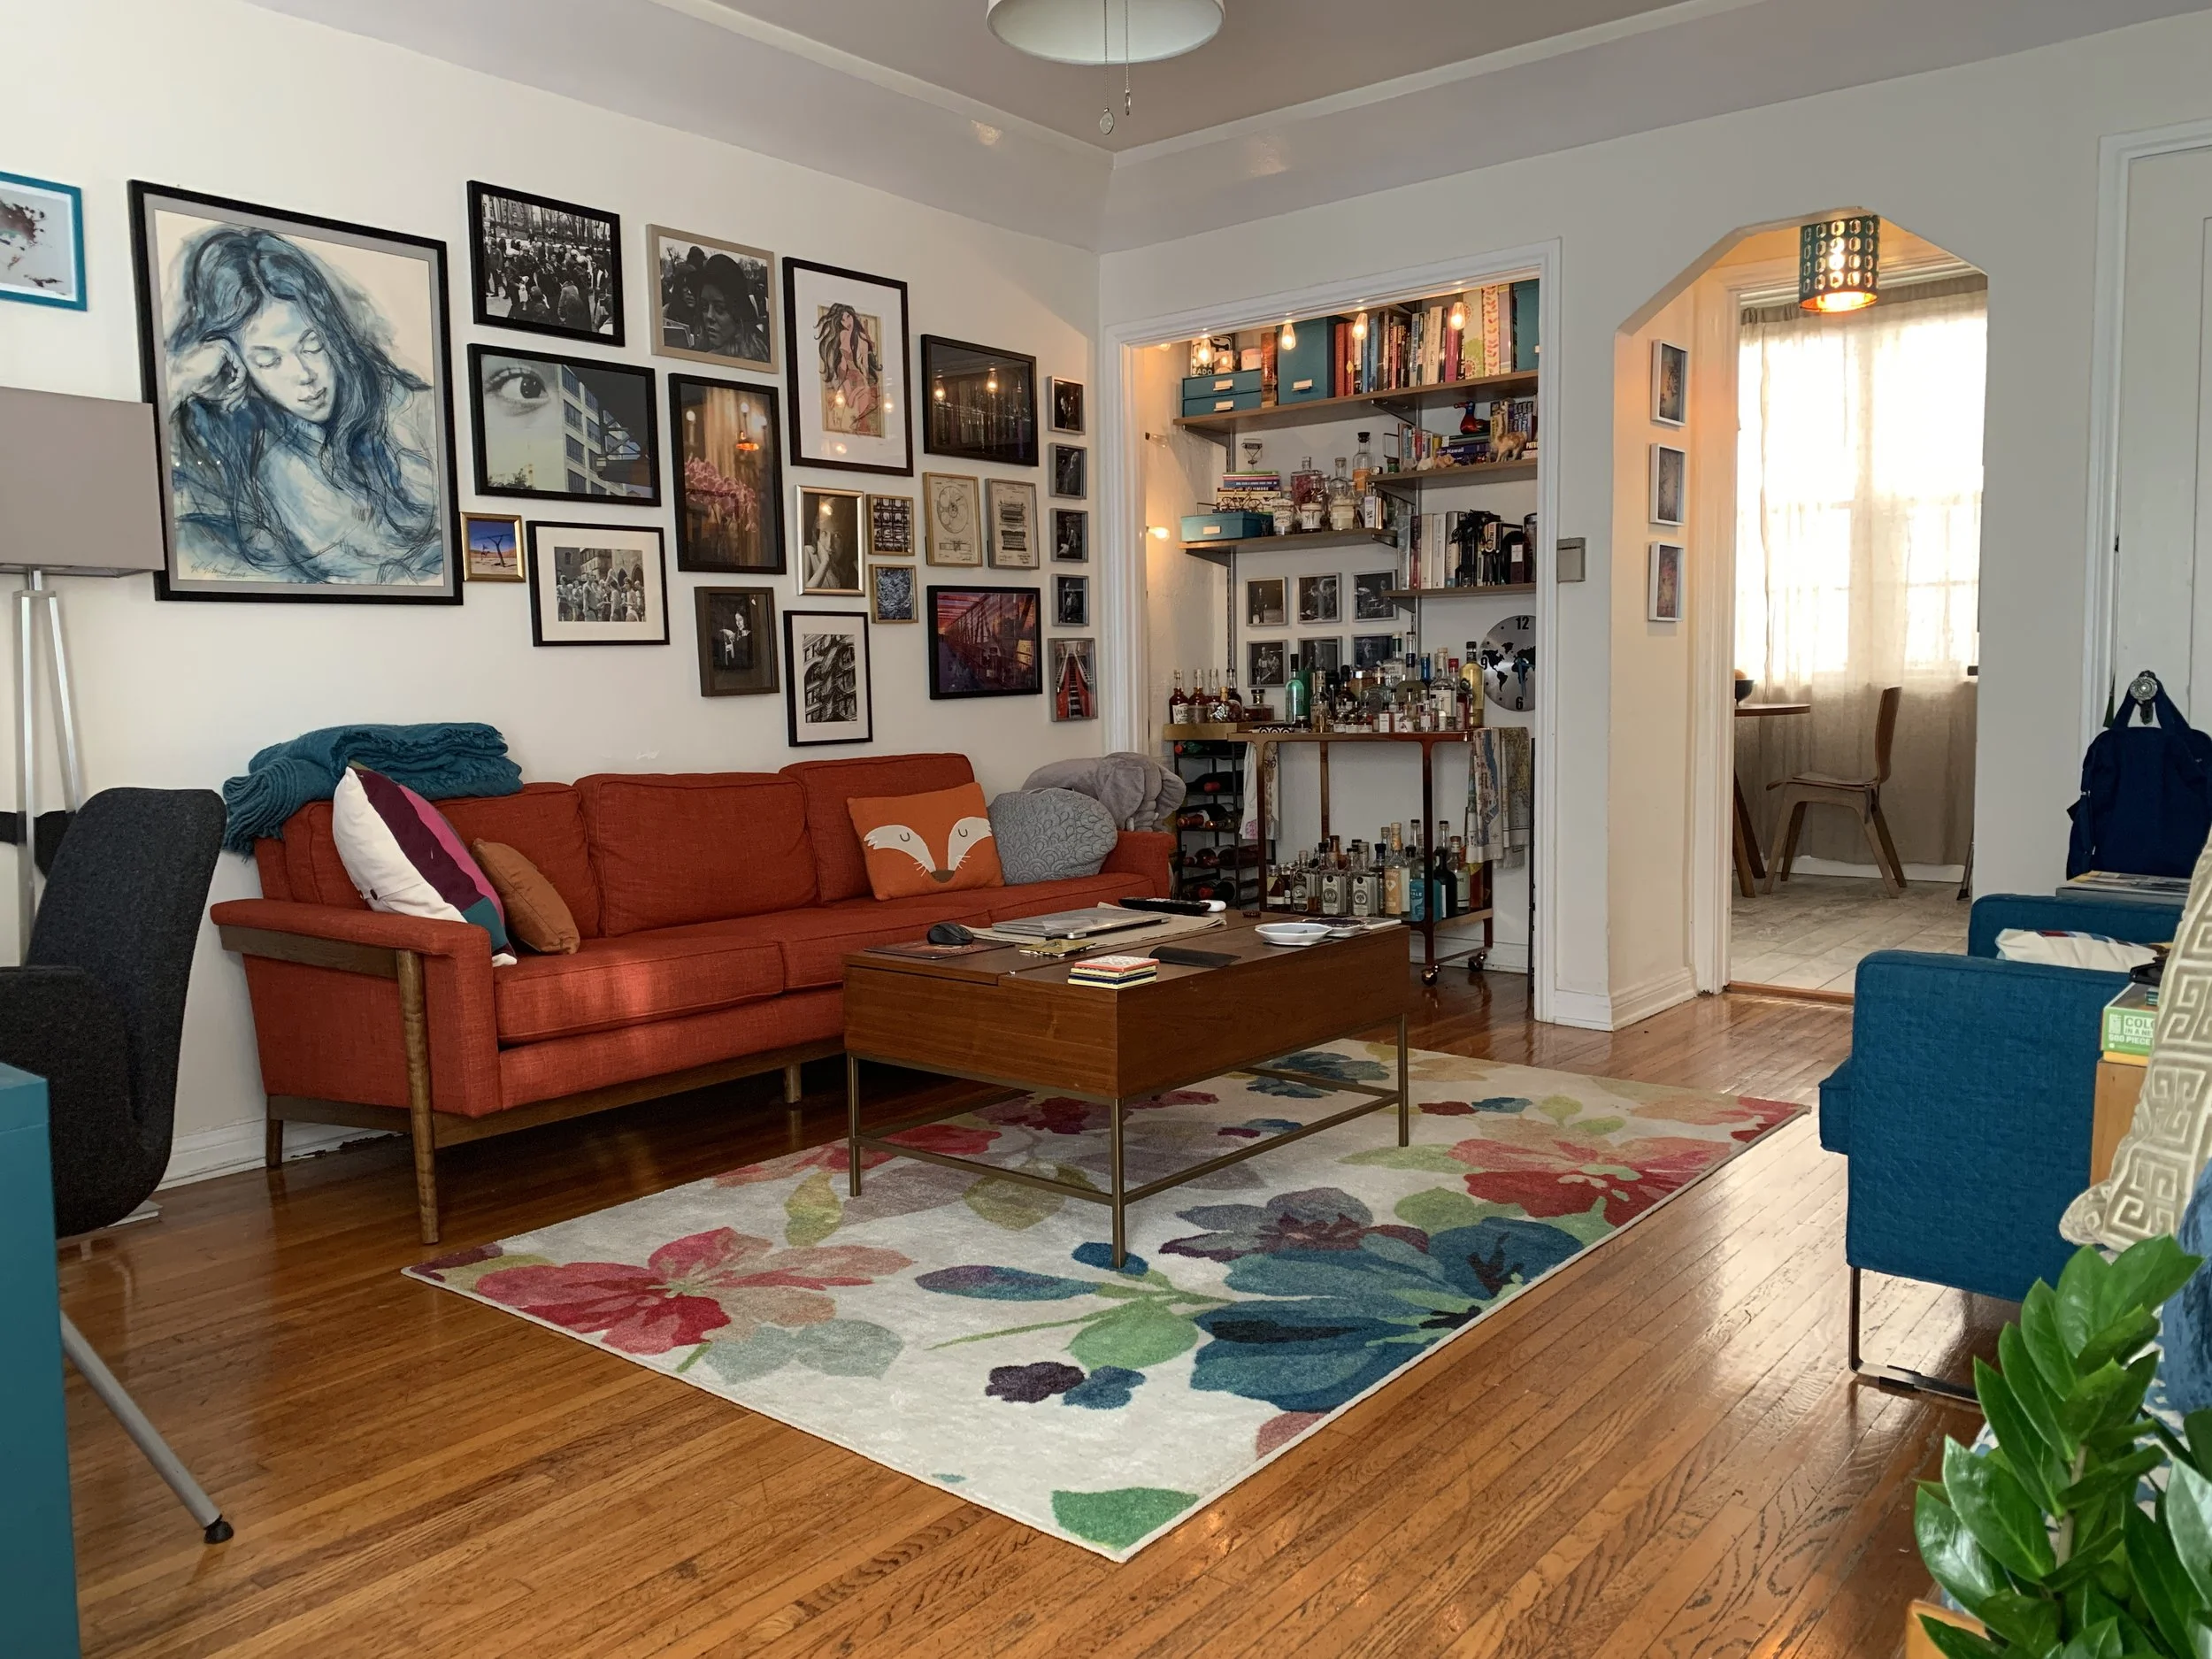
AFTER:
A decluttered, repainted living room that Sara was proud enough to invite people over to! All the clothes were put away, bins full of papers and stuff gone through, all the cardboard boxes and packing material sent off to recycling. No more anxiety about where to find that important piece of mail - it's in the file cabinet! No more wondering where that favorite book, or the TV remote! Finally a sense of serenity in the house of Sara.
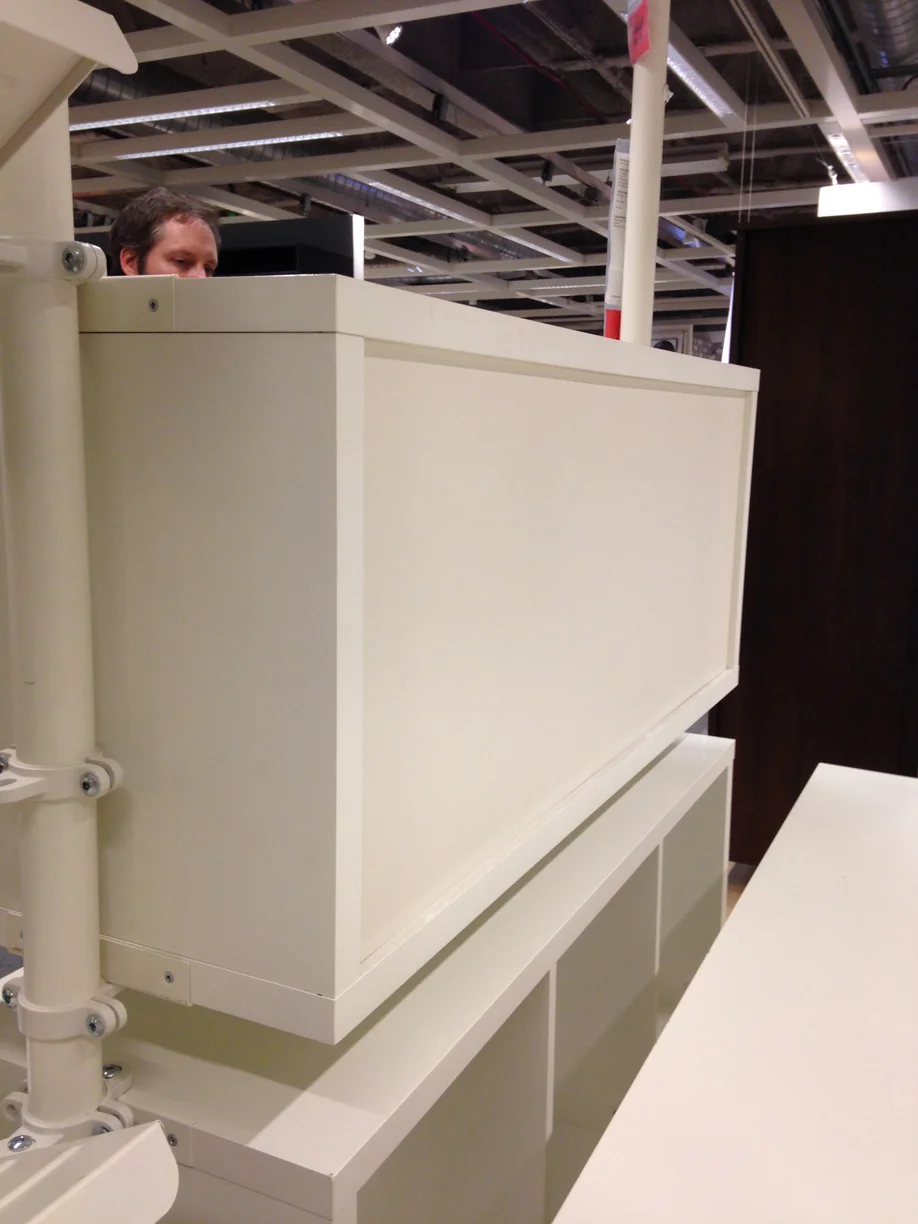
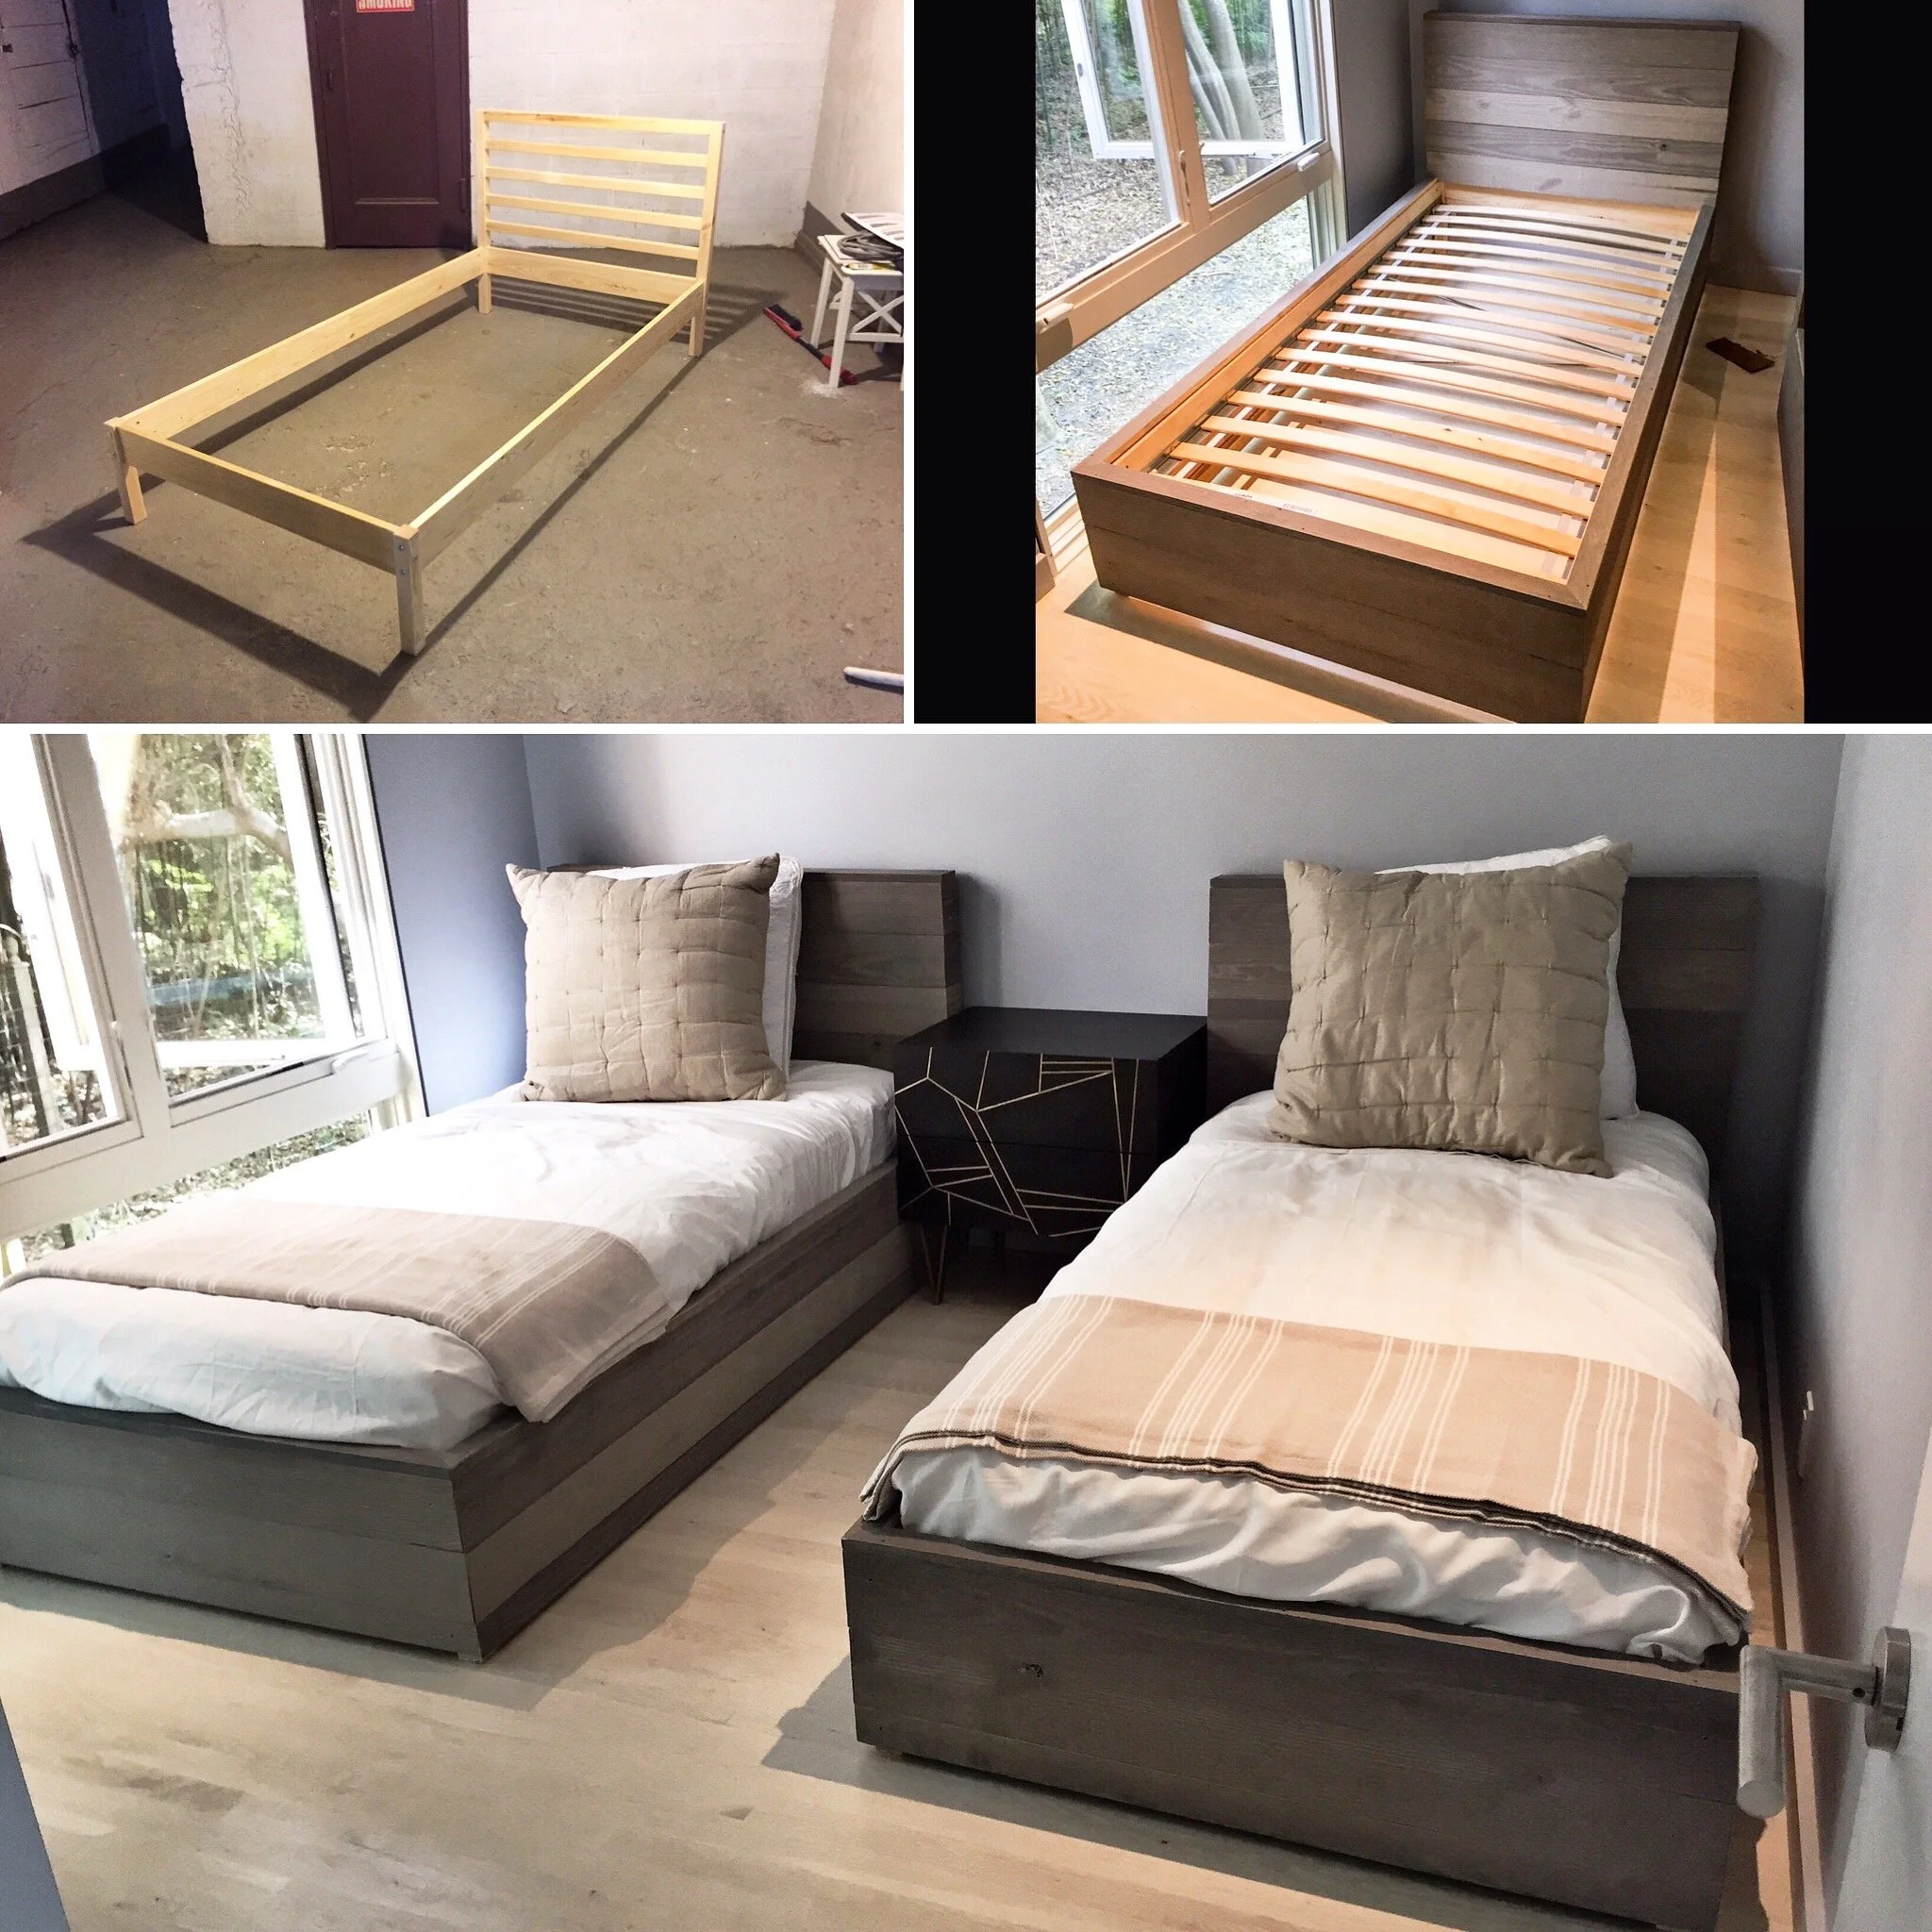
Ikea Stolmen Modification for Sara
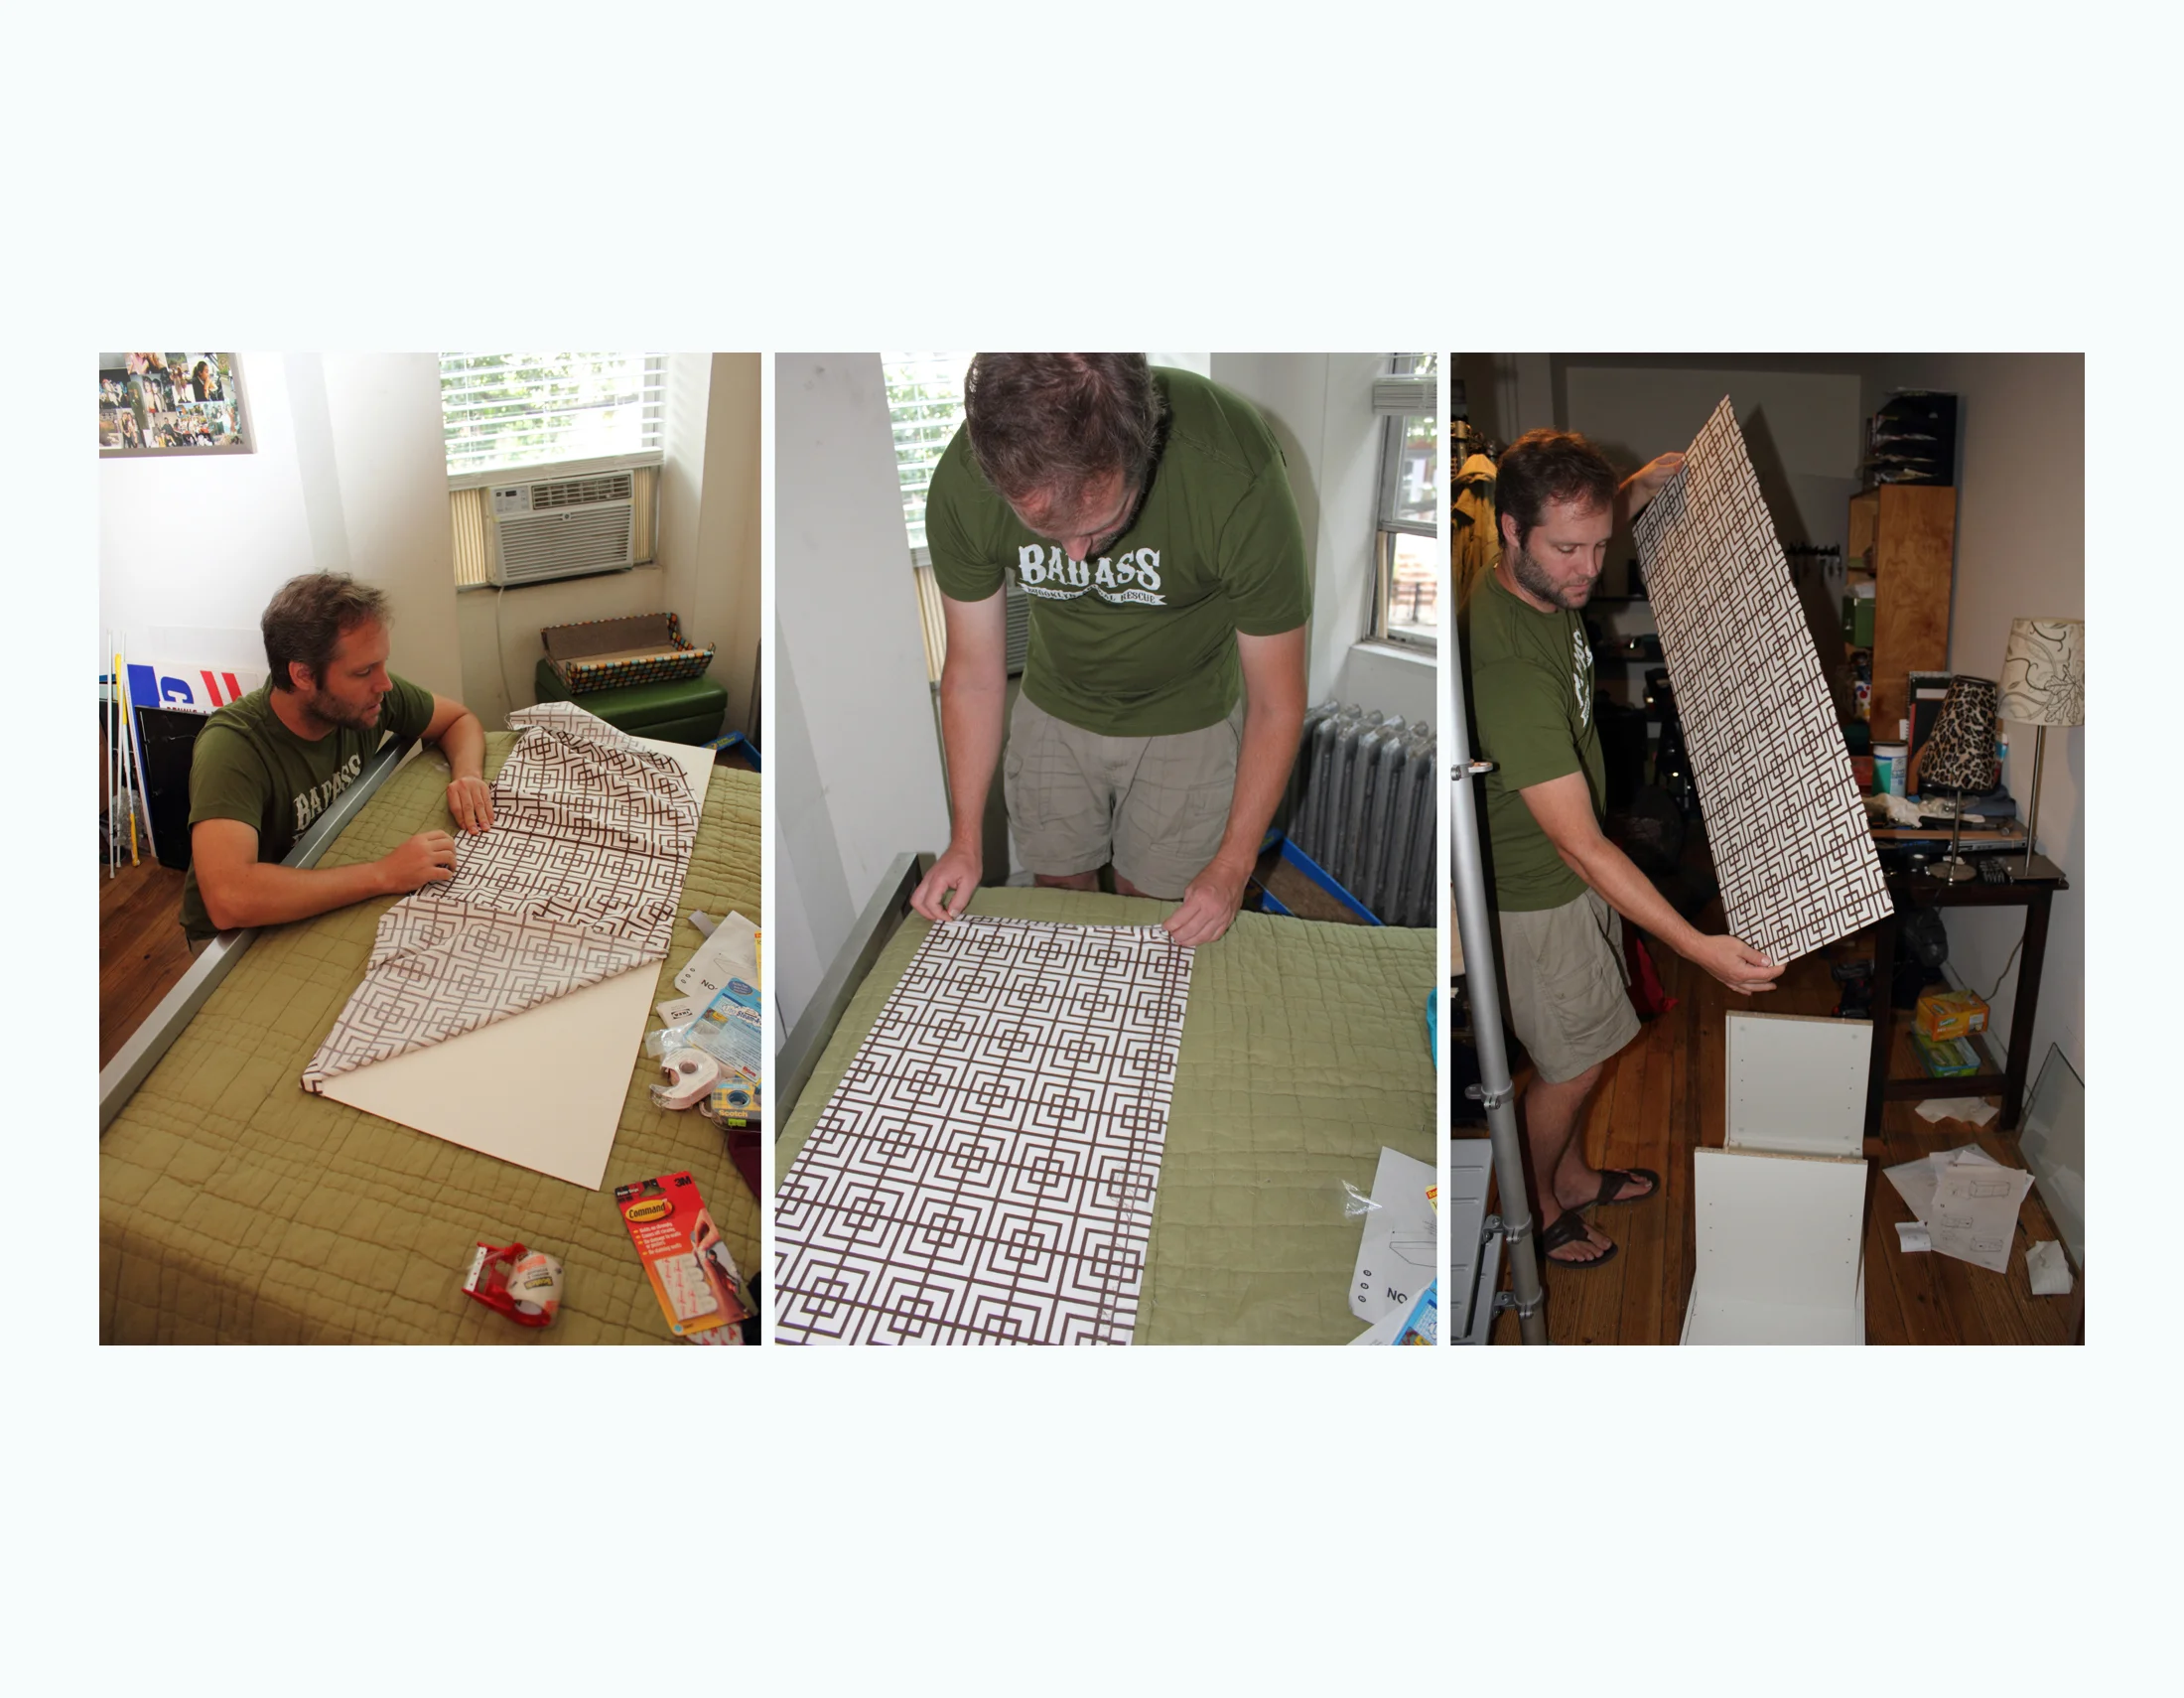
Sara was not very excited about the abundance of plain white with the Ikea Stolmen components we were installing in her bedroom. Fortunately, she had some cool fabric laying around that would make an attractive new back panel.
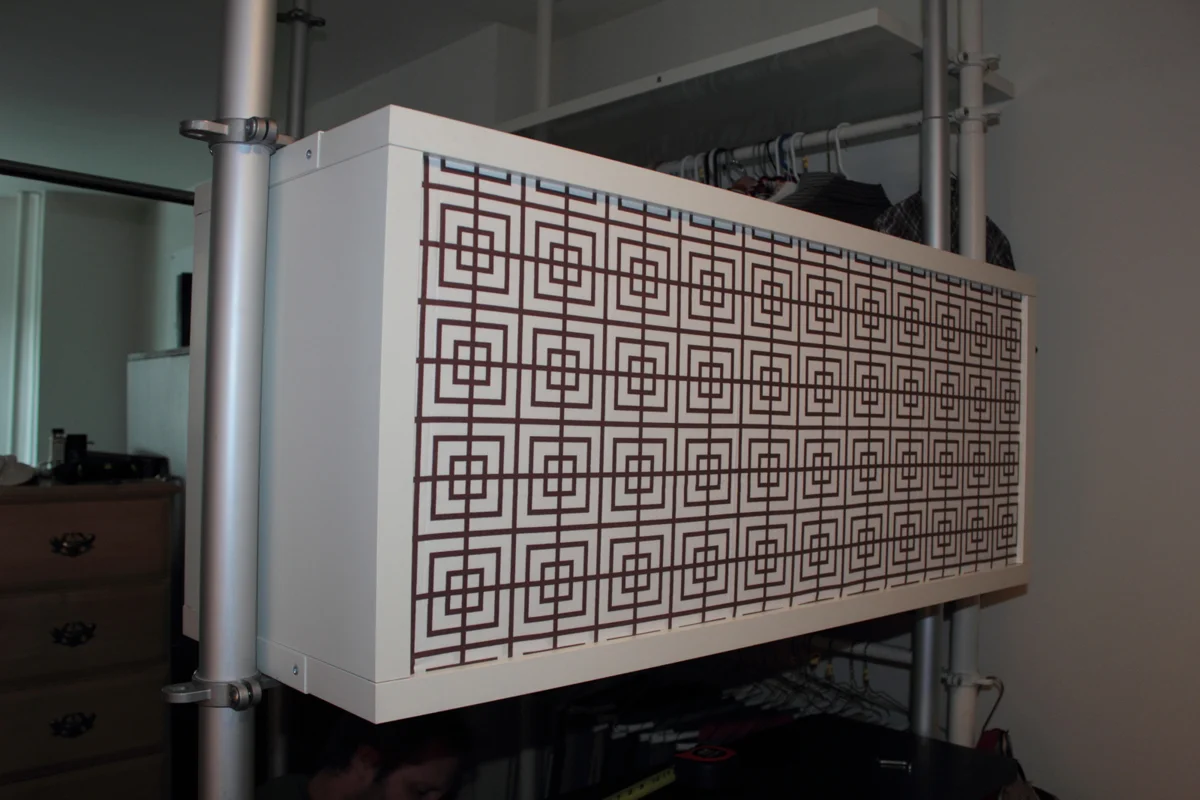
We covered the back panel insert with the fabric, making sure it was centered. Since we were inserting it into the already made grooves in the Stolmen cabinet unit we were able to fold over the fabric edges, carefully and neatly tape the seam and slide the back in place. The fabric is held in place because it is wedged into the grooves of the cabinet unit.
Instead of a bare white backside she has a fun and interesting fabric pattern.